| Live Search | ||||
|---|---|---|---|---|
|
Using the links on this page or the EXACT Help Files navigation you should find everything you need to help you understand the EXACT Patients screen.
| Page Tree | ||||
|---|---|---|---|---|
|
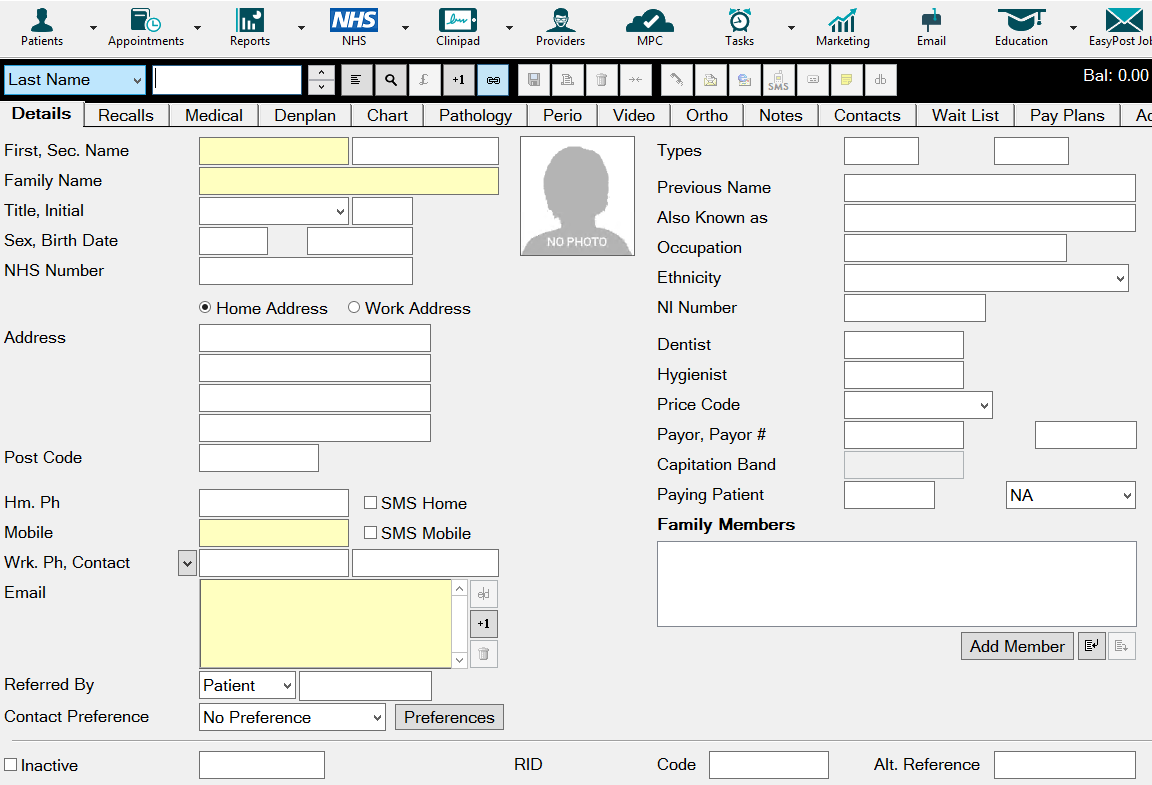
Patient Toolbar
The tool bar displays across the top of the Patient File, above the tabs.

TIP: Hover the mouse cursor over each icon on the tool bar to see a tooltip label explaining the function of the button. For example:
| Expand |
|---|
 Click to view a list of patients, from which you can select one.  This button allows you to perform a search to locate a particular patient record. The search criteria can be the patient's date of birth, part of their name, or part of a numeric code such as their phone number, or postcode.  To view a patient’s transactions.  Click to add a new patient.  Link to other windows. This button allows other windows that share a patient record to retain the selected patient as the focus if the user returns to the Patient tab. If the Link button is not depressed, the Patient Tab will only display the last patient record accessed.  Save the information. The coloured state (as shown) indicates changes have been made to the current patient record that need to be saved. You will be prompted to save the changes if you try to exit from the screen without first saving the changes.  The same button in a greyed out state indicates there have been no changes that require saving.  Print patient details, including any, or all, of the following: Notes Transactions Clinical History Tooth Chart showing Permanent and/or Deciduous teeth. DMF & BPE Scores.  Print a list of a particular selection of patients. For example, a list of patients for a specific dentist.  Delete the currently displayed patient. Note that this is subject to security settings, and a patient with transactions or appointments cannot be deleted.  Merge two patient records into one. This can be used if a patient has accidentally been added twice. The practice administrator should have access to this button.  Record notes regarding any telephone conversation that may occur between the practice and the patient. These notes will be recorded within the Contacts tab. This symbol is displayed in many different screens within the software.  Create a letter for the selected patient. This icon is visible in many different screens throughout the system, enabling letters to be generated very quickly. Any letters that are generated using this icon are stored within the Contacts tab, within the Patient File.  Email the selected patient.  Send a text message via SMS to the patient's cellphone.  Print a mailing label for the patient. If appropriately configured, print a mailing label with a single click.  Create a new Pop Up note. This allows notes relating specifically to the selected patient to be created and appear as pop up notes. The note could be to reception, or it could be a reminder note for clinical staff regarding the patient’s next appointment. Any notes that are made are recorded in the Notes tab, within the Notes section.   Transfer to Imaging Software. The icon will vary depending on which imaging system you are linking to.  To access guru, click this button.  Mouseover to view British Periodontic Examination (BPE) assessment data. Click to display the BPE window for recording BPE assessments.  Various 3rd party buttons A custom button can be installed on the Patient file toolbar, that when clicked launches the third party software in relation to the currently selected patient. Standard Link: The product button displays constantly on the toolbar and only activates when you click it, after which it communicates to the third party in relation to the current patient. Active Link: Based on active communication between EVOLUTION and the third party, the product button only displays when its service applies specifically to the current patient. See Standard and Active Links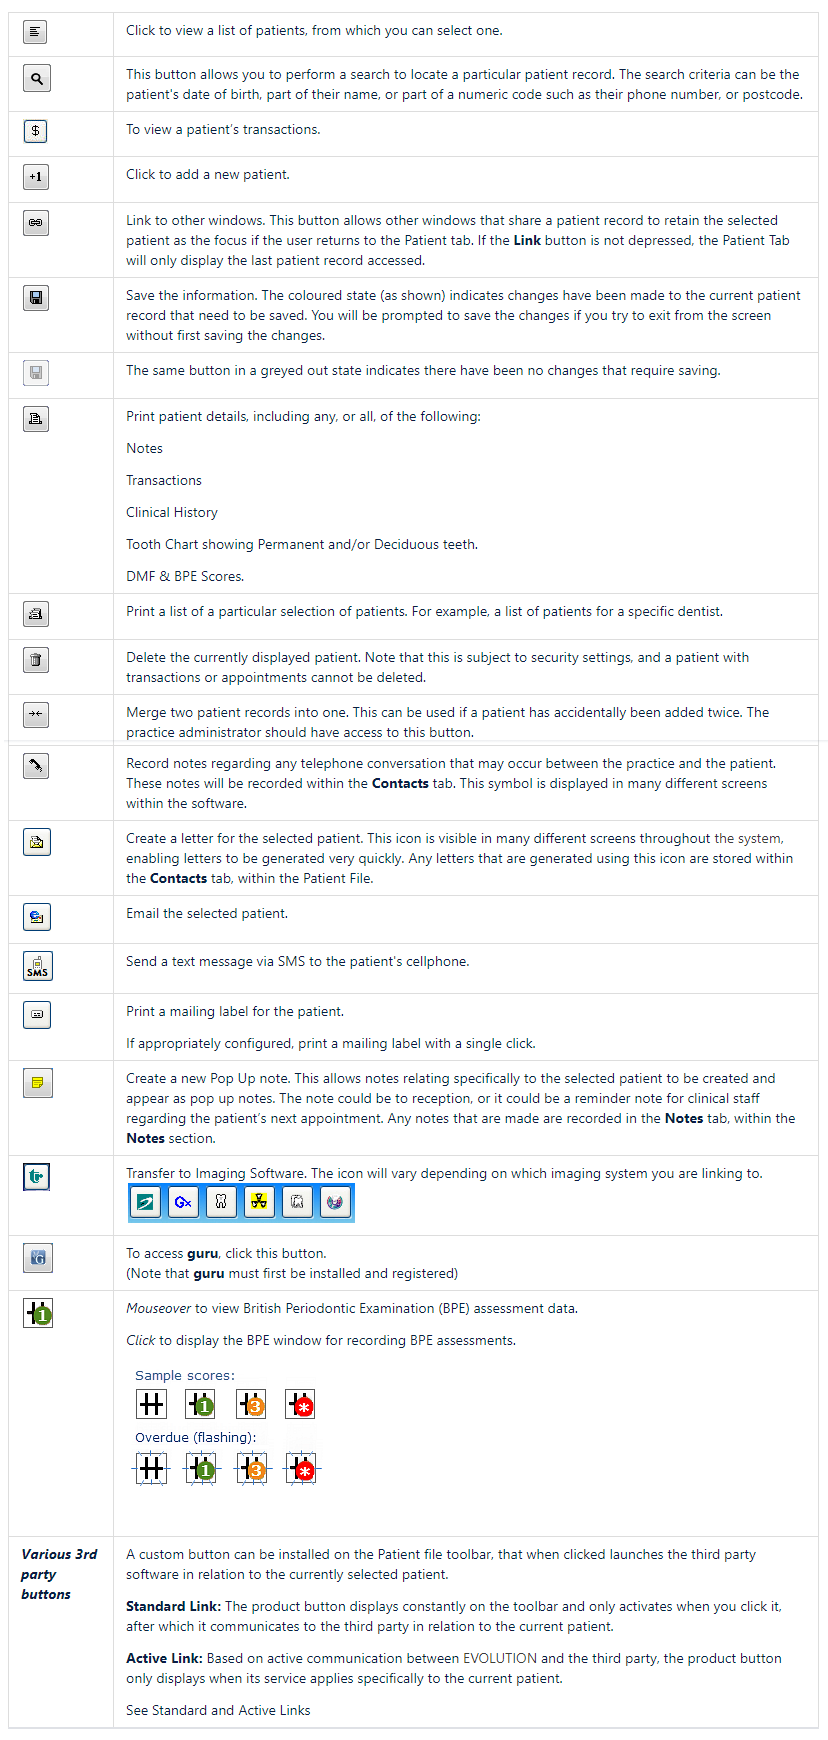 |