...
...
...
...
...
| Live Search | ||||
|---|---|---|---|---|
|
This facility enables you to select a patient’s future appointment(s) and print the details. The appointment(s) may be selected from a variety of places within
...
EXACT, according to whatever task the person printing the appointment is performing at the time
Table of Contents maxLevel 2
Using an Existing Appointment
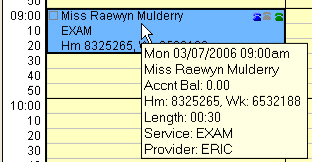
Highlight the appointment for the patient by clicking once on it (when selected, there will be a bold outline around the appointment):
...
Move to the lower right of the Appointment Book and click on the
...

button.
...

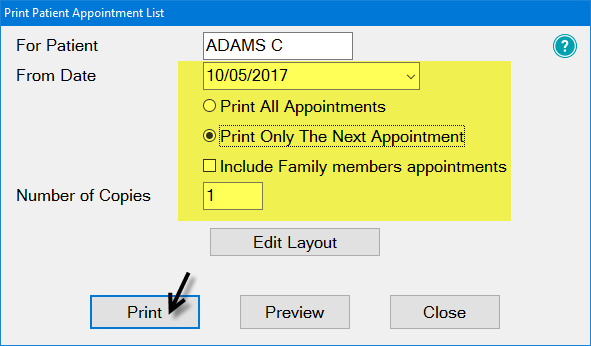
From this window you can choose what you would like to print (all future appointments or the next appointment only), by clicking beside the option.
...
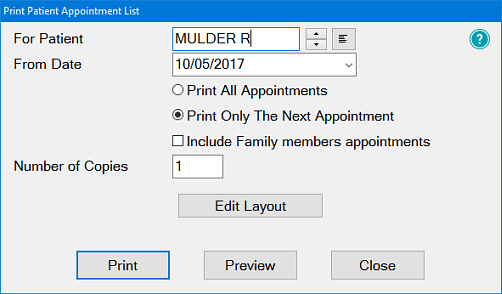
Check all details are correct then click the
...

button.
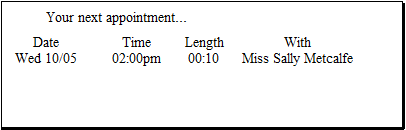
Example, Print Only The Next Appointment:
...
Without Selecting the Appointment
Regardless of which appointment is currently selected, just click the Print button or press CTRL-P:
...

When the Print Patient Appointment List window displays, click the Select a Patient button, or press CTRL-L:
...

The View Patients window displays:
...

Locate your required patient and select OK.
...

Back in the Print Patient Appointment List window, select the print parameters and then click the Print button:
...

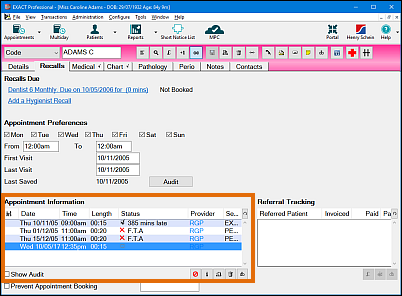
From the Recalls Tab (patient file)
TIP: This is convenient if you are currently working in the patient record rather than the Appointment book.
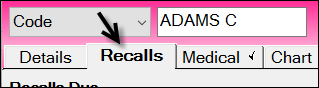
With the patient record selected, click the Recalls tab:
...
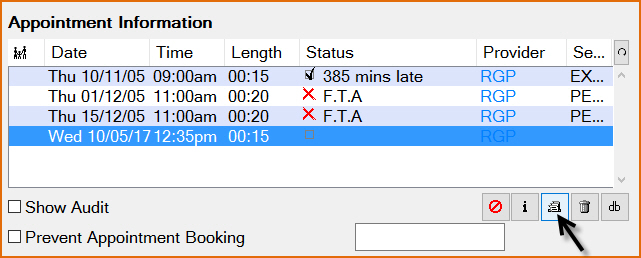
Click the Print Appointment List button
...

below the patient’s Appointment Information list.
...
...
Make the appropriate selections in the Print Patient Appointment List window, then click the Print button:
...
From the Edit Appointment Window
This is useful if you would like to print the appointment as you are making it
In the Edit Appointment window, select the patient concerned:
...
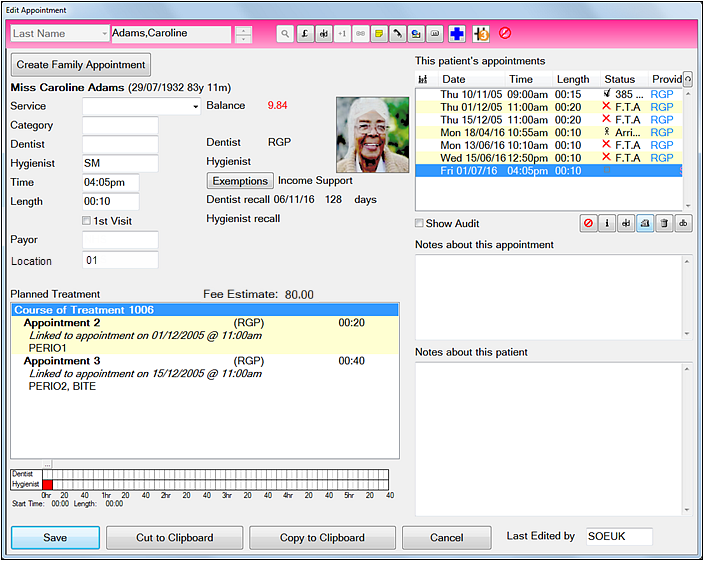
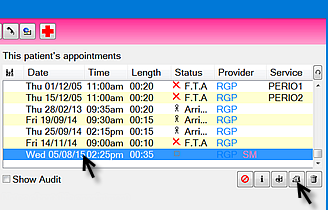
In the This patient’s appointment pane, select the appointment to be printed and then click the Print Appointment List button
...
...

Make the appropriate selections in the Print Patient Appointment List window, then click the Print button:
...