Search these help files
| Live Search | ||||
|---|---|---|---|---|
|
Perio Tab
Use the Perio tab to record EXACT has 2 different Perio functionalities. The basic/original Perio and the advanced Single Screen Perio Charting Information on how to enable can be found here - Enable/Disable Single Screen Perio
To access Perio examinations you need to open a patient file and click on the Perio tab.
...
From here you can view extensive periodontal charting for the patient .
...
This includesincluding:
Pockets
Recession
Bleeding
Mobility
Plaque
Suppuration
Furcation.
...
.
...
Previously saved Perio Charts are listed on the upper left hand pane in the order they were taken, and can be viewed, edited (only on the day created), and/or printed.
When EXACT is running on a large monitor, or is using the 'very large' text size user setting, a button depicting a magnifying glass ![]() will be displayed above the perio charts. Clicking this button will enlarge the perio charts. Clicking the button again will return the perio charts to their original size.
will be displayed above the perio charts. Clicking this button will enlarge the perio charts. Clicking the button again will return the perio charts to their original size.
If the patient file window is wide enough, additional layout options will be made available:
...
Creating and editing a Perio Chart
To create a Perio Chart
...
Click the +1 (Add) button at the bottom of the Perio pane (centre left of the tab) to open the Add Perio Chart window:

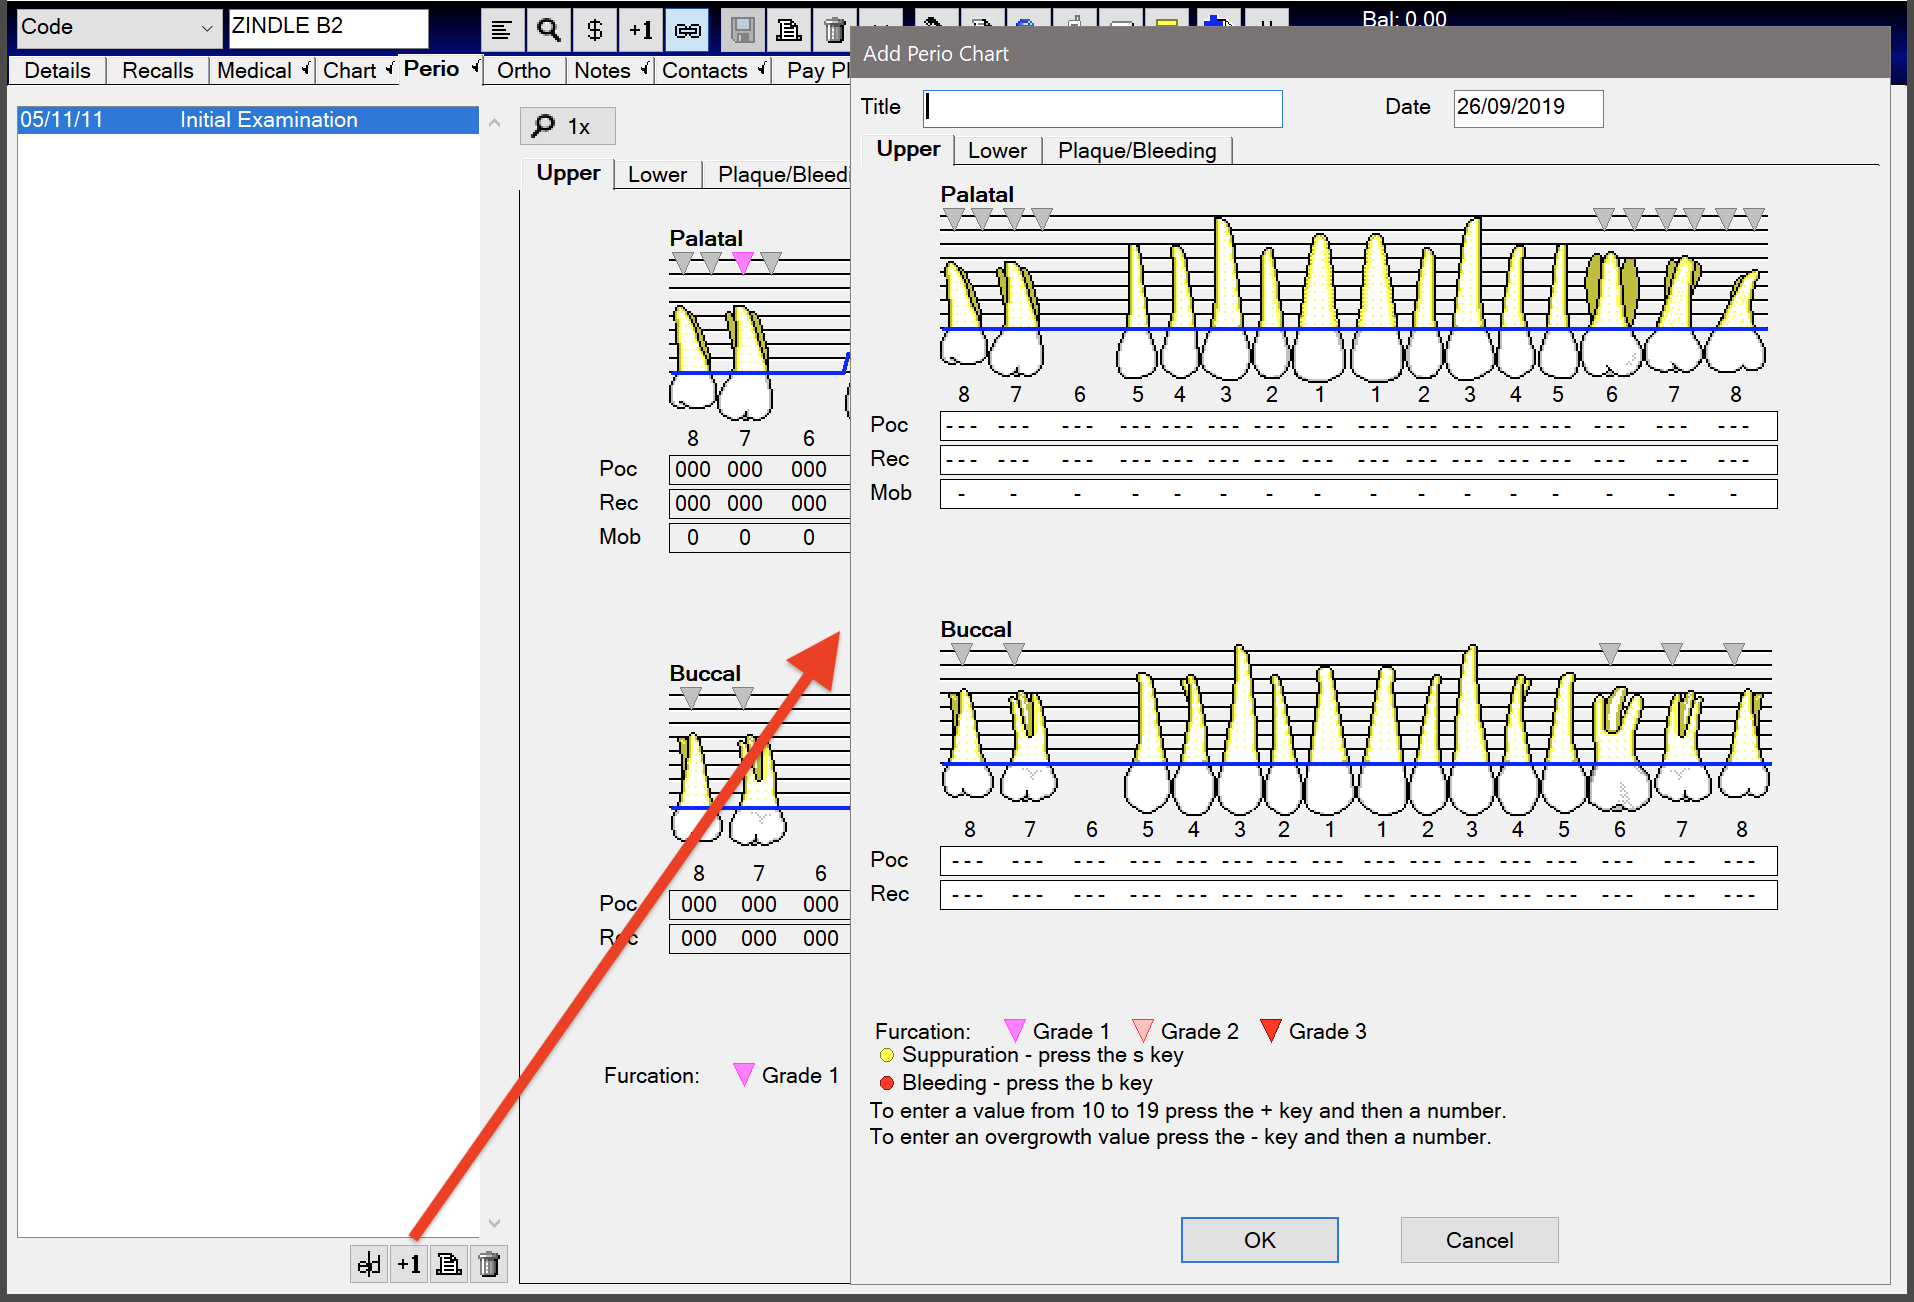
Enter a title for the chart. Examples of common charts are:
Initial Examination: 1st Measurement
Periodic: Annual Examination
Recall: Maintenance
Re-evaluation: 2nd Measurement
Follow the instructions on the screen to enter the correct values for:
Palatal Pocketing
Gum Recession and Mobility
Buccal Pocketing
Gum Recession
If you want to chart a pocket greater than 9, select + followed by the number.
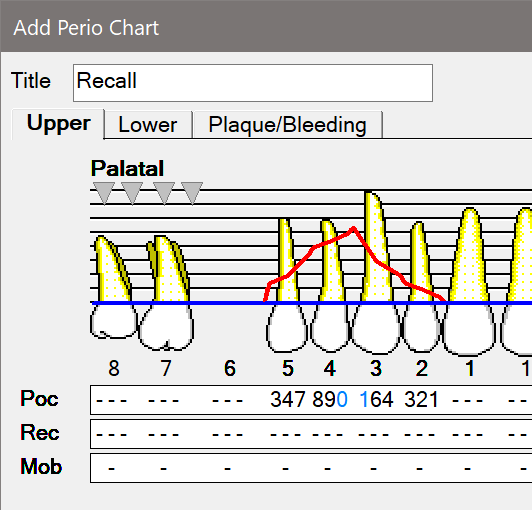
For example, a pocket of 10mm would be recorded as +0 and a pocket of 12mm as +2; this number would appear as a blue digit on the chart.Example:

Mark any areas of Furcation and the severity by clicking on the triangles marking the areas. Click once (Grade 1), twice (Grade 2), or three times (Grade 3). Click a fourth time to remove furcation.
Mark any areas of Suppuration by selecting either the Pocketing or Recession number at that location and pressing the S key on the keyboard.
Mark any areas of Bleeding similarly by selecting the location and pressing the B key .
.
To enter an overgrowth value, press the Minus key followed the number e.g. –3 to show an overgrowth of 3mm.
To remove pocketing, recession, or mobility, highlight the value and press the Space bar .
.
To move between values, use the left or right
  arrow keys. Hold down the Control key
  to move one tooth at a time.
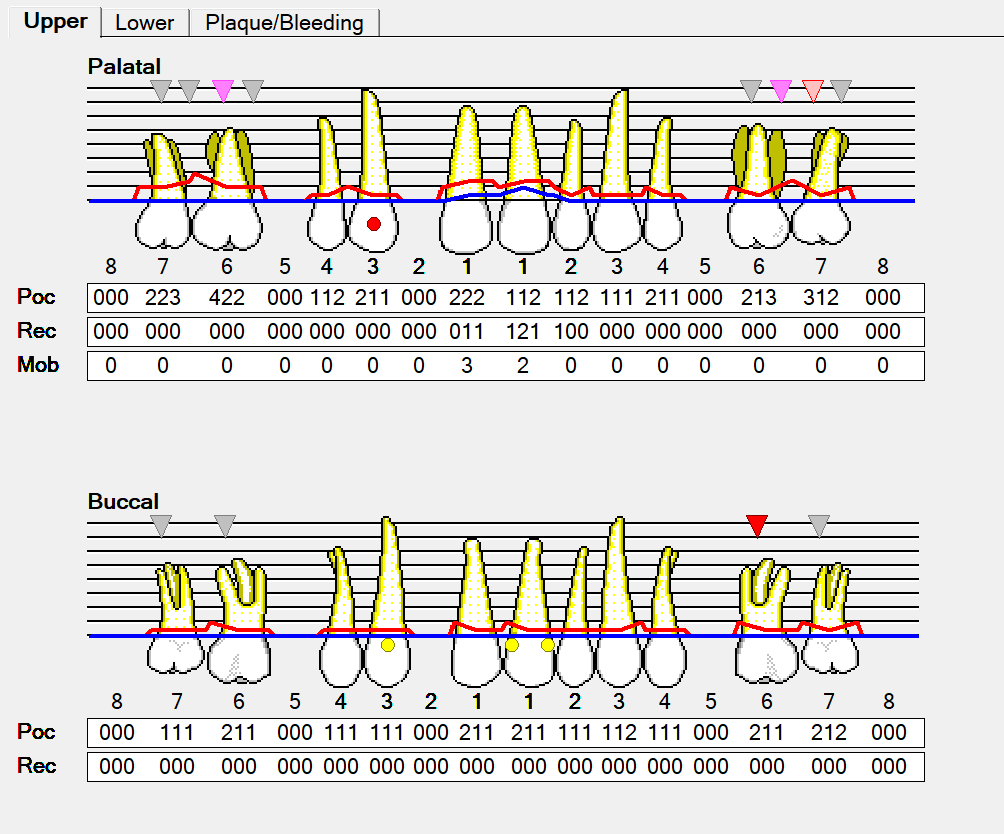
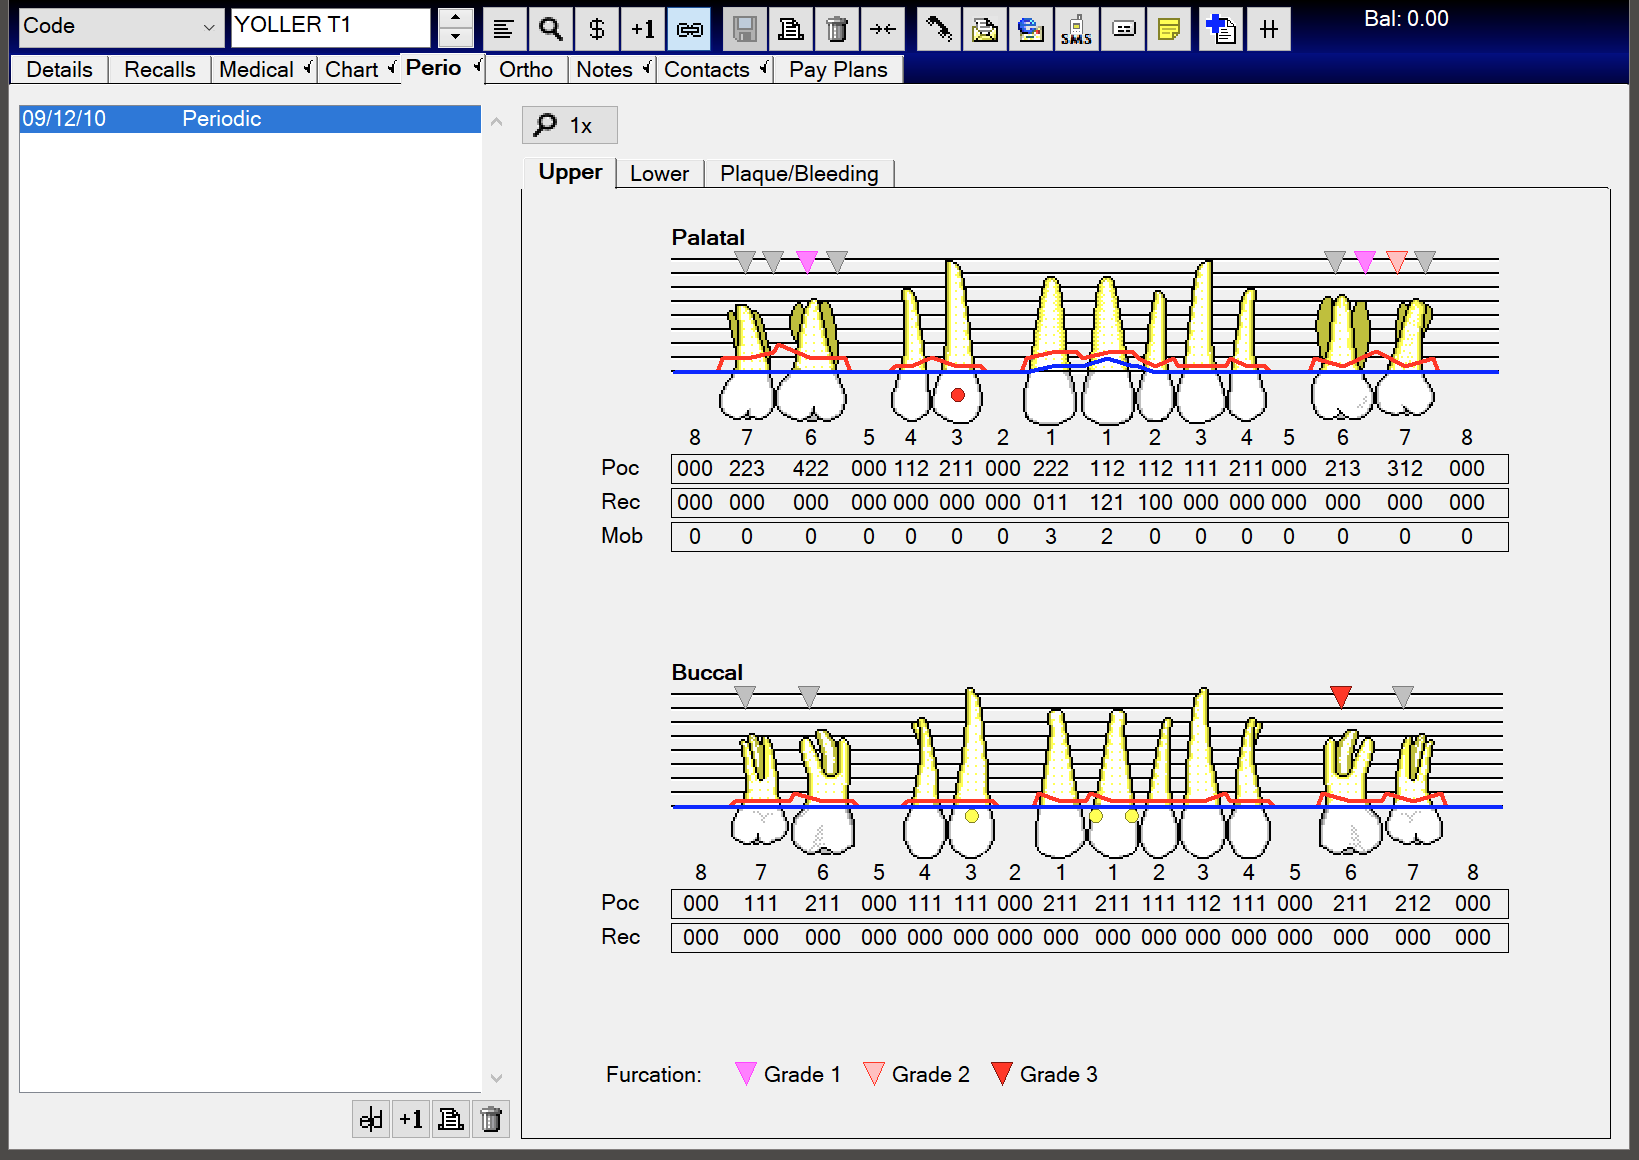
Populated Upper tab example:

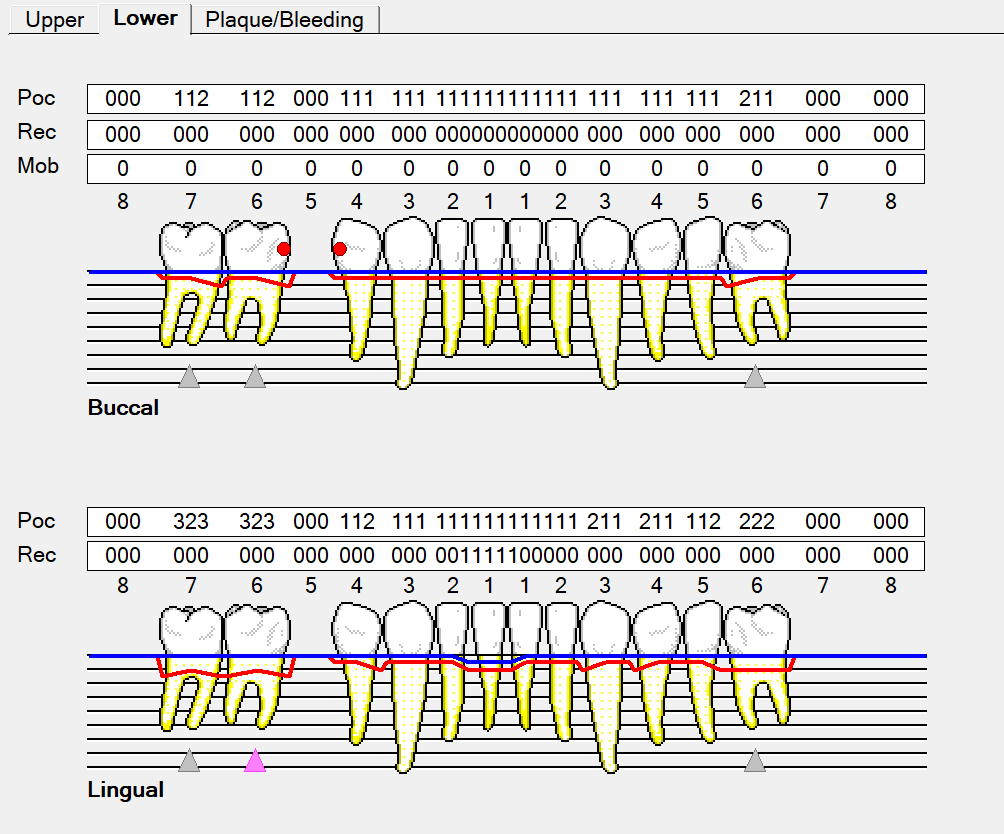
Select the Lower tab and repeat the process. Populated example:

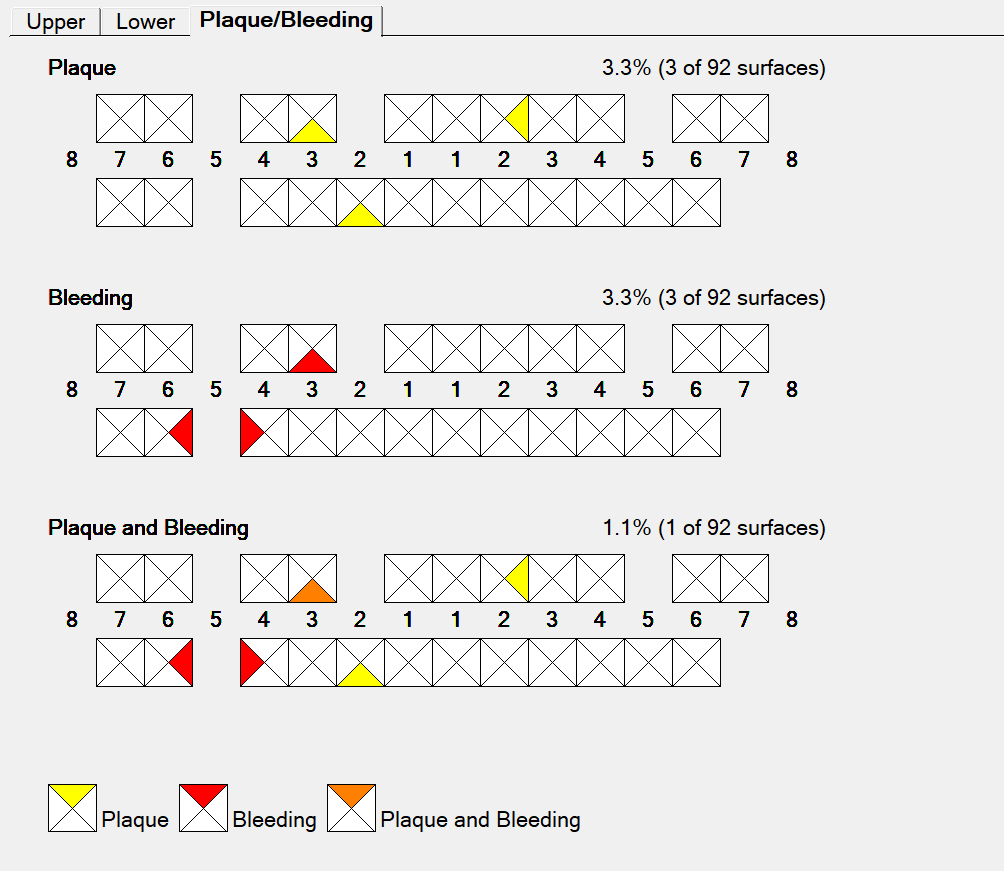
Select the Plaque/Bleeding tab and use the mouse to mark the facets of the teeth with Plaque or Bleeding. Populated example:

Click OK to save the chart, which will now be listed in the top left pane of the Perio tab, and displayed to the right:

To edit a Perio chart
Select the chart in the Perio tab, click the e|d (Edit) button, then change the values as described above.
DMF Score - creating, editing, deleting
...
Click the +DMF button at the bottom of the Perio tab list.
If you do not see this button at the bottom of the perio tab, the Perio DMF is disabled. It can be enabled in Configure→Patient File, Perio Options.
The DMF window will open:
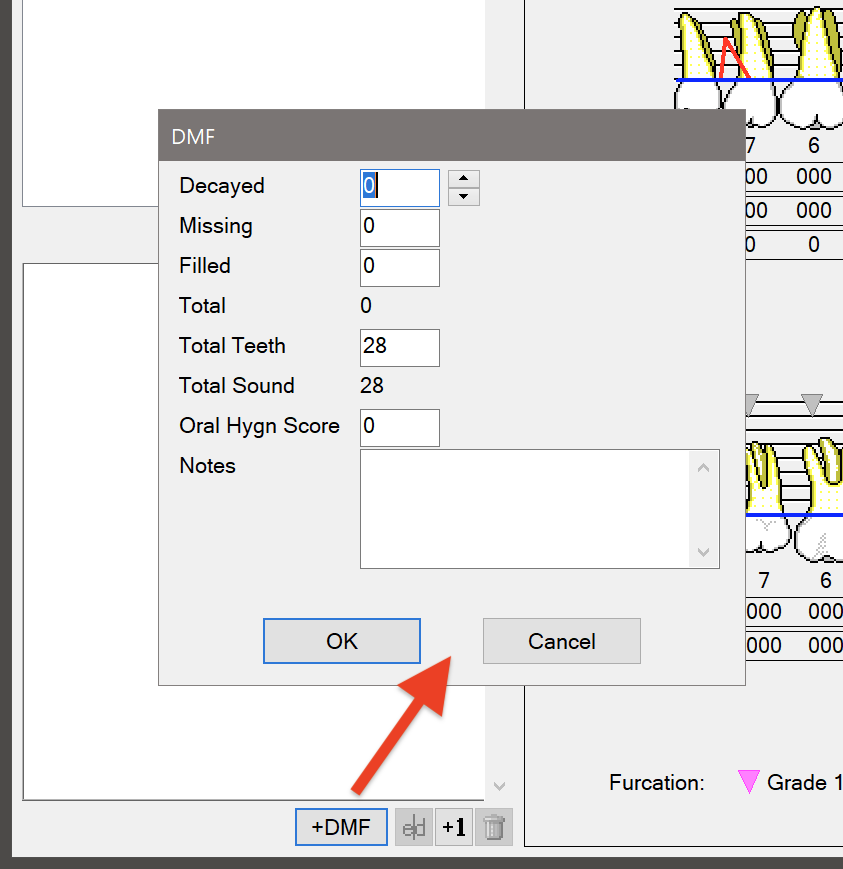
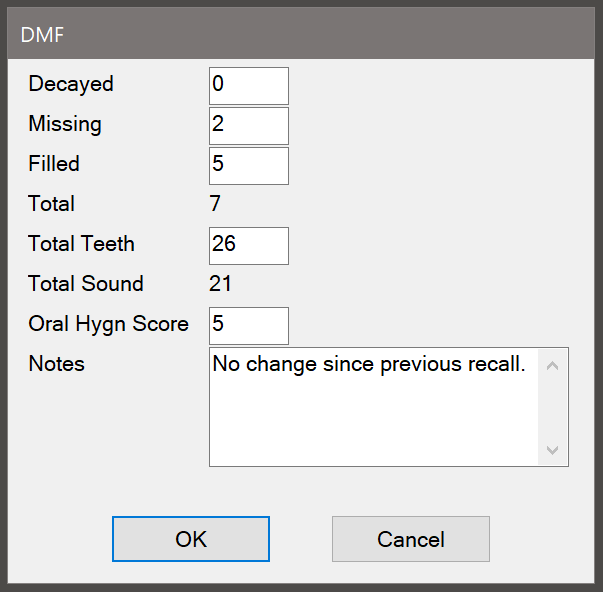
Enter the appropriate numbers for decayed, missing and filled teeth for the patient.
The numbers will be totalled for the Total and Total Sound fields, and cannot be edited.Click in the ‘Oral Hygn Score’ field and type or use the arrow buttons to select a rating for hygiene, and add any notes.
The window will now look similar to the following:
Click the OK button to save the DMF score.
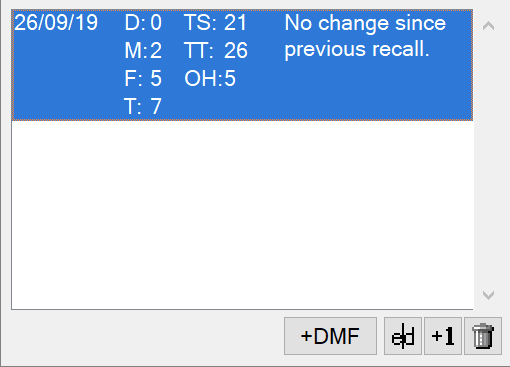
You will see the new DMF score in the list:

To edit a DMF score
Select the item in the Perio tab list and click the e|d (Edit) button to re-display the DMF window, then make and save the changes as required.
To delete a DMF score
Select the item in the Perio tab list, and click the Delete (![]() ) button .
) button .
Creating a Perio Grid (Basic Perio Exam)
NOTE:
From EXACT v12.6 onwards, an icon on the patient file toolbar displays the highest BPE score for the patient, and flashes when the BPE is overdue.
The period for defining "overdue" is set in Configure→Patient File.
To create a Perio Grid
Open the BPE window from the patient file toolbar or from the Perio tab:
Patient File Toolbar:
Click the BPE button:
...
Perio Tab:
Select the Perio tab on the patient file, then click the +1 button at the bottom of the screen to display the BPE window with all fields blank:
...
Sextants
The dentition is divided into sextants (6):
...
Upper right (17 to 14)
...
Upper anterior (13 to 23)
...
Upper left (24 to 27)
...
Lower right (47 to 44)
...
Lower anterior (43 to 33)
...
Lower left (34 to 37)
These are represented on the screen as follows:
...
Blank is the default (not recorded). X is edentulous.
...
Bleeding
...
Tick the boxes to indicate whether bleeding is occurring in the relevant quadrant.
This is not a requirement but has proved useful to dentists.
...
BPE Grid
...
Click to select a quadrant, or move around the quadrants clockwise by pressing the tab key as indicated in the above image. The default first BPE grid entry is the top left.
Either type a value or select from the drop downs for each quadrant.
For typing, only correct characters can be entered. If you type an invalid character, the field is immediately blanked. Valid characters are as for the drop down values: blank, 0,1,2,3,4,*, and X
Blank is the default (not recorded), and X is edentulous.
...
Notes
...
Free text box (notes are optional).
Examine each sextant and award a value:
Examine all teeth in each sextant, with the exception of 3rd molars.
For a sextant to qualify for recording, it must contain at least 2 teeth.
(If only 1 tooth is present in a sextant, the score for that tooth is included in the recording for the adjoining sextant).Use a World Health Organisation probe, which has a “ball end” 0.5 mm in diameter, and a black band from 3.5 to 5.5 mm.
Use light probing force (20-25 grams).
Walk the probe around the sulcus/pockets in each sextant, and record the highest score in that sextant.
The moment you identify a code 4 in a sextant, optionally move directly on to the next sextant. If you do not detect a code 4, examine all sites in that sextant to ensure that you record the highest score in the sextant.
Recommendation: It is better to continue to examine all sites within the sextant. This will help to gain a fuller understanding of the periodontal condition, and will ensure that furcation involvements are not missed.
Recording Bleeding is not a compulsory recording element, but has been included in the EXACT software for each sextant due to its proven usefulness in the dental industry.
...
Enter the patient’s Grid numbers and add any notes.
Click OK to save the Perio Grid.
You will see it listed at left:
...
You can edit this perio grid by selecting it and then clicking the e|d (Edit) button.
To edit Perio Grids
From the Perio grid:
Select the Perio Grid from the Perio tab as described above, click the e|d (Edit) button to re-display the BPE screen, then make and save the changes as described above.
From the patient file toolbar:
Click the icon in the patient file toolbar to open the BPE window, then simply edit the values and click OK.