The Education tab contains educational slides and animated movies to show to patients regarding their treatment.
Hover your mouse over the Education tab to see a tooltip description:
...
The movies in EXACT EXACT are entitled Anatomy, Bridges, Canals, Crowns, Decay, Perio and Restore. Each of the movies can be viewed five times free of charge on each workstation. Once this has occurred, permanent licences can be obtained from Software of Excellence International as required.
Slideshow topics:
The slideshows cover the topics shown below:
...
Slideshows
Although EXACT EXACT comes with 'ready to run' slideshows, you can also create your own slideshow, using a series of images on your computer. You can also add slides to an existing slideshow if you wish.
To Play a Movie
Select the education option that you wish to view and click

.
On the video screen, used the video controls to control how the movie plays:

...
Restarts the movie if stopped
...
Pauses the movie if started
...
Stops the movie
...
Controls sound volume
...
Allows the user to scroll to a specific place in the movie. To do this, click on the slider, and while holding the mouse button down, drag it left or right. Releasing the button when the movie is at the required scene.
To create
...
a
...
To create a slide show with new images you will need these images located in a location that is accessible from your computer.
To be usable, images must be saved as JPEG (*.jpg), Bitmap (*.bmp) or GIF (*.gif).
Select File > Education... to open the Patient Education window.
From the Patient Education window, either click into an existing slideshow or click the +1 button to open the Add Slide Show window:

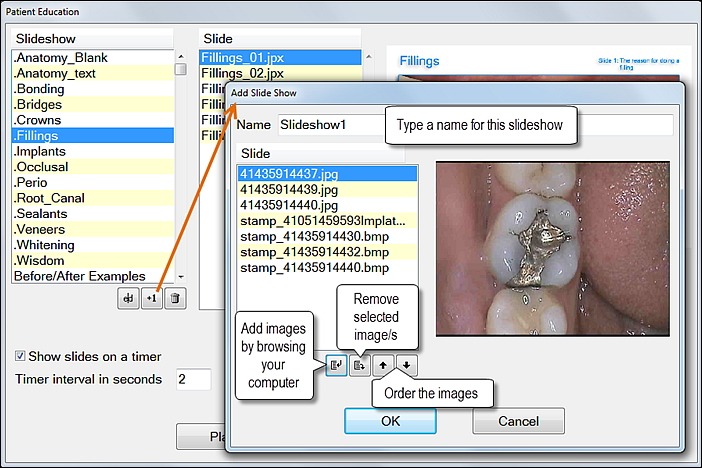
If adding a slideshow type a suitable name for the Slide Show in the Name field.
Note that Slide Shows cannot be renamed; they have to be re-created with a different name.
To add an image click the Add Images button

to open your Windows browse dialog, and browse for slides that you require.

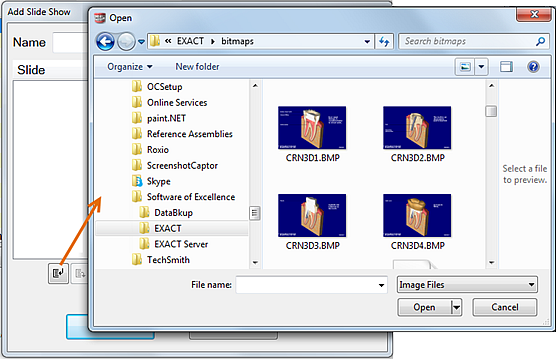
Select images as follows:
Select an individual image by single click > Open button
Select multiple individual images using CTRL-Click of the images > Open button
Select a range/sequence by clicking the first image and SHIFT-Clicking the last in the range > Open button
Use the ordering buttons to

order your images as required.up/down arrows to change their order
You can remove any images using the Remove Selected Image button.

On the Patient Education window check whether the slide show is set for timed display, or whether you need to advance slides manually, then Play the slideshow and check ordering of the slides.
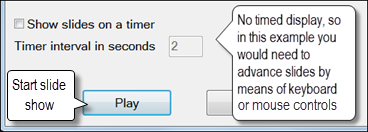
To advance slides manually, use the arrows on your keyboard or press the spacebar to display clickable buttons.