A Quick Plan enables you to chart multiple appointments/treatment items with just a double-click.
Create a Treatment Plan for a patient that includes all treatment and appointments required for the Quick Plan. In the example below an examination with a separate scale and polish appointment has been set up.

Click the “+1” button on the Quick Plan area of the Chart, Enter a Unique Name for your plan
If the Quick Plan is to add treatment to an existing Treatment Plan, no payor is required since the existing plan will already designate that.
If the Quick Plan is to create a new Treatment Plan, select that option and select a payor.
Note that leaving this field blank will cause all Treatment Plans created with it to be private plans.
Leave the provider and Type fields blank if you want the plan to be available to all users.
This example will create a new Private COT and is available for all users.
Click OK to save the Quick Plan to the list in the Quick Plans tab.

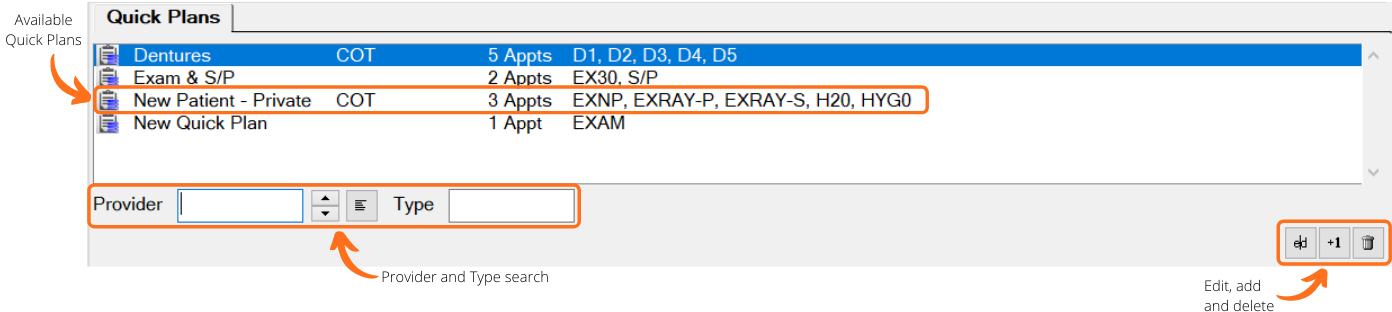
Double-click the Quick Plans when required to chart them
Quick Plans can also be added to the Quick Charting Menu.
Quick Plans is a tool aimed to save you time charting the same treatment again and again. Enabling you to chart multiple appointments/treatment items with only two clicks.
Scroll down to read all about Quick Plans or use the list below to jump to a section.
Quick Plan Tab
You can add/move the Quick Plan tab on the Charting screen via the Spanner on the Service List to a location you would like, to edit tabs see Chart Activity Tabs.
...
Create a Treatment Plan for a patient, including all treatment and appointments required for the Quick Plan.
The example below shows an examination with a separate appointment for a scale and polish.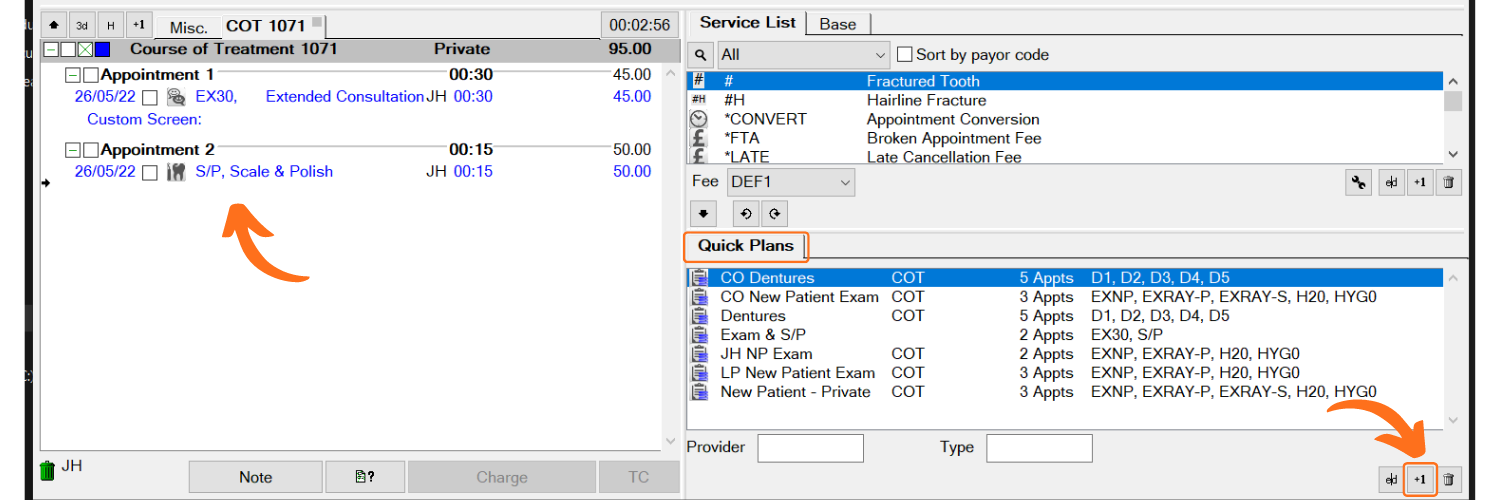
On the Quick Plans tab click the +1, this will open the Quick Plan Wizard window.

Enter a unique name for your plan.
You can then select a graphic to help identify plans at a glance.
The Quick Plan can either create a new course of treatment or add to an existing course.
Create a new Course of Treatment if you would like the Quick Plan to be added to an existing Treatment Plan, the payor box is greyed out as no payor is required since the existing plan will already contain the payor.
Select Add to an existing Course of Treatment if you would like the Quick Plan to open a new course of treatment, you can then select the desired payor.
Note: Leaving this field blank will cause all treatment plans created with this Quick Plan to be Private plans.
Leave the Provider and Type fields blank if you want the plan to be available to all users or skip down to Provider and Types for more information on how to use these fields.
Click OK to save the Quick Plan to the list in the Quick Plans Tab.
Double click a Quick Plan to chart the plan.
...