...
| Expand | ||
|---|---|---|
| ||
Access the Wizard by going to Configure->Add User/Provider Wizard 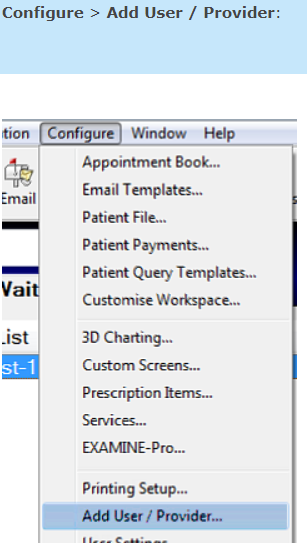 Wizard - 1st Page Enter the initials of the new user (Most users use Initials). If these already exist, an error message will alert you to this. When it asks you whether it is a provider click No. Click Next 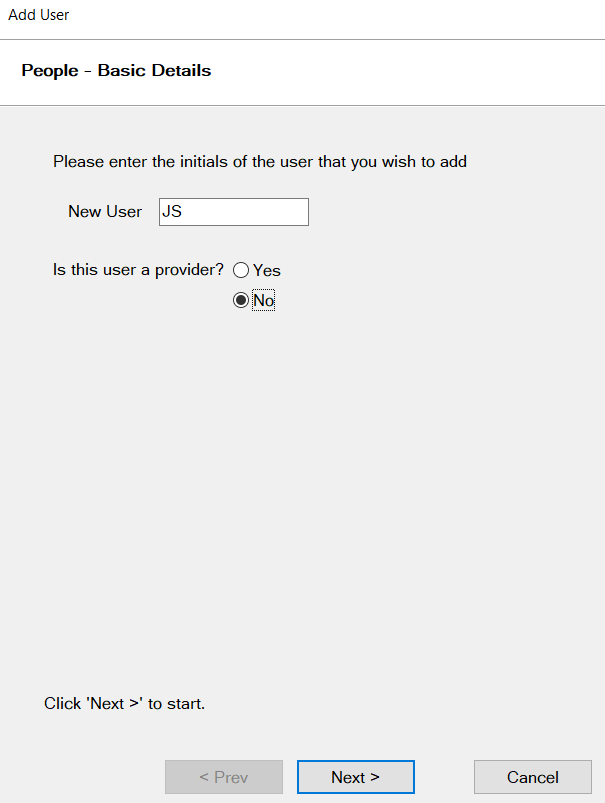 Wizard 2nd Page Enter (or select with the selector buttons) the appropriate Security Group (for example "DENTIST"). Specify whether this user has administrator privileges (Yes / No). Set the password options according to your practice’s security policy. Password security can range from light (password never needs changing) through to strict (forcing the user to change their password regularly). Optionally set a password for the user, and if necessary force them to choose a new confidential one of their own the next time they log in to the system. The following options define the user’s password - how often it must be changed. User must change password at next Login: For a new user or one who has forgotten their password. Either assign them a password in the ‘Password’ field and inform them what it is, or leave it blank. Either way, they must set a password next time they access EXACT. User cannot change password: Use this if for some reason passwords are to be permanent, and/or are set by the administrator. This will be the user’s password until this option is unticked or the password is changed using this window. Password never expires: The lowest level of security, particularly if the Password field is left blank. The password will remain the same unless changed in this window. If this option is ticked, the "change every [] days" is disabled. User must change password every [ ] days: The highest level of security, particularly if the number of days is set very low (which can also be irritating for the user). You can use this with the other options unticked, or tick the ‘User must change password at next login’ option when setting up new users. 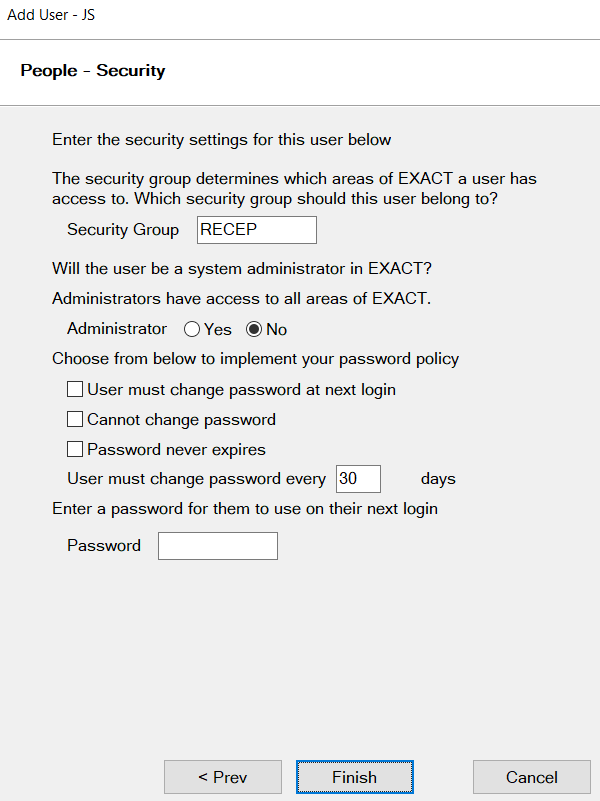 Click Finish to complete your User Setup |
Adding a New Provider User
| Expand | ||
|---|---|---|
| ||
Access the Wizard by going to Configure->Add User/Provider Wizard Wizard Page 1 - Basic Details Enter the initials of the new provider. If these already exist, an error message will alert you to this. When it asks you whether it is a provider click No Yes. Click Next 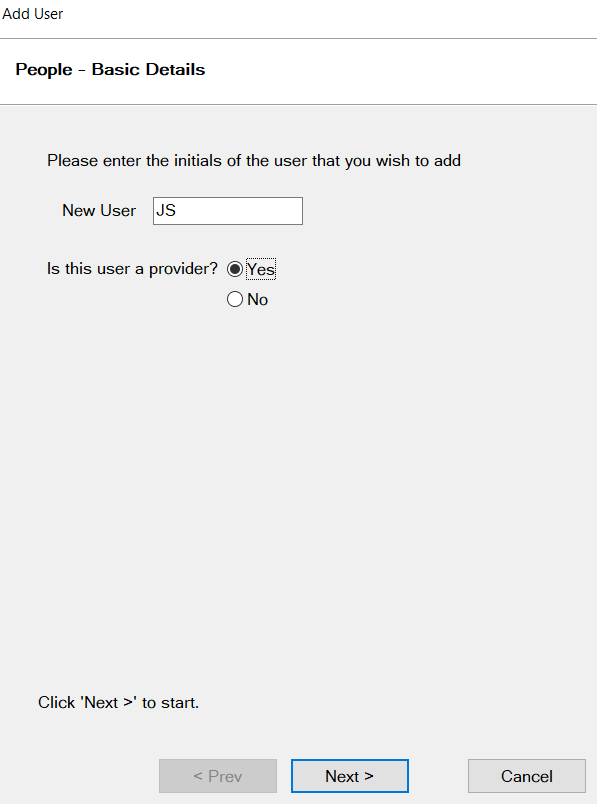 Wizard Page 2 - Security Enter (or select with the selector buttons) the appropriate Security Group (for example "DENTIST"). Specify whether this user has administrator privileges (Yes / No). Set the password options according to your practice’s security policy. Password security can range from light (password never needs changing) through to strict (forcing the user to change their password regularly). Optionally set a password for the user, and if necessary force them to choose a new confidential one of their own the next time they log in to the system. The following options define the user’s password - how often it must be changed. User must change password at next Login: For a new user or one who has forgotten their password. Either assign them a password in the ‘Password’ field and inform them what it is, or leave it blank. Either way, they must set a password next time they access EXACT. User cannot change password: Use this if for some reason passwords are to be permanent, and/or are set by the administrator. This will be the user’s password until this option is unticked or the password is changed using this window. Password never expires: The lowest level of security, particularly if the Password field is left blank. The password will remain the same unless changed in this window. If this option is ticked, the "change every [] days" is disabled. User must change password every [ ] days: The highest level of security, particularly if the number of days is set very low (which can also be irritating for the user). You can use this with the other options unticked, or tick the ‘User must change password at next login’ option when setting up new users. 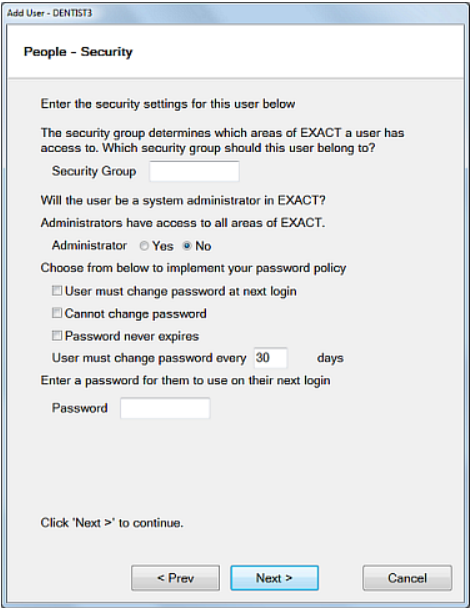 Click Next Wizard Page 3 - People Additional Details On this page you can enter some of the providers details. You must enter an active Bank Account and select a provider type to continue. Click Next to continue 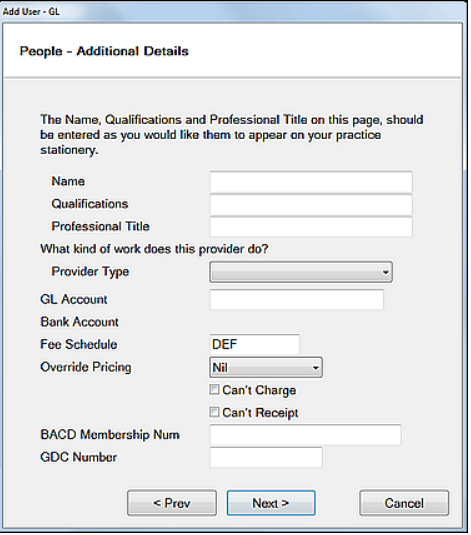 Wizard Page 4 - Optional Details You have the option to enter in the Providers contact details. You may also choose to have one of your preset email message reminders sent to this provider’s email address whenever an appointment is made with them. Click Next to continue 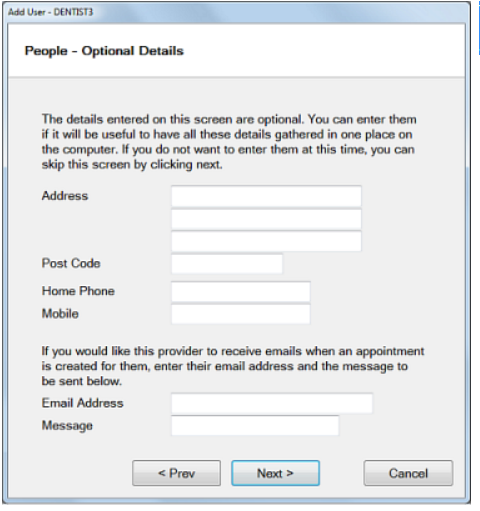 Wizard Page 5 - Treatment and Diary Colours Use this screen to set colours used in the practice diary. Ensure that colours are distinctive, and cannot be confused with other Providers' colours. Click the Review Provider Colours button to check currently used colours: Once set click Next to Continue. 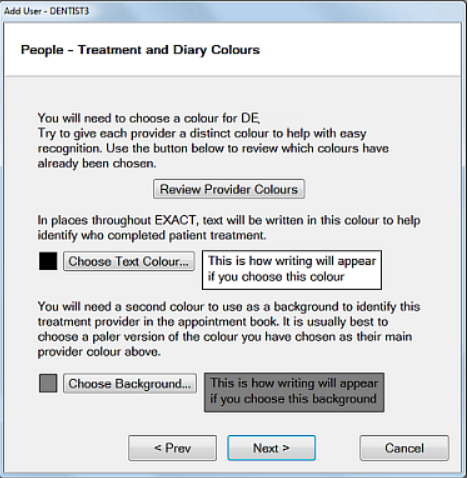 Wizard Page 6 - Recall Methods Select if you want the Provider to be set for Dentist and/or Hygienist recalls. Tick the options you want them to have and click Next to continue. 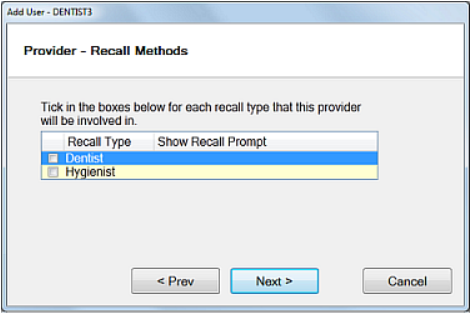 Wizard Page 7 - Rota Setup Click on Create Block Rota, choose the Start Date and days/hours working. 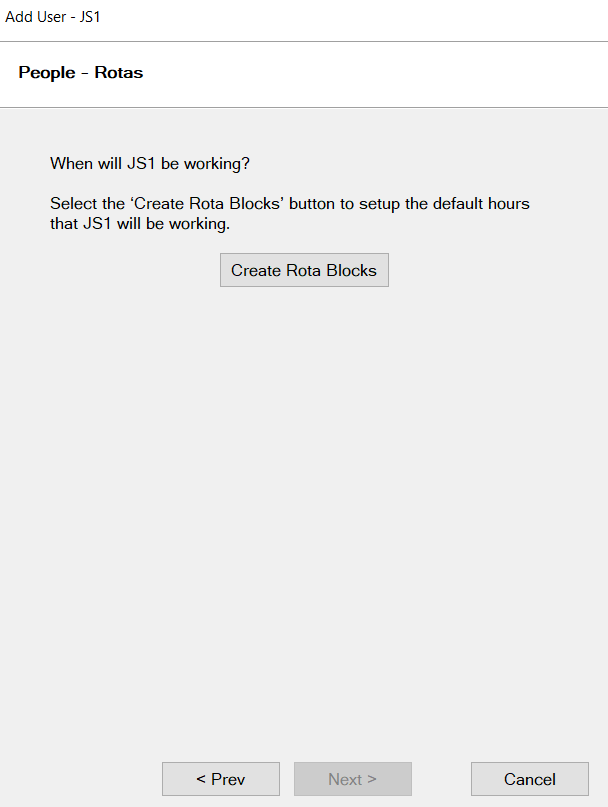 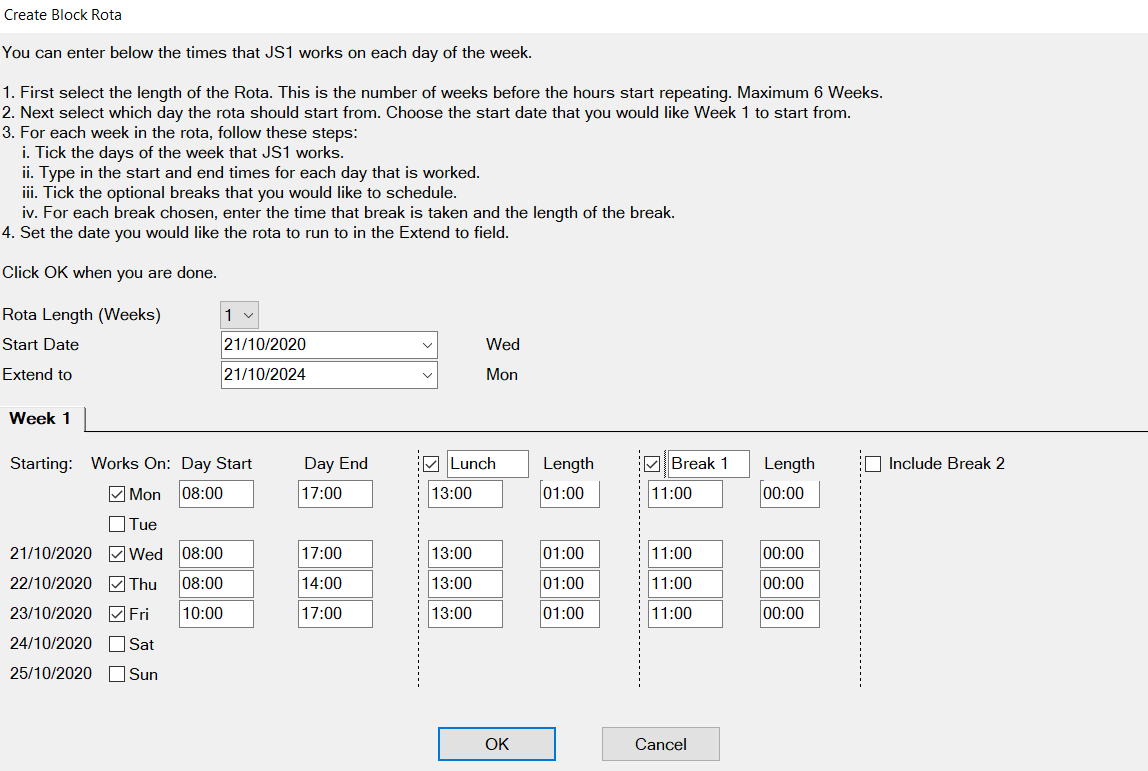 Once you have entered the days/Hours worked click Ok to create the Rota and then click Next to continue. Wizard Page 8 - Appointment Books Select the appointment book(s) that the provider is to appear on. If the provider is already on a book or room, then the entries will be ticked by default. NOTE: You must select (or be on) at least one book or room before you are allowed to continue. Select books or rooms by placing a tick in the box on the line describing the appointment book. You can only add the user to existing rooms or appointment books. Use the Edit button to edit the details of the highlighted book or room. When you click the Next> button, if the newly created provider is not already present on each of the ticked books, (s)he will be added as a wide column to the end of each of the ticked books. If a narrow column is required, you will need to edit the book.  Wizard Page 10 - Additional Appointment Book and Queue Details Set the Provider's default Appointment Book parameters. The Stickman Queue refers to the state of the patient within the Appointment Workflow: Arrive > In the Chair > Depart. (Patient arrives in reception > Patient is moved to chair by Provider and treated by Provider > Patient departs through reception) The Provider sees "stickman" icons of patients waiting to be moved to the chair: The Animate Stickmen option allows you to specify animated actions that patient icons perform after x minutes of waiting. For example for the default settings, a patient stickman icon will start toe tapping after 1 minute, Yoyo playing after 5 minutes, Yawning after 10 minutes, and Sleeping after 15 minutes. Once set click Next to continue  Page 11 - NHS Contracts (UK Only) Add in the Provider Performer Number/Pin and add to an existing contract or create a new contract for that provider. 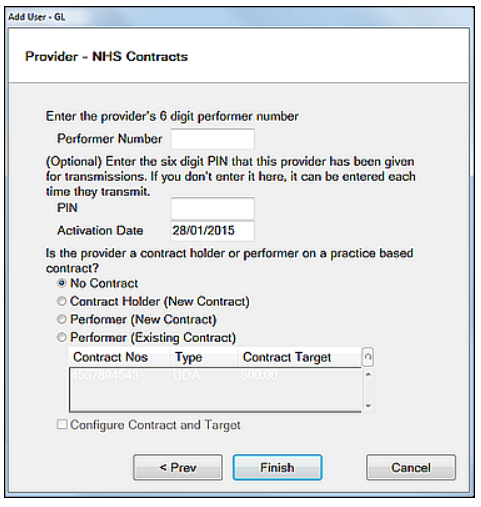 Click Finish and your Provider is now Complete |
...