| Info |
|---|
make cIf If you do not have access to some of the areas mentioned here please see a higher EXACT user to assist or amend your security permissions. If you would like the article as a PDF, use the 3 Dot's in the top right to Export |
PATIENT INFORMATION
| Expand | ||
|---|---|---|
| ||
From the Patients Window Go to File > Patients 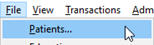 Click on the +1 on the toolbar Enter all of the relevant information for the patient and select OK 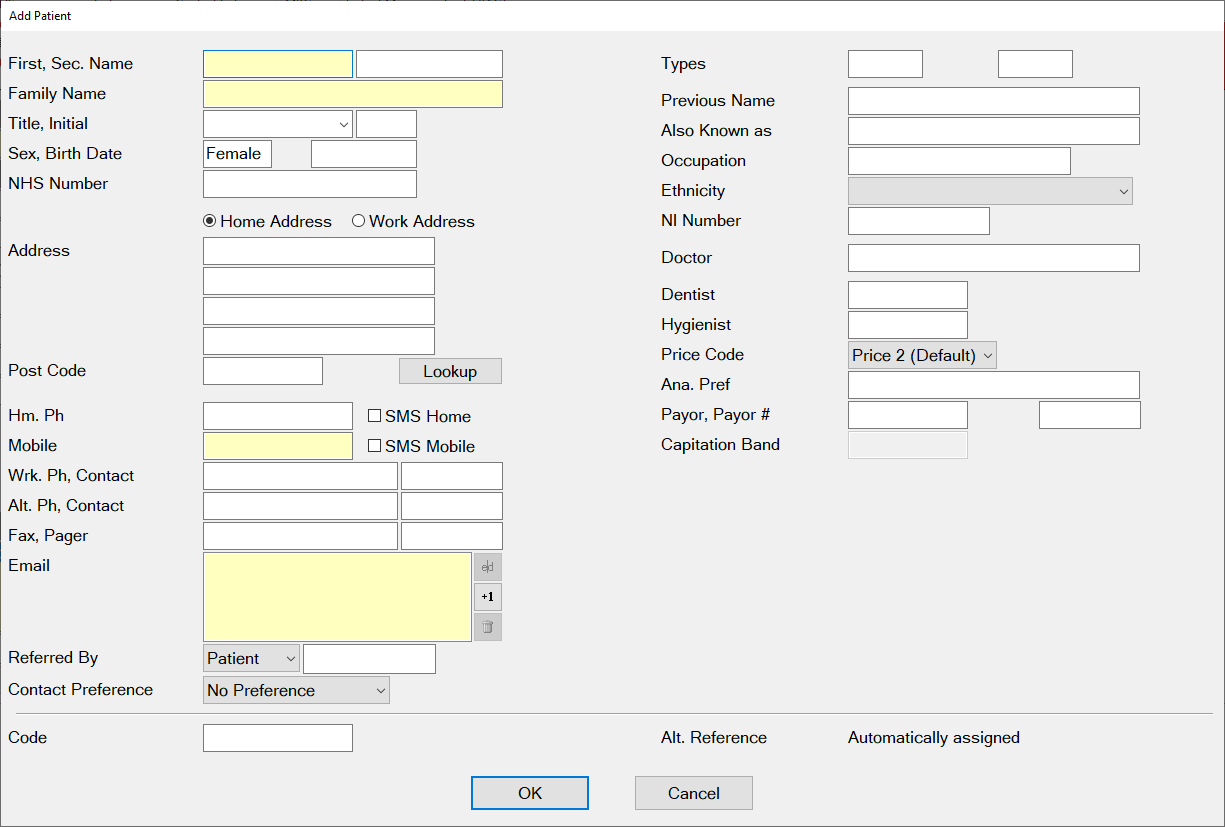 The patient will now show in your list. From the ClipboardFrom the appointment book double click on the clipboard icon at the bottom left-hand side of the appointment book columns. 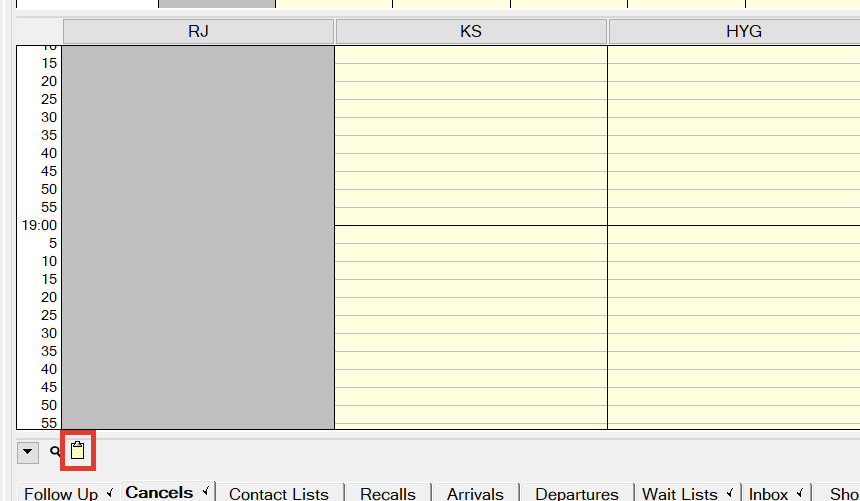 Click on the +1 on the toolbar Enter all of the relevant information for the patient and select The patient will now show in your list. |
...
| Expand | ||
|---|---|---|
| ||
Please use the steps below to scan any paper document into the patients' file: Click on the ‘Contacts’ tab of a patients file Click on Scan in the bottom right-hand corner From the screen below select the scan type – if your document is only one page select ‘Single Page Scan’ and if it is more than 1 select ‘Multi-Page Scan’  From the screen below select the paper source from the drop-down (this is whether you will be using your flatbed or feeder) and choose the picture type – I would advise using Black and White as this will be a smaller file.  Click on Scan and you will see the screen below: 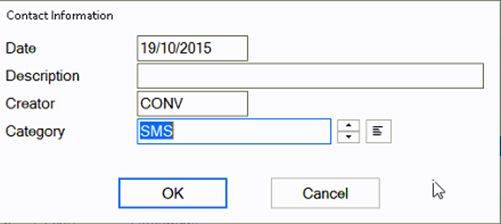
|
APPOINTMENT BOOK
| Expand | ||
|---|---|---|
| ||
You can view a video guide using the link below: |
| Expand | ||
|---|---|---|
| ||
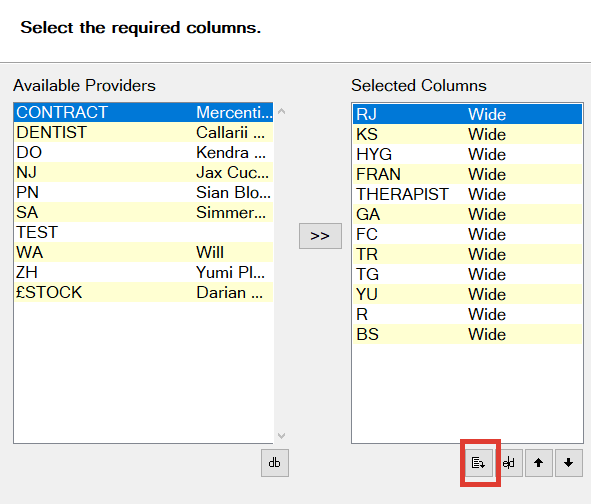
Amending the opening hours and Time IntervalOn the main appointment book screen, in the bottom right-hand corner there is a little black spanner icon, this is where the appointment book tabs can be configured. 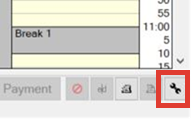 Add a tick in ‘Make Changes to this appointment book  Select Next and on the screen below you can adjust the time interval (increments on the sides of the appointment columns) and start and end time of the practice. 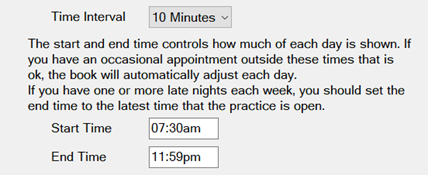 Once you have made the changes select Next, Next and Finish. Adding and Removing TabsOn the main appointment book screen, in the bottom right-hand corner there is a little black spanner icon, this is where the appointment book tabs can be configured. When you have pushed this the next window should appear with the following options; (If these options are not available please login as an administrator) 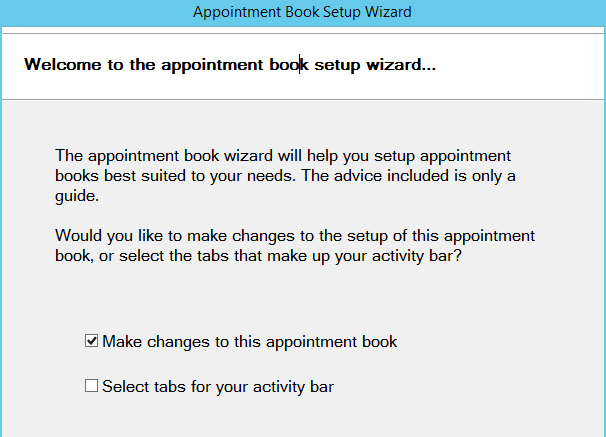  Click on the option “select tabs for your activity bar” and press next twice and the next window should appear;  All of the available tabs should appear on this screen, the ones currently in use will appear in the right-hand box. You can move the order they appear in but highlighting them and using the up and down arrows. To add or remove a tab, highlight the option and then use the chevrons in the middle of the boxes, anything appearing in the left-hand box will not show on your appointment book. When happy with the layout, press finish. You may have to close out the appointment book and reopen for changes to appear. Adding and Removing ColumnsOn the main appointment book screen, in the bottom right-hand corner there is a little black spanner icon, this is where the appointment book tabs can be configured. Add a tick in ‘Make Changes to this appointment book’  Select Next, Next and Next again and you will see the ‘Select the required columns.’ Screen:
 Select Finish on the window below and the provider will no longer appear in the appointment book. |
...
| Expand | ||
|---|---|---|
| ||
Once the provider has been added to EXact and the rota set it may become necessary to make amendments to their working pattern. To do this the practice will need to adjust this from the appointment book screen. from the appointment book, they will need to click on the providers' initials then select the Create Blocks and Clinics button shown below.
Once the Restrict Appointment Times window opens you will need to select Create Block Rota. This will open the edit rota screen which works exactly as it does in the Add User/Provider wizard. 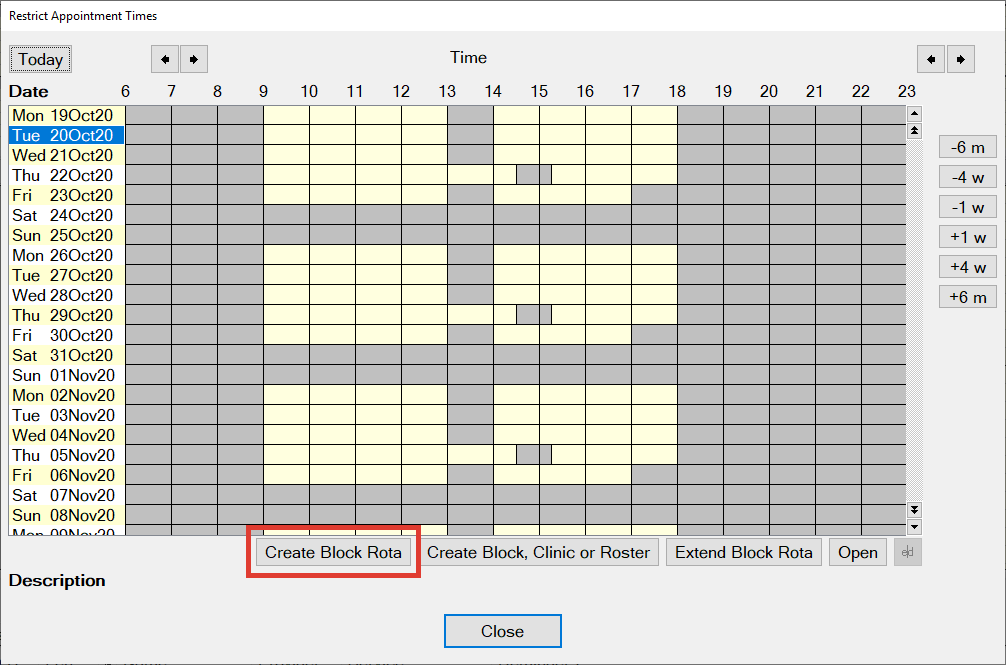 Once you select the button you will see the screen below 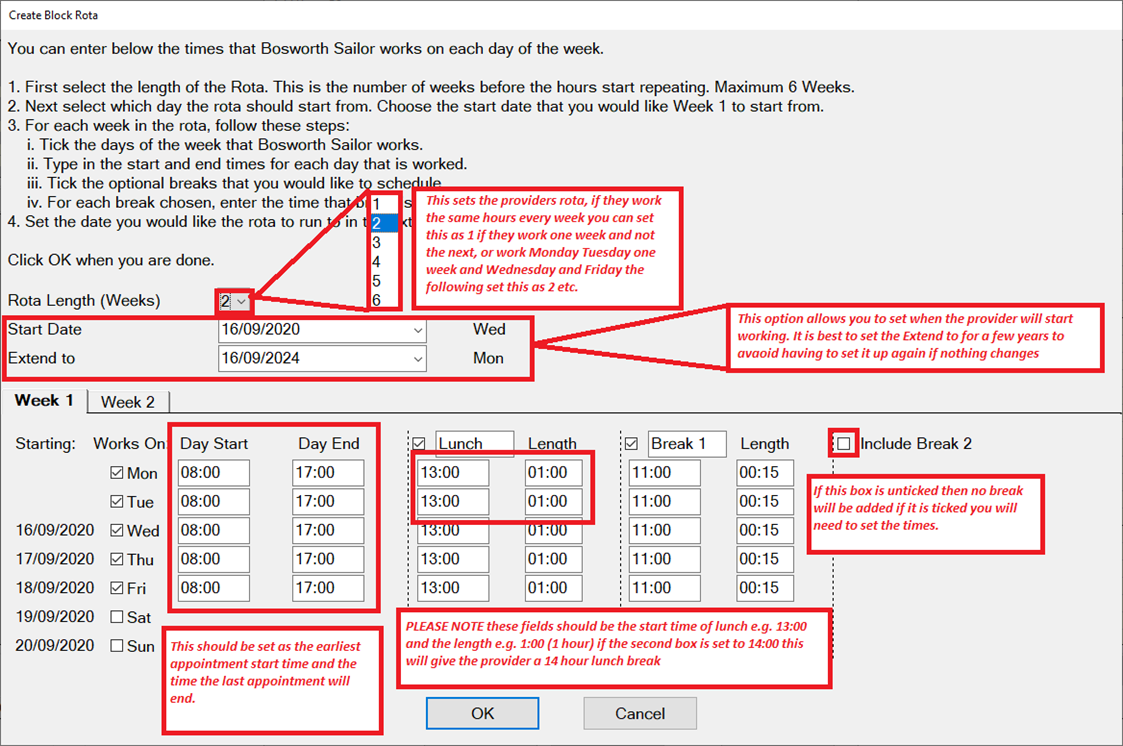 If you have set the rota length to 2 or above you will need to then make the changes on the subsequent week tabs. Once you are happy with the information entered select OK. |

APPOINTMENTS
| Expand | ||
|---|---|---|
| ||
From the appointment book double click on the clipboard at the bottom left-hand side of the appointment book columns. 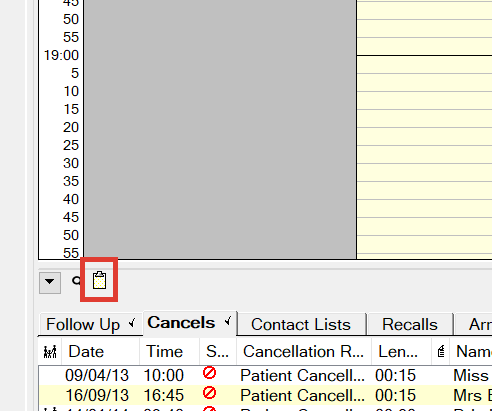 Select from the drop-down list which allows you to filter how you would like to use to find the patient. For this example, I have used the last name field. 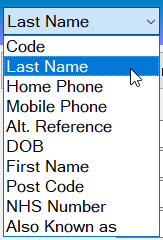 Type in the patients the last name into the field then click on the list button 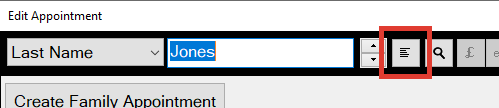 Choose the correct patient from the list and select OK Fill out the information shown below excluding the time field. 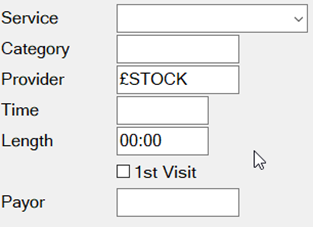
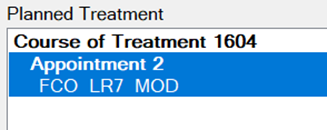 Once you have done this the information from the planned treatment will fill out the fields 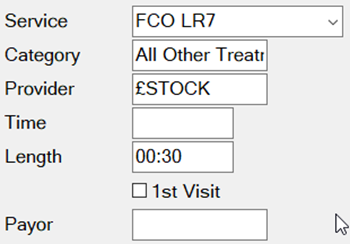 Select Copy to Clipboard The appointment will now show on the clipboard on your appointment book and you can do two things: 
|
...
| Expand | ||
|---|---|---|
| ||
Using the Cancels listClick on the Cancels tab on the appointment book Set the ‘Appt Status’ in the bottom left to the type of appointments you are looking for 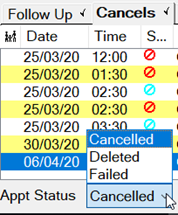 If you have contacted a patient from this list and would like to reschedule their appointment you can drag and drop them into the appointment book, alternatively, you can drag them to the clipboard and use the search tool. Removing appointments in a date range from the listClick onto the Cancels tab then click on No Rebook Select ‘Remove a range of cancelled appointments’ and set the date range you wish to remove the appointments in the list between. 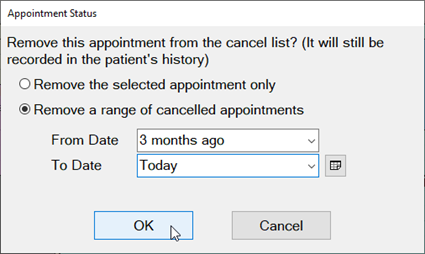 Select OK then a loading screen will appear whilst Exact removed the appointments 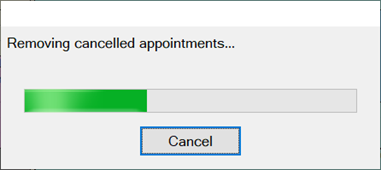 The appointments within the date range will be removed from the cancels List. |
PATIENT TRANSACTIONS
| Expand | ||
|---|---|---|
| ||
In order to take a payment in Exact please follow the steps below: Go to the patient record and click on the £ or from the ‘To Depart’ bar click on ‘Take Payment’ as shown below 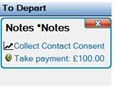 The amount this patient owns will automatically be entered into the ‘Payment Amount ‘ box – if the amount needs to be different you will need to manually adjust this. Select a payment method and then select ‘Process’  You will then be prompted to print a receipt by the window shown below, please note that once you chose a receipt type (NHS or Private) this will be the only one available. 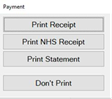 |
...
| Expand | ||
|---|---|---|
| ||
If you have not used adjustments before you may need to use the steps below to set up a new adjustment type in Exact. Please Note: You may need to be logged in as a SUPER user to carry out the following steps: If you already have an adjustment type set please ignore the steps below
The new adjustment type has now been set up. To adjust the price of an invoice please follow the steps below: Go to the ‘£’ sign on the patients file then highlight the invoice then click on adjust 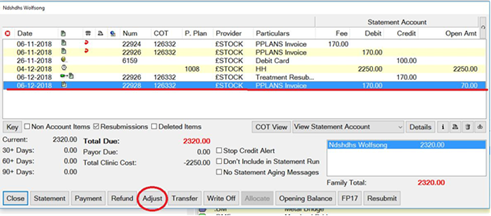 On the ‘create adjustment’ screen add the amount that you need to adjust it by. If you add a whole number it will mean the patient owes more and adding a minus number means the patient pays less. Press OK and this will either increase or decrease your invoice amount. |
TRANSMISSIONS & RESPONSES
| Expand | ||
|---|---|---|
| ||
Go to File – Payors or if you have one, the ‘NHS’ button along the top. 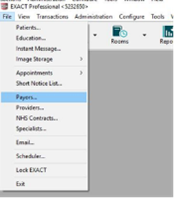 To the right of ‘Sort by name/Sort by code’, find NHS. 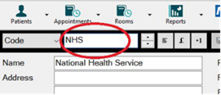 To the right of this screen, click on the button that says ‘Claim’. 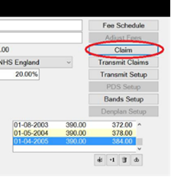 On the next screen, select the providers you wish to bundle claims for, leave blank for all providers, or select multiple to the right. The date field is set to today's date, so it will bundle everything up to today. Click ‘OK’. 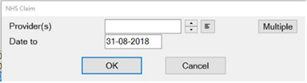 The system will bundle the claims, and once finished, will prompt you to print the list of claims, press print if you would like to print, or cancel to skip this. 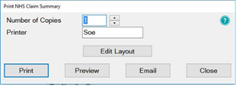 If you get a message saying ‘No Claims Found’, nothing is ready to send, and if you get a message saying ‘There are too many claims for the bundle…’, once finished, you will need to press the ‘Claim’ button and bundle again, to bundle these extra claims ready to transmit. You will then get the ‘Transmit Claim’ screen click OK, the transmission is complete. 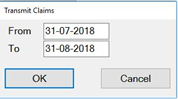 |
...
| Expand | ||
|---|---|---|
| ||
To amend/resolve any responses you receive; Click into responses under the NHS dropdown. 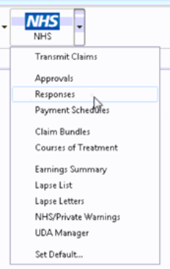 Highlight the responses you want to deal with;  Click on Resubmit in the bottom right-hand corner;  Once you have resubmitted, click on to the Patient icon at the top of your screen and it will load the patient that you have resubmitted the treatment for and allow you to amend the treatment. 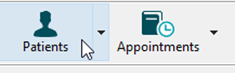 Before you TC the treatment back through, please check that you have “prompt for date when charging” checked under your user settings; You can turn this on by going to configure > user settings then making sure there is a tick in the option shown below which shows under the chart section on the left-hand side.  |
USER SETTINGS
| Expand | ||
|---|---|---|
| ||
A users security defines what they have the ability to do one the system, these are divided into groups that users are a part of. If you adjust a security setting it will amend it for all users in that group. You will need to be a superuser or admin user to amend security groups First to find out what security group someone is in, go into Configure > User Settings Find the user you want to look at and you can then see the security settings underneath the user's name and password; 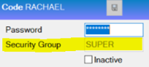 Then go into Configure > Security 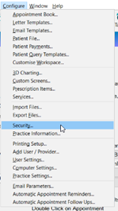 Using the Code section find the group you want to amend. Everyone listed underneath is in this security group and everything ticked it what they have the ability 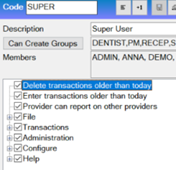 You can then click in these subsections and amend the security settings for that group. Any box that has a tick means the group have access to that area, button or action. |
| Expand | ||
|---|---|---|
| ||
To add a new user or Provider into Exact you must first click on configure > Add User / Provider; 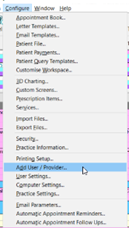 Then on the first window on the Add User Wizard, put in the way you want the user to appear on the appointment book and user name when logging in. When selecting if they require an appointment book, if they are a provider but aren’t starting yet, still click yes – this is what makes them a provider and not an admin user. 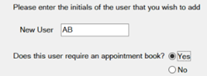 Click Next > and the next screen will want you to select the security group that the provider requires and add in a temporary password for them to just get logged in (make sure you tick “User must change password at next login” Press Next> and the next page will be for any additional details you wish to add such a the providers' name and qualifications. This is the section where you fill in the provider type; 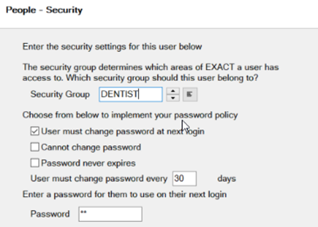 Press Next > and this page you can add in the providers' address/telephone numbers and an email address if they would like to receive an email every time an appointment is made with them. Press Next > and this section is where you can pick the providers' appointment book colour and text colour. Press Next > where you will be asked to tick which recall type the provider will set, either dentist or hygienist Press Next > and you will be prompted to add in the providers working rota, make sure you start this as the correct date that the provider is starting with you. 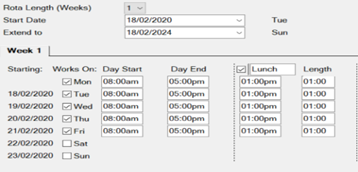 The next two pages will ask you which appointment book (if you have more than one) that you want the provider to show in and how they want their stickman (patient at the door) settings to show. Press Next > and this is where you can add in the provider NHS details and press Finish, this will then add the new provider to the diary and open their rota from the dates you selected. |
REPORTING
| Expand | ||
|---|---|---|
| ||
When you are in Exact Reports you have the ability to add reports that you use frequently into your favourites tab, this will be for the user that is currently logged in and each user will have to add their own favourites in. Go into reports and highlight the report you want to add into your favourites and press the star icon in the bottom right-hand corner;  You can then choose or add the group as monthly/weekly or daily, depending on the frequency that you run it. With a description, if you would like.  You will then be able to fill out the relevant fields that you use when running the report, like performer and date ranges.  This will then save into the favourites tab to be run easily with the prefilled dates/performers in place |
...
| Expand | ||
|---|---|---|
| ||
To get a list of patients who have failed their appointments in a given time period please follow the steps below: Go to Administration > Reports  Scroll through the list and select ‘Patient List’ and double click on it. Click into the ‘Select Patients’ field then click on the list button to the left 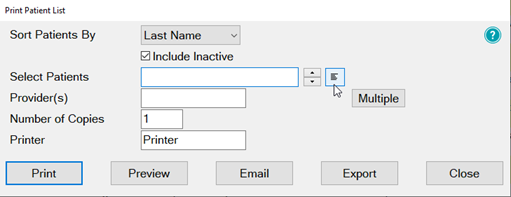 Click on the +1 in the bottom right-hand corner Enter ‘FTA List’ in the description field then click on the insert button shown below to the bottom right-hand side of the window. 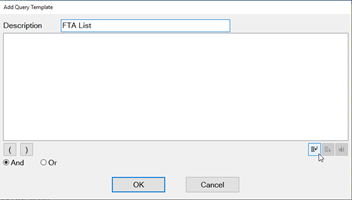 Choose ‘Failed Appointment’ from the list then select OK  On the screen that appears leave the dates as they are but put a check in ‘Prompt for entries’ (this will allow you to select the date range each time you run the report) the select OK and select OK again. 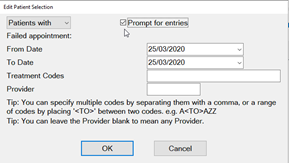 Ensure ‘FTA List’ is highlighted and click OK You should see the screen below where you can select ‘Print’ or ‘Preview’ 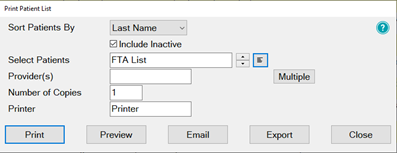 Once you select ‘Print’ or ‘Preview’ you will see the screen below where you can enter your selected date range and then select OK and the report will run. When you run this list again use the steps in blue. |
...
| Expand | ||
|---|---|---|
| ||
Shows UDAs/UOAs claimed and completed over time, grouped by the date of TC. From the reports list select the performers required for the report, can use Multiple to select specific providers. (Leaving blank will print the report for all providers in the practice)
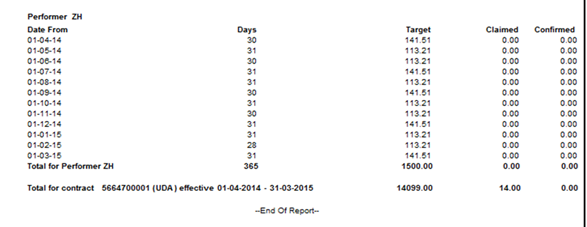 The report will show the date from which will be the first of the month if run monthly or every seven days from the first day the contract started. It will give the details of how many days are in that period. The target column will show the providers target as of that period/date. Then the claimed column shows how many UDA’s have been TC’d through Exact and the confirmed column shows how many UDA’s were confirmed by the board. |
MANAGING WHITE SPACE
| Expand | ||
|---|---|---|
| ||
Please use the link below to access a video guide for using Exact’s Care Manager |
...
| Expand | ||||
|---|---|---|---|---|
| ||||
The Short Notice List allows you to collate a list of patients who would like to be notified of sooner appointments or of any opening slots if they have had to cancel. Once a space appears you will be able to hover over the gap in the appointment book and click on the puzzle piece icon to alert patients on any appointment spaces that become available. Enabling the Short Notice ListIf the short notice list is not visible on the appointment book you may need to turn this on. In order to do this, you will need to be logged in as an administrator or SUPER user. Go to configure > practice settings Add a tick in the ‘Enable Short Notice List’ box located at the bottom left-hand side. Adding the Short Notice List tabAfter you have ensured the Short Notice List is enabled you may need to add it to your appointment book.
Configuring the Short Notice ListGo to the appointment book and go to the short notice tab, there should be a black spanner in the bottom right-hand corner. You may need to be an administrator / SUPER user.
This will open the 'Short Notice List Settings' window. 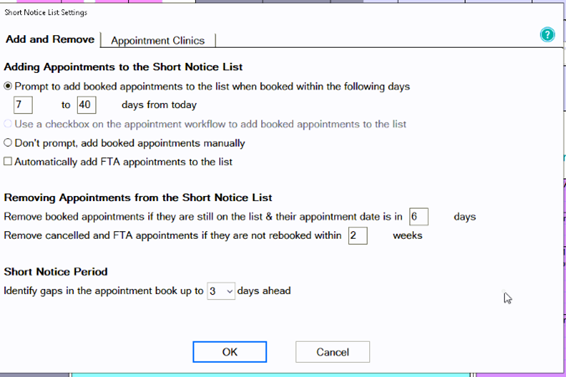 If you would like to be prompted to add appointments to the Short Notice List if booked within the specified date range (this is usually set to appointments between 7 to 40 days but can be amended for the practice’s needs) OR use a checkbox OR don't prompt and add manually. You can add an appointment to the short notice list when cancelling or by right-clicking on the appointment and selecting ‘Add to Short Notice List’  You can Tick/Untick box to add FTA appointments automatically. You can also decide when to remove appointments from the Short Notice List by setting time intervals in the two removal conditions shown above. You will need to specify the short notice period itself. So the length of time from today it may find an appointment for- Maximum 5 days Contact' tab is located to the top middle of the setting screen.
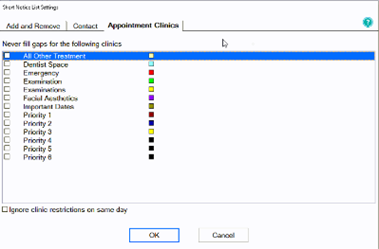 a) Select which clinics you would like to prevent gaps being filled |
PATIENT COMMUNICATIONS
| Expand | ||
|---|---|---|
| ||
You can view a video guide using the link below: |
| Expand | ||
|---|---|---|
| ||
How to add SMS templateGo to Configure > SMS templates 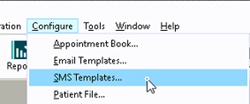 Click on +1 from the toolbar Enter a code and a description. Please note: the code needs to be unique  Type your message into the available field. To automatically pull information from the patient file click on View Merge Fields at the bottom left of the window and it will open the ‘Letter Merge Fields’ window Select the merge field you need then click on ‘Copy Field(s) to Clipboard’ 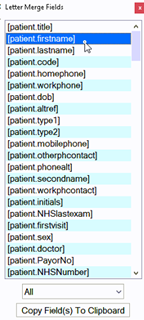 To paste the merge field into the body of your SMS right-click in the space and select ‘Paste’ 
Once you have finished your template click OK How to contact patients by SMSGo to the patients file that you wish to send an SMS to Click on the SMS button shown below on the patient’s toolbar  If you would like to free type your SMS please go to the blue steps On the screen below click into the SMS Template field and then click on the list button to the right-hand side 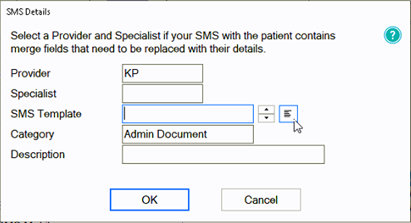 Select the email template from the list and then click on OK Click OK You will be shown a preview of your SMS – if you have not used a template you will need to type your SMS here Once you are finished click OK and the SMS will go to your patient. Any SMS sent will be stored in the ‘Contacts’ tab. |
| Expand | ||||
|---|---|---|---|---|
| ||||
Checking Inbox/OutboxIn order to check emails that patients have sent to you and make sure that your emails have left the outbox follow the steps below:
Go to File > Email 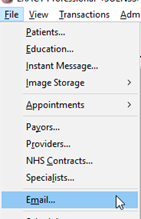 Once the screen opens you will see four tabs
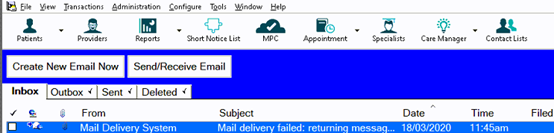
Resetting Failed MessagesIf any messages in your outbox show with the message Failed to Send follow the steps below to resolve.
Filing an email to a PatientIf you receive an email from a patient where their email is stored on their ‘Details’ tab it will automatically file to their ‘Contacts’ tab. If they have emailed you from another email address you will need to manually file this to their contacts tab, to do this please follow the steps below: Go to the inbox Click on the email that is not linked to a patient  Click on File On the screen that appears click on the list button beside the ‘File to patient’ field and select the correct patient from the list. 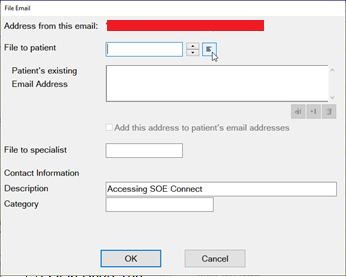 Once you have selected the patient if you would like to add the email address to their patient file add a check in ‘Add this address to patient’s email addresses’ 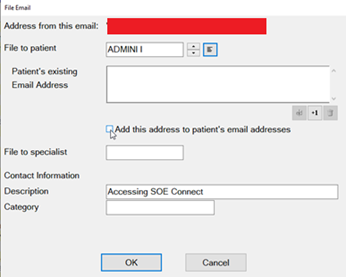 Once you are finished select OK and the email will now be stored on the selected patients' contacts tab.
|
| Expand | ||
|---|---|---|
| ||
How to add email templatesYou can view a video guide using the link below: https://www.youtube.com/watch?v=KgAX2dUrHU8 How to contact patients by emailGo to the patients file that you wish to email then click on the email icon on the patients' toolbar  If you would like to free type your email please follow the blue steps On the ‘Email Details’ screen click into the ‘Email Template field and then click on the list button to the right-hand side 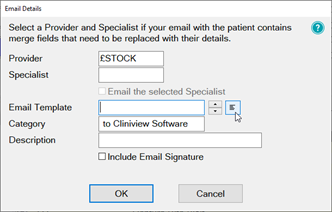 Select the email template from the list and then click on OK Click OK You will be shown a preview of your email – if you have not used a template you will need to type your email here. Once you are finished click Send and the email will go to your patient. Any emails sent will be stored in the ‘Contacts’ tab.  |
HELPFUL INFORMATION
| Expand | ||
|---|---|---|
| ||
General EXACT QueriesContact the SOEUK Support Desk on 01634 266 800 NHS Queries (PIN Numbers, List Numbers, Transmissions, Regulations)Contact NHS Switchboard on 0113 825 0000 NHS Local Area TeamsPrimary care providers and other NHS organisations can find regional contact details by accessing the link below: |
...