| Info |
|---|
If you do not have access to some of the areas mentioned here please see a higher EXACT user to assist or amend your security permissions. If you would like the article as a PDF, use the 3 Dot's in the top right to Export |
CONFIGURATION
| Expand | ||
|---|---|---|
| ||
Please note for any of these changes you may need to be logged in as a SUPER user or an Administrator. Adding ServicesFrom the ‘Configure’ menu, select ‘Services’. 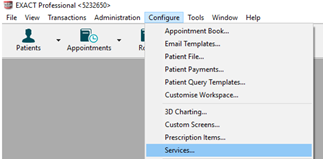 At the bottom right-hand corner of the screen click on the This will bring up the ‘Add service item’ screen. Enter a code for the new service
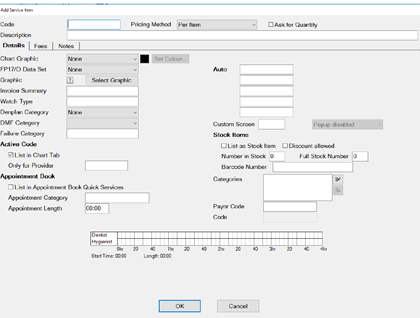 Enter a description and select the Pricing Method. If applicable, tick the ‘Ask for Quantity’ box. Configure the Details Tab information as necessary, i.e. selecting the price code, graphic and colour for the service and add it to any required category. These options control what the service will look like and how it will function. Next, click on the ‘Fees’ tab and enter the pricing information as appropriate. Enter the price in ‘Price 2 (Default)’ field as this is where the default fee schedule picks up the prices for charting. 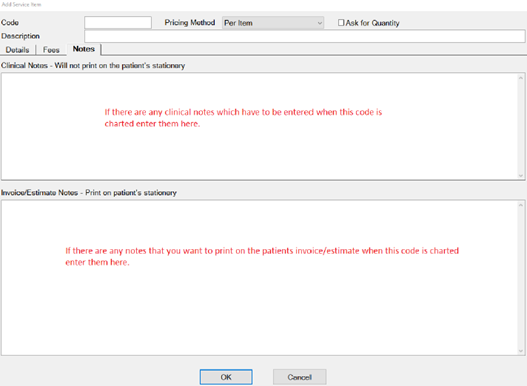 If required, click on the ‘Notes’ tab to enter ‘Clinical Notes’ or ‘Invoice/Estimate’ notes for this service. Please note that this will show for all patients the service is charted for – you can still edit the invoice/estimate and clinical notes on the chart tab. Press the OK button to create the new service. This will return you to the ‘List Service Items’ screen. You can also view a helpful video on adding services using the link below: https://www.youtube.com/watch?v=C7zP0_6qPgI Amending Service FeesGo to Configure > Services  Locate the service you wish to change the fee of – you can do this by scrolling through the service list or entering the services code into the bottom left-hand corner  Double click on the service and it will open the ‘Edit Service Item’ screen then click on the ‘Fees’ tab 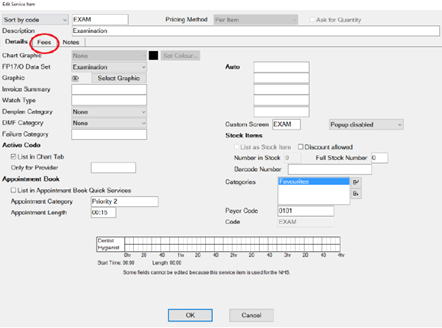 From this screen, you can change the price of the service in the ‘Price 2 (Default) column. 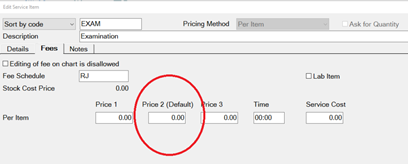 Repeat for any other services you need to amend. Adding Services to CategoriesHave the required ‘Edit Service Item’ screen open. This is done by locating the service item in the service list and double-clicking on it (please note if you are on the service list on the chart tab you will need to right-click on the service and select edit) 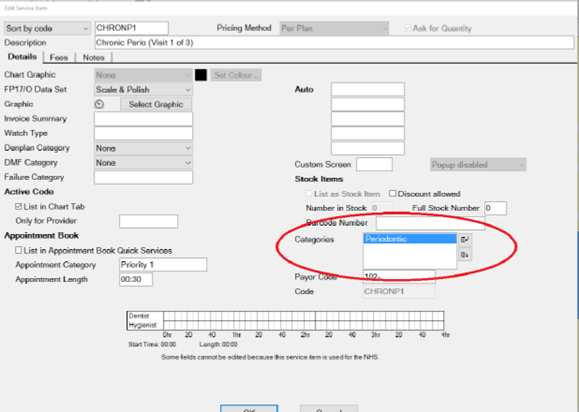 Click the insert icon shown below to the right of the ‘Categories’ field;  This will open the ‘View Service Categories’ window. 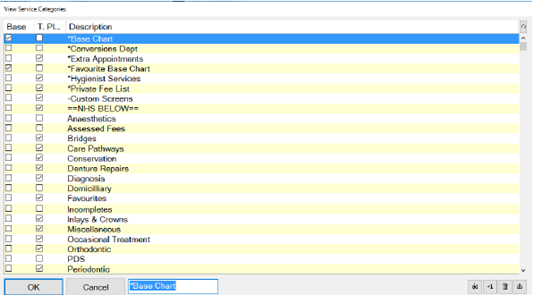 If the category that you would like to add the service to is not in the list click on the +1 in the bottom right-hand corner and you will see the ‘Add Service Category’ window. Give the new category a description and select whether it is for base charting or treatment then press OK 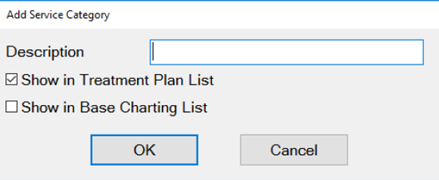 Ensure the category you would like to add the service to is highlighted and press OK. You can add a service item to as many categories as you like. In order to add it to more categories follow steps 2 and 3. Removing a service from a categoryHave the required ‘Edit Service Item’ screen open. This is done by locating the service item in the service list and double-clicking on it (please note if you are on the service list on the chart tab you will need to right-click on the service and select edit) Click on the category you would like to remove the service from in the ‘Categories’ field  Click on the on the right-hand side and select |
...
| Expand | ||
|---|---|---|
| ||
Quick Charting is the hover box which displays a list of selected services when you move your cursor over the tooth chart. Go onto the chart tab of a test patient Hover over the tooth chart and you should see the screen below 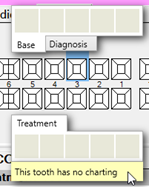 Right-click on the yellow bar and select Configure 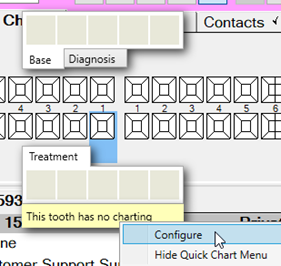 To add base items double click on them from the list on the right. You can move them around by dragging and dropping. 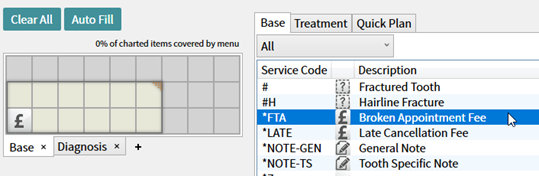 You can add up to 27 services to each tab to increase the number of services you can add click on the triangle in the top corner of the selection window and drag as required. Click onto the treatment tab and repeat the blue step Once you are happy with your Quick Charting set up click on OK |
...
| Expand | ||
|---|---|---|
| ||
You can view a video guide using the link below: |
CHARTING TREATMENT
| Expand | ||
|---|---|---|
| ||
You can view a video guide using the link below: |
...
| Expand | |||
|---|---|---|---|
| |||
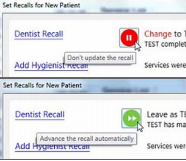
Depending on your recall set up you will be prompted to set a recall date for your patient when charging treatment. The recall date should automatically set to the default recall interval chosen by the practice. Advancing and pausing recallsFrom the recall prompt you can do the following:
Changing the recall intervalIf you would like to amend the recall interval from the default click on ‘Dentist Recall’ or ‘Hygienist Recall’ and you will see the screen below: 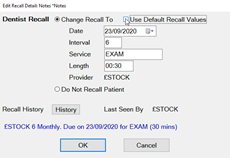 Untick ‘Use Default Recall Values’ and you will then be able to edit the recall interval, service and length as required. From this screen you can also set the patient to ‘Do Not Recall Patient’ and this will stop them receiving any recall communications. |

...
| Expand | ||
|---|---|---|
| ||
Voiding treatment from the tooth chartGo to the patient's chart that you wish to edit Hover over the tooth to find out the precise code that was used originally 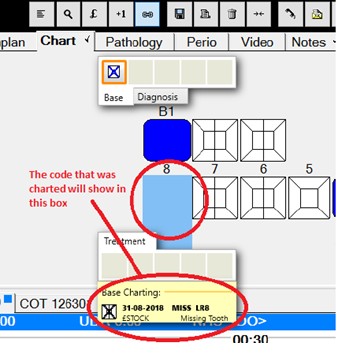 Highlight this in the Base Chart service list 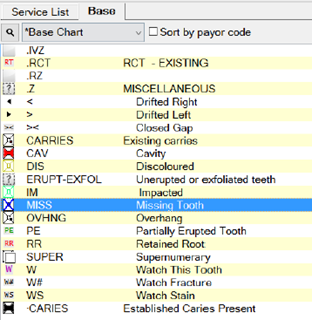 Click onto the tooth in question and this will remove the incorrect base charting on the patient's tooth chart. Voiding treatment from the patient's historyUse the steps in ‘Viewing Treatment History’ to access the history window Scroll up to find the base charting section and highlight the item you want to remove 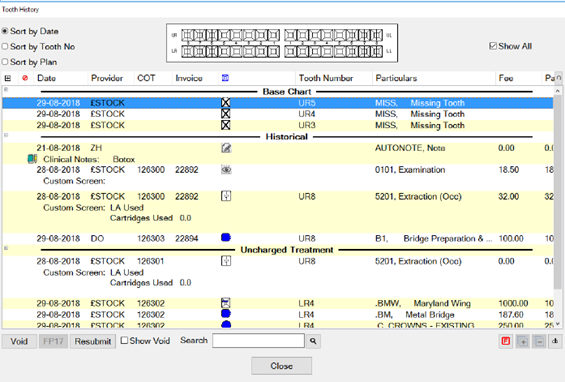 Then click on Void in the bottom right-hand corner and this will remove the charting. |
THE PERIO TAB
| Expand | ||
|---|---|---|
| ||
Configuring classic perioFrom the patients file select the ‘Perio’ tab you will see the options below 
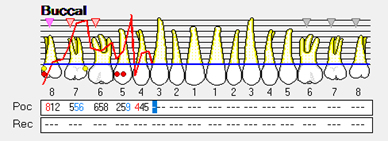
Recording Perio using the classic perio screenGo to the Perio tab then click on the +1 at the bottom of the top window to the left-hand side You can now begin charting from the R8 – L8 on each of the arches
|


| Expand | ||
|---|---|---|
| ||
Turning on Single Screen PerioGo to Configuration > User Settings From the user setting screen click on the box next to ‘Use single screen perio’ 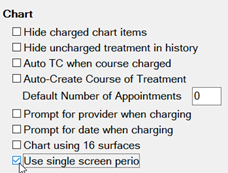 Click on the save icon shown below on the toolbar.  Configuring single screen PerioGo to the 'Perio’ screen on a patient file Click on the Spanner shown below in the bottom right-hand corner  On the screen below you can set the way that you chart including the order in which date is entered, attachment level threshold and recession data. 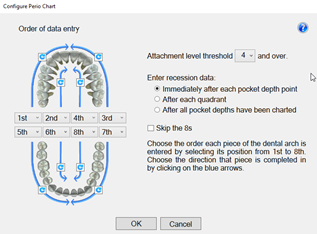 Using Single Screen PerioFrom the Perio tab click on the +1 beneath the top window on the left Add a title for your perio charting From the chart, you can add the following
 Once you are finished select OK and your charting will be saved. |
THE MEDICAL TAB
| Expand | ||
|---|---|---|
| ||
Updating the Medical History with ClinipadIf you are using clinipad your patient would have filled out their medical history form on arrival. When you move the patient to the chair you should see the pop-up box below 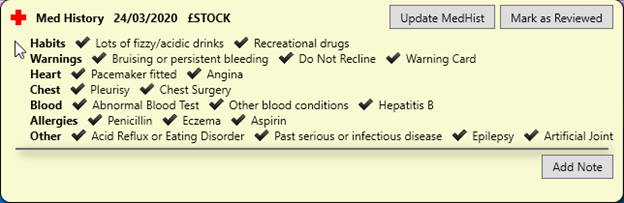 From this window you can do two things:
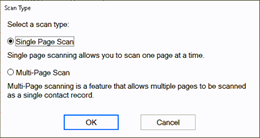
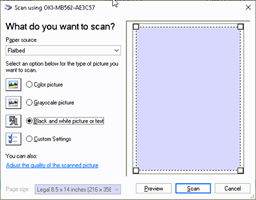
Updating the medical history from a paper formIf you are working with paper-based medical history forms when the patient arrives you will see the box below:  From this screen click on ‘Update MedHist’. From the medical history, window select all that apply and put a tick in Reviewed by at the bottom of the form then select Save. Please then scan the paper form into the patient file using the steps below:
|
...
| Expand | ||||||
|---|---|---|---|---|---|---|
| ||||||
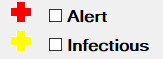
Adding Medical alerts
Viewing Medical AlertsOn the patient's toolbar, you will see the medical history ‘+’. The icon will show in different colours depending on the alert set:
|


NHS
| Expand | ||
|---|---|---|
| ||
When you TC an NHS COT you will need to fill out the HS45 form which contains the following I. Type of Treatment – please select the appropriate for the patient you are seeing. II. Child Arrangements – only to be used for patients 17 and under. III. Treatment Dates – ‘Registration/Acceptance’ will pick up from the date of the first appointment and the ‘Completion of Treatment’ will show as the date of the last treatment completed for the patient. Please note for a child where only an exam has been completed there should be no date entered in ‘Completion of Treatment’ IV. Declaration by claimant – select all that apply. V. Exemptions/Charges – are picked up from the Exemption added at the bottom of the COT. 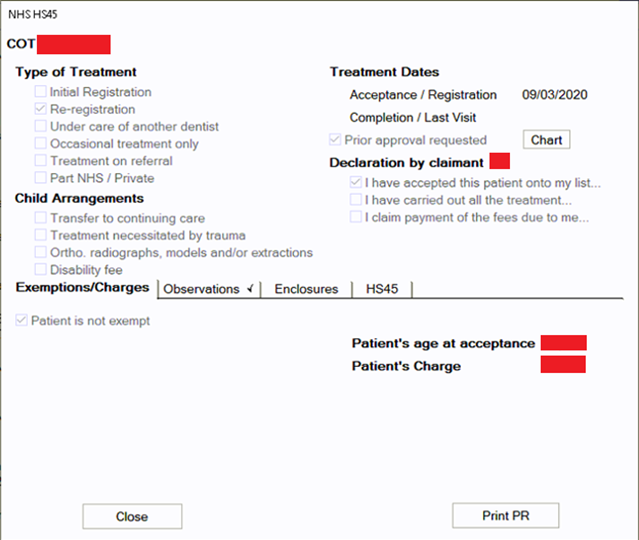
|
...
| Expand | ||
|---|---|---|
| ||
To amend/resolve any responses you receive; Click into responses under the NHS dropdown. 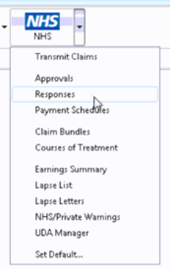 Highlight the responses you want to deal with;  Click on Resubmit in the bottom right-hand corner;  Once you have resubmitted, click on to the Patient icon at the top of your screen and it will load the patient that you have resubmitted the treatment for and allow you to amend the treatment. 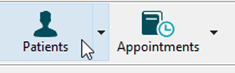 Before you TC the treatment back through, please check that you have “prompt for date when charging” checked under your user settings; You can turn this on by going to configure > user settings then making sure there is a tick in the option shown below which shows under the chart section on the left-hand side.  You can view a video guide using the link below: |
PATIENT INFORMATION REQUESTS
| Expand | ||
|---|---|---|
| ||
You can view a video guide using the link below: |
...
| Expand | ||
|---|---|---|
| ||
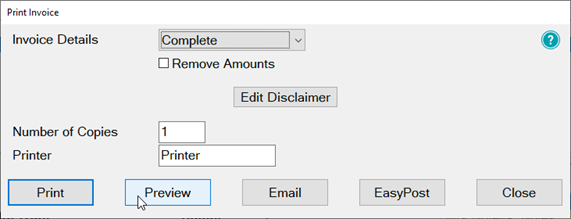
To print an invoice click on the £ button on the patient's toolbar Click on the invoice line for that the patient needs 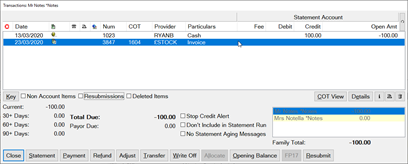 Click on the print icon shown below under the transaction window on the right-hand side  On the screen below select how to would like to give the patient their invoice
 Your estimate will contain the patient's name and address and any items which have been charged through under that invoice line. 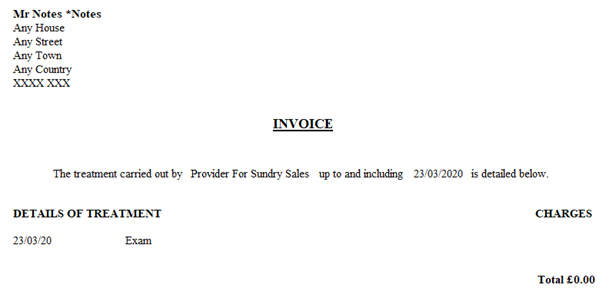 |
MANAGING OPEN COTs
| Expand | ||
|---|---|---|
| ||
You can view a video guide using the link below: |
| Expand | ||||||||||
|---|---|---|---|---|---|---|---|---|---|---|
| ||||||||||
When to use this report: It is recommended that this report is run at regular intervals, at least once a month or once a week, for each Provider. This is used to print a report listing the patients who have:
To run the 'Outstanding Treatment' Report
In the case where some of the chart items have planned or completed dates outside this date range, use the tick by Include all treatment on matching COTs/Treatment Plan checkbox to specify whether those chart items will be included in the Report or not. For example: If you run the report for a date range over the last month with this option deselected, it will display any COTs with their information from the last month only, and any COTs prior to the last month will display as headings only. However, if you select this option it will show those matching COTs prior to this last month with their treatment item information, and COTs within the last month also with their treatment item information. TIP: A useful query to use would be for patients with no future appointments booked. That way any patient who appears on the list will either need to be invoiced for completed work or scheduled for another appointment.
Provider from the list by clicking in the field and using the list button. The report will then print for the selected provider only. Use the Multiple button to select more than one provider.
Provider Category rather than one or more providers.
From and To dates to specify the date range for the planned or completed treatment.
Report OutputThe example below shows an Outstanding Treatment report for all patients, with all checkboxes selected. Included in this report are:
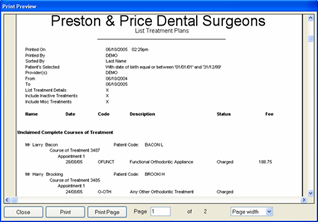 Ideally, the report will be run with each option selected. For the Treatments not completed option, once the list has been printed, where the patient does not have any further appointments they can be contacted and if necessary the Course of Treatment closed and sent to the Payor as incomplete treatment. For the Treatments completed but not charged and the Treatments completed but not claimed (TCed) options, there will be duplicates in the report, as TCing treatment also acts as a method of charging. If the treatment has not been TC'd then it may not have been charged also. When selecting these options it may save time when cross-referencing patients to run one of the reports, deal with the patients who appear on the list, and then run the other option separately. |
PATIENT COMMUNICATIONS
| Expand | ||
|---|---|---|
| ||
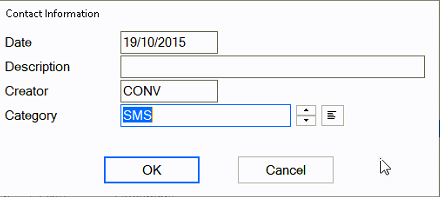
How to add SMS templateGo to Configure > SMS templates 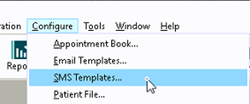 Click on +1 from the toolbar Enter a code and a description. Please note: the code needs to be unique  Type your message into the available field. To automatically pull information from the patient file click on View Merge Fields at the bottom left of the window and it will open the ‘Letter Merge Fields’ window Select the merge field you need then click on ‘Copy Field(s) to Clipboard’ 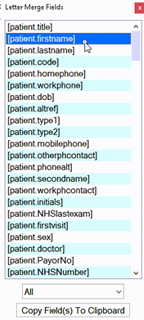 To paste the merge field into the body of your SMS right-click in the space and select ‘Paste’ 
Once you have finished your template click OK How to contact patients by SMSGo to the patients file that you wish to send an SMS to Click on the SMS button shown below on the patient’s toolbar  If you would like to free type your SMS please go to the blue steps On the screen below click into the SMS Template field and then click on the list button to the right-hand side 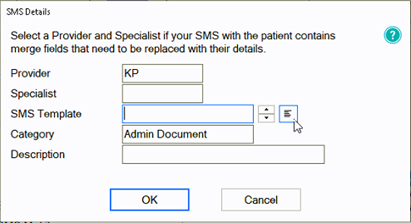 Select the email template from the list and then click on OK Click OK You will be shown a preview of your SMS – if you have not used a template you will need to type your SMS here Once you are finished click OK and the SMS will go to your patient. Any SMS sent will be stored in the ‘Contacts’ tab. |
| Expand | ||
|---|---|---|
| ||
How to add email templatesYou can view a video guide using the link below: https://www.youtube.com/watch?v=KgAX2dUrHU8 How to contact patients by emailGo to the patients file that you wish to email then click on the email icon on the patients' toolbar  If you would like to free type your email please follow the blue steps On the ‘Email Details’ screen click into the ‘Email Template field and then click on the list button to the right-hand side 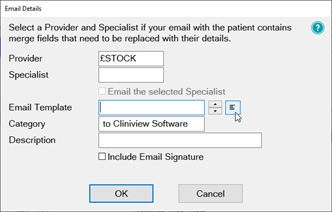 Select the email template from the list and then click on OK Click OK You will be shown a preview of your email – if you have not used a template you will need to type your email here. Once you are finished click Send and the email will go to your patient. Any emails sent will be stored in the ‘Contacts’ tab. 
|
HELPFUL INFORMATION
| Expand | ||
|---|---|---|
| ||
General EXACT QueriesContact the SOEUK Support Desk on 01634 266 800 NHS Queries (PIN Numbers, List Numbers, Transmissions, Regulations)Contact the BSO on 02895360333 and select option 4 then option 1 Please make sure if you are querying claims you have the patients H&C number or their date of birth and CHI. |
...