Images on Chart (EXAMINE Pro)
The "Images on Chart" feature gives a dentist close integration between the chart and any images stored in EXAMINE Pro. You will instantly be able to see whether there are any images stored for a tooth, and to access them with one click.
...
Hover the mouse over the bar next to the tooth - the most recent image will appear. It will disappear once the mouse cursor is moved off the bar.
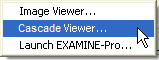
Right-click the the bar next to the tooth; the Image menu will be displayed, offering you the choice of launching EXAMINE Pro, the Image Viewer or the Cascade Viewer:
In the Images window, select the appropriate tooth, then click either the Image Viewer button

or the Cascade Viewer button
 .
.
Configuring Images on Chart
Images to be used for viewing on the chart are classified into four types:
...
If no type is chosen, then the image type will not be shown on the chart representation.
Adding or Editing images
To add items to the list, click the +1 button, and then browse your computer to find the image file(s) you wish to add.
To edit list items, either double-click the item in the list, or highlight it and click the

button to display an Edit window:
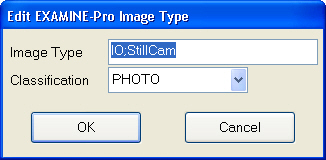
Images Type - Each type has up to three subcategories, separated by a semicolon, including:
(Intra-oral), EO (Extra-oral), NA (Not Applicable).
XRAY, PAN (Panoral), CEPH (Cephalometric ), TWN (Twain aquisition).
...
Click the OK button to save the changes made, or the Cancel button to close the window without saving any changes.
Image Representation
Colour Coding:
Image indicators are shown onscreen, as coloured bars above and below the teeth, to show there are images present.
...
A recent (less than 1 year old) panoral x-ray image (red centre).
Recent images of type Other at UR8-LR6 (a bitewing), at UR6-UR4, and at LL6.
An older image (3 to 4 years old) at UL4 to UL6.
Image Controls
The image representations also function as shortcuts to the images. If you hover the mouse cursor over the representative rectangle, a tool tip will be displayed of the most recent image of the types being shown (excluding filtered images) for the tooth.
...
Image Manipulation The features below describe various ways you can manipulate the image(s) displayed. None of these permanently alter the stored image (changes are lost once another image is selected). | |
Number of Images | If there is more than one image available, you can scroll the images by using the  button to scroll the images left, and the  button to scroll right. Each click will move the images one position, and shift the highlight to the image in the centre of the pane. Alternatively, you can click on a scroll button, and hold it down, and the images will scroll continuously until you release the mouse button. The three buttons on the middle section  control whether the lower pane displays one, two or four image viewports: Click the appropriate button; this will display 1, 2 or 4 viewports. Click the viewport the image is to be displayed in. Select the image in the upper pane that is to be displayed in the currently selected lower viewport. |
Size | There is a slider control in the bottom right-hand corner of the viewport for the currently selected image: 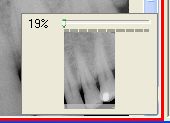 This shows a thumbnail picture of the current image, and what size the image is set to, relative to the original image (in this example, 19%). |
Pan | If the image size is larger than will fit in the viewport, scroll bars are displayed to enable you to move the image vertically and/or horizontally. You can also drag the image with your mouse, or click with the middle mouse button or wheel: this will display a four-headed arrow - move your mouse around this and the image will move in that direction. |
Brightness | Right-click anywhere on the image and while holding the right button down, move the mouse to the right to make the image brighter, or to the left to make it darker. |
Contrast | Right-click anywhere on the image and while holding the right button down, move the mouse up to increase contrast, or down to decrease contrast. |
Image Toolbox | Select an image and click the  button, or right-click an image, and the following menu is displayed, to enable you to manipulate the selected image: |
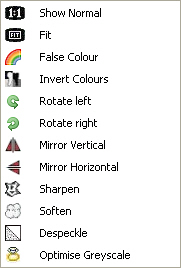 | Show Normal: Shows the selected image at original size. Fit: Resizes the image to fit the current viewport size. False Colour: Applies a preset false colour to the image. Click the button again to return the image to normal colouration. Invert Colours: Inverts the current display colour. Click the button again to undo the colour inversion. Rotate left/right: Each click of one of these buttons will rotate the image through 90 degrees anticlockwise/clockwise as appropriate. Mirror Vertical/Horizontal: Shows a mirror image of the original, as if reflected in the horizontal or vertical axis. Sharpen: Makes the image appear sharper by emphasising the difference between adjacent spots on the image. Soften: Makes the image appear softer by blurring the distinction between adjacent spots on the image. Despeckle: Makes an image look less 'speckled' by merging small dots on the image with adjacent (background) parts of the image. Optimise Greyscale: Click this button once to optimise the contrast and brightness for black and white images such as x-rays. |
Cascade Viewer
The Cascade Viewer is available to EXACT users who have EXAMINE Pro registered, and have configured it to be used.
...