...
...
...
...
...
...
...
...
| Table of Contents | ||
|---|---|---|
|
Add Prescriptions
NOTE: This topic is about creating a new record in the database for an item to be prescribed.
For details of how to issue a prescription to a patient, see To Issue Prescriptions.
Select the Chart tab for a patient.
Select the Prescriptions tab in the Activity Bar / Sub-tabs area
Click on the
...

spanner button at the bottom of that tab
Click the +1 button to display the Add Prescription window.
...
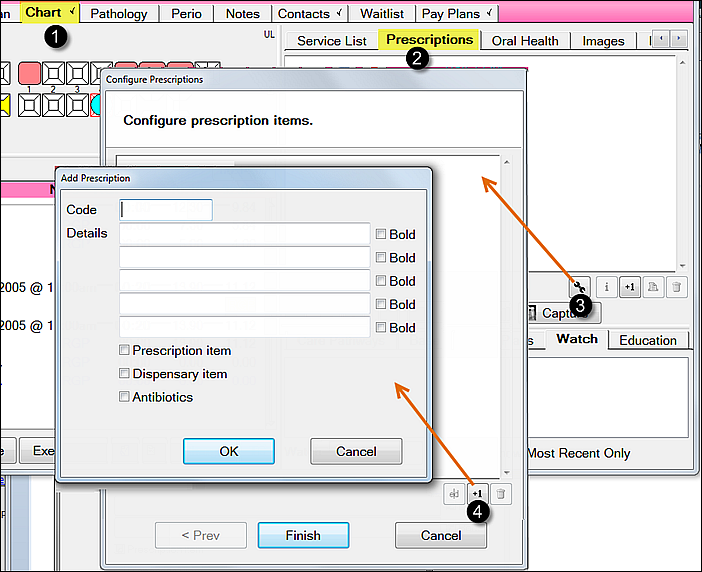
This window has two functions:
it enables you to create a record for the item to be prescribed,
it allows you to set up the text to be printed on the label of the prescribed item.
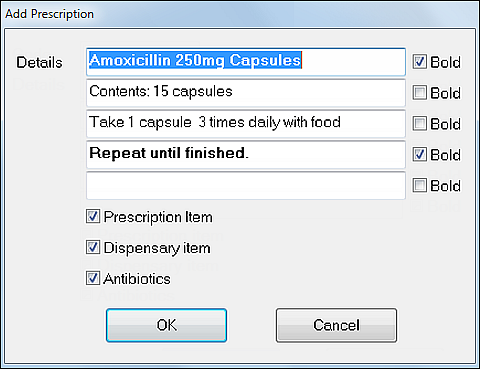
In the Code field, enter an appropriate identifier for the item. You can enter only 6 characters, so you need to choose something that will uniquely identify it.
For example, if you commonly prescribe the same drug in different formulations, you might wish to leave the last three characters for the different strengths. As an example, for Amoxicillin, if you had 250mg tablets, and the suspension in 250mg/5ml and 125mg/5 ml, you could have "AM250T", "AM250S" and "AM125S".
Each of the Details lines is also a line on the label if you are printing labels.
You can choose to click the
 checkbox if a line needs to be in bold type to stand out, and you have a label printer capable of bold type. Usually, the name of the drug and any warning or precautions would be in bold, e.g., "Take with Food", "Avoid Alcohol". etc.
The three checkboxes at the bottom of the dialog window allow you to classify the items as Prescription item, Dispensary item, or Antibiotics.
This has implications for when items are prescribed, as items are listed either under the Prescription category or the Dispensary category, or both - you must tick Prescription or Dispensary or both to have the item appear in either or both lists.
You can in theory use this to list items but not make them available to issue a prescription, by making sure neither checkbox is ticked.
The Antibiotics checkbox is informational only and has no implications.
The completed prescription record will appear similar to the following example:
...
When completed, click
 to save the prescription
View Prescriptions
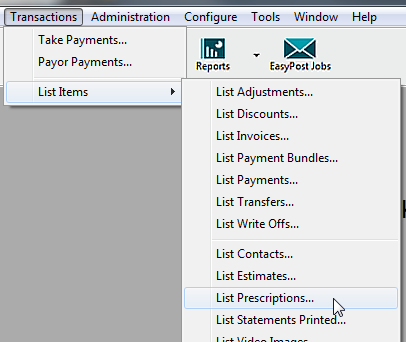
Select Transactions > List Items > List Prescriptions:
...
The List Prescriptions window will open, displaying all the issued prescriptions contained in the system, sorted by date:
...
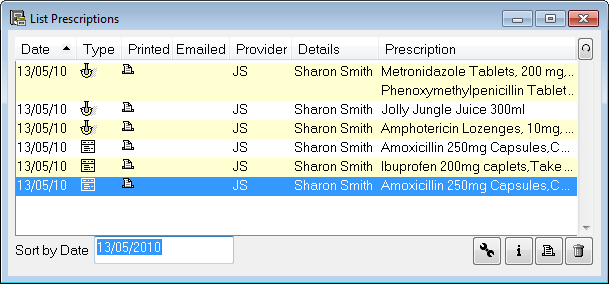
Date
The date the prescription was issued.
Type
The icons indicate whether an item is a dispensary
 item or a prescription item
  .
.Printed
This column will show a
 icon if the prescription and/or a label has been printed.
Emailed
When a prescription is first saved, you have the option to send it as an email attachment.
If this has been done, an icon will appear in this column.
Provider
The code of the provider who issued the prescription.
Details
The patient name.
Prescription
The details of the item(s) on the prescription.
Sort by Date
Enter a particular date in this field to find and display prescriptions for that date.
Click on a prescription to select it. The following options are then available:
Click the
...

button to view the prescription (you can also double-click an item to view it);
Click on the
...

button to print a hard copy;
Click the
...

button to delete it permanently from the system.
The
...

button will open the 'Configure Prescriptions' window - this is the same window as displayed from the Configure > Prescriptions menu item, and lists all the items available.