Search these help files
...
To create Label Templates
(requires Presentation Manager / EXDOC-PRO)
Click the +1 button at bottom centre of the Label Details window.

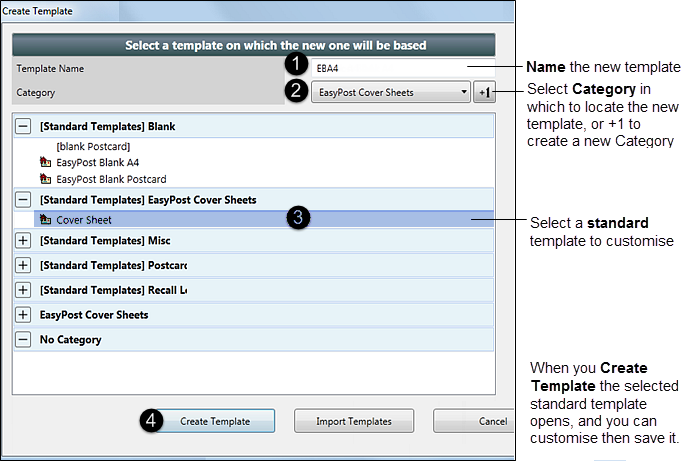
The Create Template window displays. In this window, do the following:
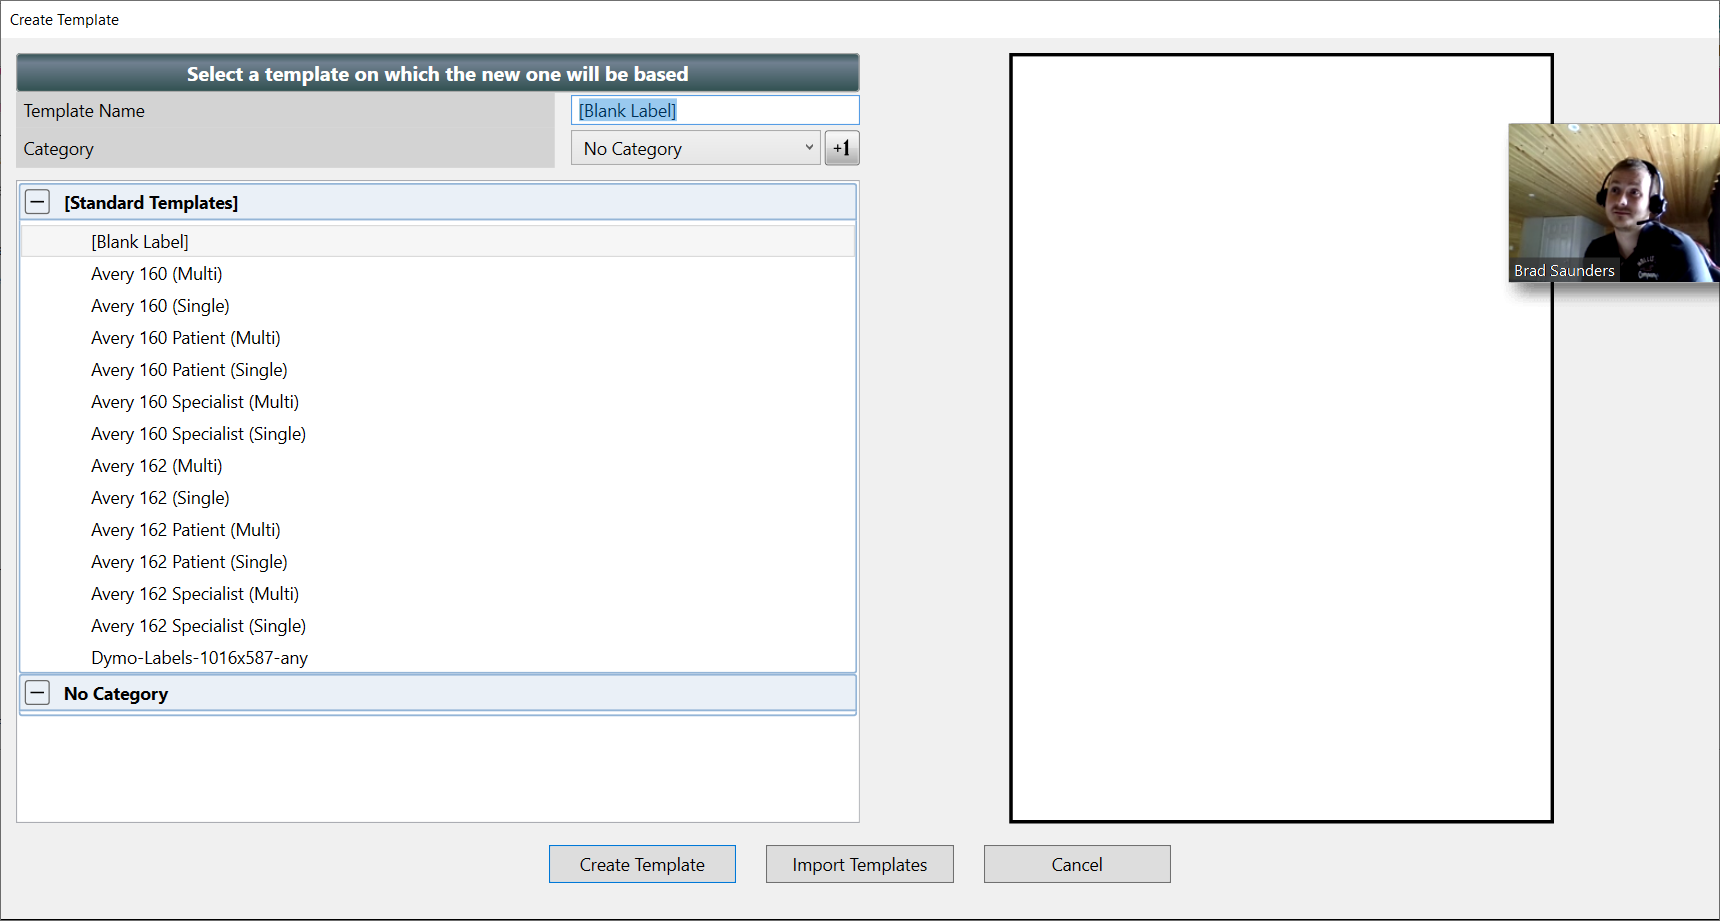
First select an existing template to use as a Base template.
EXACT will by default name it the same as the Base template, but with an incremented (number) after the name. You can later edit and rename it. can later rename it.
Click the Category dropdown and select a Category in which to save the new template that you will create.
Click the Create Template button.
You will see the Presentation Manager Loading... message:
Please refer to the Presentation Manager module for further information:
Checking if you're Editing a Template or Patient Document
Depending on how you work, you can be in either template-editing or patient document-editing mode. Template-editing is the means to creating a custom patient document.
There are multiple factors to check:
Look at the top left of the window.
If you see the Patient name, you are editing a patient document, not a template. For example:

If you do not see a patient name, you are editing a template. For example:

Look at the data on the page.
If you see merge fields such as <<patient.name>>, or placeholder graphics with the red "Placeholder" label, you are editing a template.
If you see a patient name and graphics without the red "Placeholder" label, you are editing a patient document.
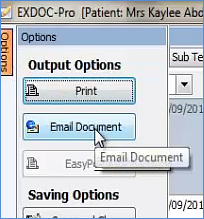
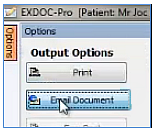
Click the Options button at top left and see if there is an Email Document option button - if YES, you are in a patient document not a template:

...
Select a template in the Document Details screen.
Select Preview.
This causes EXDOC-PRO to open in Edit mode for a custom Patient document (with all merge fields populated with the current patient's information and the practice / provider information).
If the template contains any Recall merge fields, you will be prompted to select the recall types that you want to appear in the document:
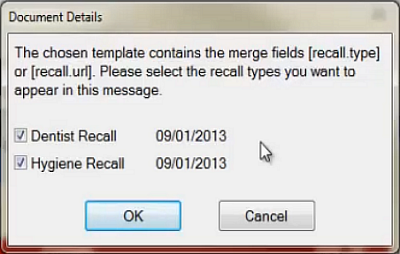
If you select both Dentist and Hygienist Recall Types, the wording in the document will refer to both.
Once the document displays you can use all of the tools that are available for editing templates (merge fields, charts, images, Xrays, etc.) This immediately drops in all of the correct patient data, which you can move or resize. You can also add additional text.
...
Select a template in the Document Details screen.
Select Preview.
This causes EXDOC-PRO to open in Edit mode for a custom Patient document (with all merge fields populated with the current patient's information and the practice / provider information).

If the template contains any Recall merge fields, you will

...
IMPORTANT: For confidentiality reasons, you can only send patient data to an email address that is stored in EXACT.
Open the Patient File on any tab (see Details tab example below).
Click the Create Patient Document button:

You will see the Document Details screen, with any templates that you currently have displayed on the screen.
Double-click a template to load it in EXDOC-PRO.
Check that you are actually looking at a patient document and not a template.
Edit the patient document as necessary, using any EXDOC-PRO functions (merge fields, charts, images, Xrays, etc).
Click the Options tab at top left of the screen, to slide out a panel with buttons.
Click the Email Document button.
You will see the Contact by Email window:
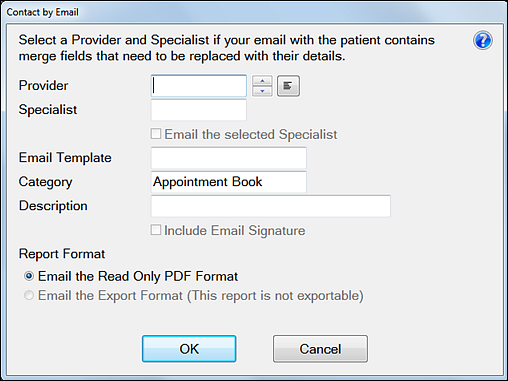
Follow the instructions. When you click OK, you will see a prompt. This is for clinical governance reasons, because a PDF file will be created for emailing, and it will be stored on the Patient File:
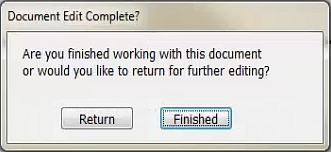
Click Finished to display the Create Email window:
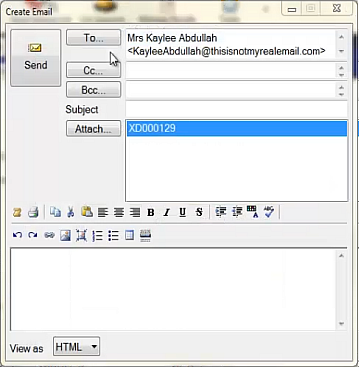
The To... field defaults to the patient email recorded in EXACT, if it exists (this can be deleted or changed).
IMPORTANT: For confidentiality reasons, you can only send patient data to an email address that is stored in EXACT.
Re-opening a Patient Document
...
Locate it in the Patient File under the Contacts tab (as shown in the image above), and double-click it to open in EXDOC-PRO.
Accessing EXDOC-PRO, Creating a Template
Start from the Patient File (any patient, on any tab).
Click the Create Patient Document button:

You will see the Document Details screen, with any templates that you currently have displayed on the screen.
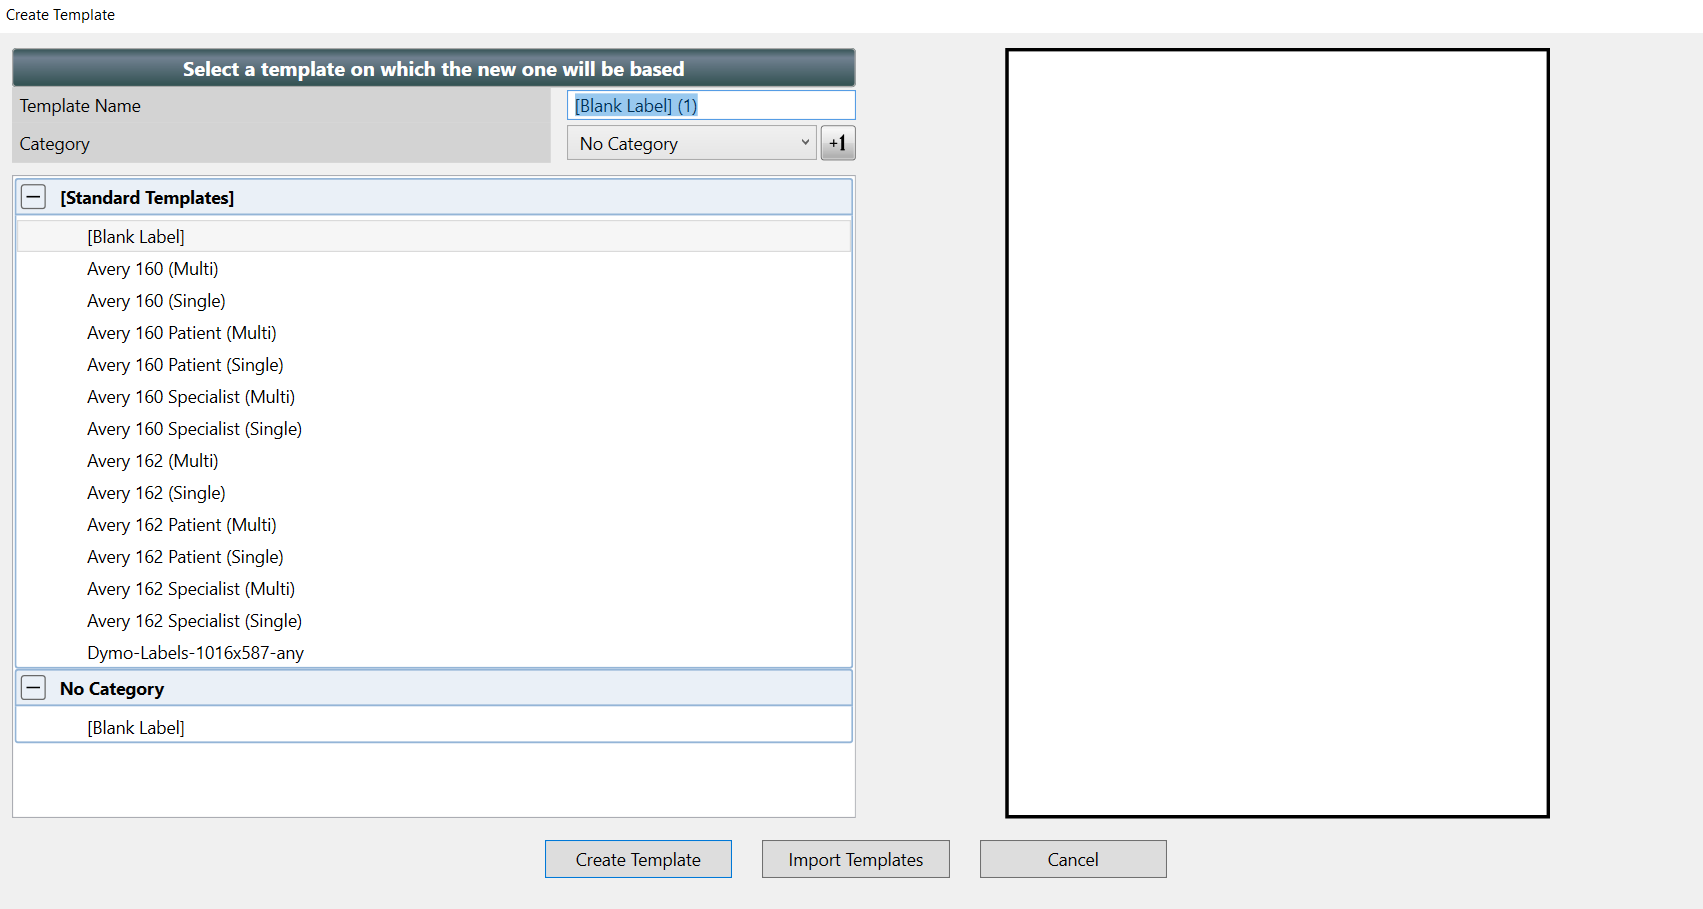
Select the +1 button at the bottom of the screen:


The Create Template screen displays, with default(locked) Standard Templates listed. You have to base any New template on a standard template, so it is essential to select a starting template.
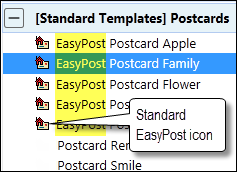
IMPORTANT: For EasyPost you must select an EasyPost template as these have the address labels set up for EasyPost.
In the Create Template window:
TIP: Create an EasyPost folder for your EasyPost templates so that you can easily see which are available for EasyPost.
Click the Create Template button.
This launches EXDOC-PRO with the existing template opened in MS Word (if you started off a blank template the entire page will be blank).
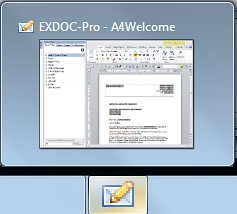
You will also see the EXDOC-PRO icon in your taskbar:

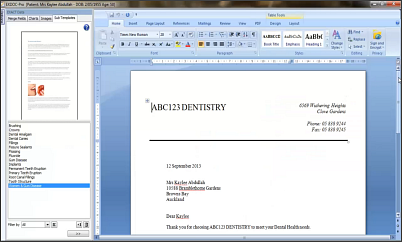
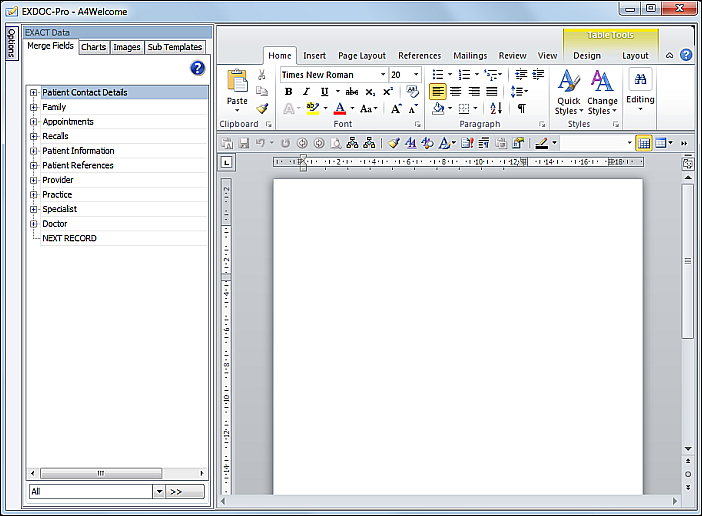
The EXDOC-Pro Screen
Use available EXACT data from the left pane as you construct the template in the MS Word document in the right pane:
...
To use the EXDOC-PRO Options Panel for MS Word Print, Save and Settings
In EXDOC-PRO the MSWord print, save and settings are available on a separate Options panel.
Click the Options button at top left of the screen.
The Options panel displays:
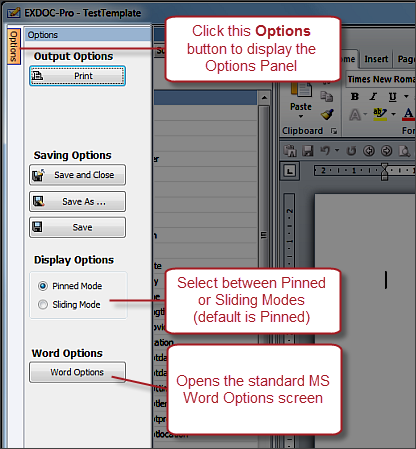
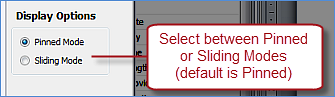
You can either set this panel to Pinned Mode (where it stays in place until you close it), or you can set it to Sliding Mode, where it slides into view when you mouseover the Options button. NOTE: Changing this setting will require a restart of EXDOC-PRO.
SEE ALSO: Using Pinned or Sliding Mode for the Options PanelUse the functions on this panel in the normal way for MS Word.
To include EXACT data in the MS Word document template:
...
The available EXACT data is arranged in tabs in the left pane for quick and easy inclusion in the MS Word document template.
...
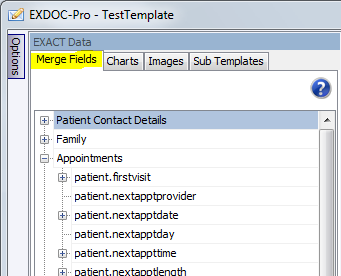 | Merge Fields Tab In EXDOC-PRO a merge field is a set of codes that instructs Word to insert custom text into documents that are automatically generated through EXACT. Also refer to MS Word Help for information on merge fields. For example, when EXACT automatically generates an appointment reminder, it will customise the patient.firstname merge field per patient, so that the reminder to John Jones will state "Hi John" and the reminder to Reshma Naidoo will state "Hi Reshma". When you create the template, either - Drag the merge fields into the appropriate position in the document, or - Position the cursor in the template and double-click the merge field, or - Position the cursor in the template, click to select the merge field in the left pane, then click the Insert button  at bottom of the left pane. Use the Filter at the bottom of the pane to quickly locate a specific merge field:  EasyPost users see also: Enabling EasyPost support in Presentation Manager for an explanation of the EasyPost Support button. SEE ALSO: Using the Merge Fields Tab in EXDOC-PRO |
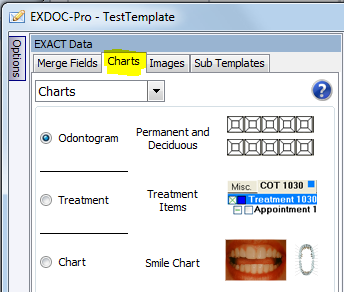 | Charts Tab Use this tab to insert patient clinical information at the current position in the template (each patient will see their own graphics in the resulting document output). The dropdown menu offers further chart options. For example: 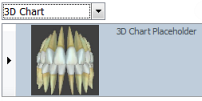 Depending which clinical content you select, you will have the option of either adding the content or of deferring it and adding a Place Holder for it:  The Add Recent option informs EXACT to populate the content with the most recently recorded content for the patient (for example the latest chart). The Place Holder is simply a place that the clinician can later manually populate when dealing with a patient and looking at the patient's document. To add content, First position your cursor exactly where you want the graphic in the template. Then select the chart option in the Charts pane and click the Insert button  at the bottom of the tab. The graphic will display in the template. Resize it as appropriate. SEE ALSO: Using the Charts Tab in EXDOC-PRO |
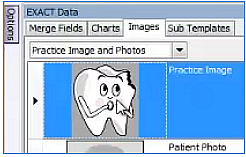
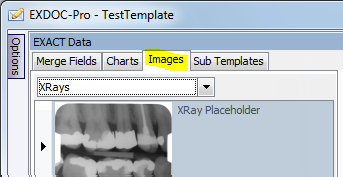 | Images Tab Use this tab to insert images from your system into the current cursor position in the template (once selected, click the Insert button  ) Select the category of images from the dropdown menu: 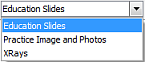 Browse to find other images on your computer / network:  SEE ALSO: Using the Images Tab in EXDOC-PRO |
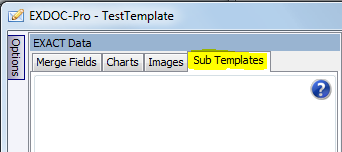 | Sub Templates Tab |
Using Pinned or Sliding Mode for the Options Panel
The Options panel makes EXACT data and imagery available to the document template being created in MS Word.
...
To set the Options Panel for Pinned or Sliding Mode
Click the Options button to display the Options Panel.
Under Display Options, select between Pinned Mode or Sliding Mode:
If you have changed the selection, restart EXACT.
Using the Merge Fields Tab in EXDOC-PRO
Merge fields are the means to empower automated communications. Dental practices with personnel who can competently use merge fields in Microsoft Word can significantly reduce the time and cost of mass communications, and can also generate documents for individual patients with just a few clicks.
In EXDOC-PRO a merge field is a set of codes that instructs the software to insert custom text into documents during automated EXACT procedures.
For example, when EXACT automatically generates an appointment reminder, it will customise the patient.firstname merge field per patient, so that the automated appointment reminder letter to John Jones will start "Hi John" and the automated appointment reminder letter to Reshma Naidu will state "Hi Reshma".
...
The Add Recent Patient Information option informs EXACT to populate the template with the most recently recorded content for the patient , such as the patient's latest chart. For example:
...
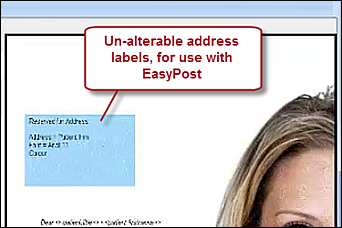
IMPORTANT: For templates with EasyPost enabled there is no need to add the Name and Address using regular merge fields because EXACT adds the blue address block to meet the requirements for the EasyPost service.
...
Start from the Patient File (any patient, on any tab).
Click the Create Patient Document button:

You will see the Document Details screen, with any templates that you currently have displayed on the screen.
Select the +1 button at the bottom of the screen:

The Create Template screen displays, with default(locked) Standard Templates listed. You have to base any New template on a standard template, so it is essential to select a starting template.
IMPORTANT: For EasyPost you must select an EasyPost template as these have the address labels set up for EasyPost.


In the Create Template window:

TIP: Create an EasyPost folder for your EasyPost templates so that you can easily see which are available for EasyPost.
Click the Create Template button.
This launches EXDOC-PRO with the existing template opened in MS Word (if you started off a blank template the entire page will be blank).

You will also see the EXDOC-PRO icon in your taskbar:
In the EXDOC-PRO module, add a Practice image to the MS Word template document, and resize it / reposition it on the page.
Add a text box to the template page in order to hold the Practice Name and details.

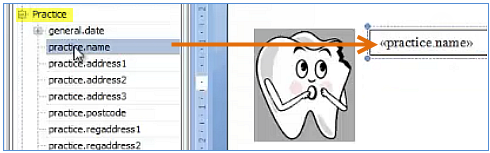
Open the Merge Fields tab, locate the Practice merge fields, and with your cursor in the text box on the MS Word page, double-click the practice.name merge field to insert it into the text box.
(Use MS Word functions to resize the font and change its colour)
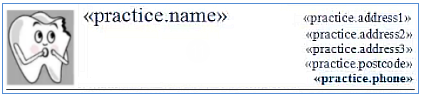
Follow a similar procedure to add the practice.address merge fields (multiple), and practice.phone to the text box, right-justify them and optionally change font.
Optionally remove the text box border and draw a line under the heading.
With your letterhead now established in this single template, it is advisable to save it as a sub template that you can use "as is" in multiple other documents:
Highlight the letterhead on the MS Word page,
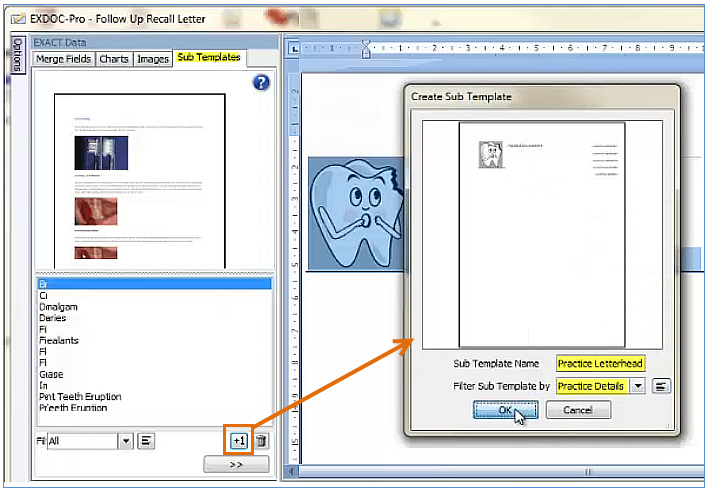
Open the Sub Templates tab in the left pane,
Select +1 to add a New sub template,
Type a Sub Template Name (in our example, Practice Letterhead),
Optionally assign/create a category for filtering (in our example, Practice Details),
Click OK.
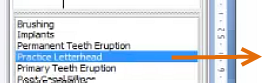
(The Sub Template is then listed at left. Simply double-click to insert it at the cursor position in any document.)
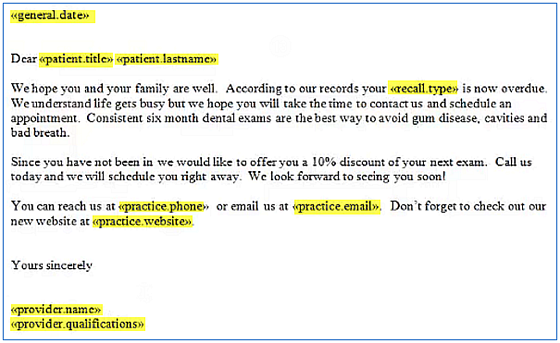
Use a combination of typed text and merge fields to create the body of the letter and its salutation.
(Tip: save your salutation as a sub template)
Click the Options button at top left and Save and Close this template, and return to the Document Details screen.
In the Document Details screen, select the template name in the list at left and then click the Preview button to preview the template.
The Patient Document (not the template!) now displays.
Check the patient name in the very top Window bar to confirm that it is a Patient Document.
Check the template. All merge fields should be populated.
You can now edit this document as required for this specific patient.
Optionally print or Email this Patient Document (see Emailing a Patient Document).
Once emailed or printed, the document becomes a read-only PDF file, listed in the Contacts tab of the Patient File (see Re-opening a Patient Document).
...