Portal videos
Quick Plans
Quick Charting, Quick Plans, Quick Notes
Overview
Quick Plans are preset treatment plans that can be used over and over again for patients, saving considerable time when conducting treatment planning. An example may be a Quick Plan for a new patient’s first appointment. During this type of patient visit, the provider may typically charge for the following services:
Examinations
X-Rays
Scale & Polish.
Rather than having the user find each code for billing under the ‘All’ codes system list or, a specific system ‘category’ list, the user can create a single entry of one user-defined code to automatically enter all three codes at the same time.
With this set-up, whenever a user provides treatment for a patient who requires the above services, they would double-click on the Quick Plan. All codes, descriptions and fees will automatically display with this single action. The user will also have the ability to change any of the displayed services as long as their user login security level is cleared for this type of data entry edits.
On request from EXACT users a software update in version 12.5 changed the behaviour of Quick Plans that have custom screens attached. However, this change proved problematic for many other users, so to satisfy the needs of all users, the following applies from v12.6: From v12.6 EXACT by default reverts to the earlier behaviour (pre v12.5). A configurable setting (off by default) has been added to retain the new behaviour. Summary: When popup mode is planned or completed, quick plans with custom screens attached continue to use the current custom screen version and default values. With popup mode disabled, quick plans with custom screens attached use the custom screen version and the custom screen values from the original charting used to create the quick plan. To change the default behaviour, go to Configure > Settings and edit this setting: patient.chart.quick plan.custom screen.default to "1". |
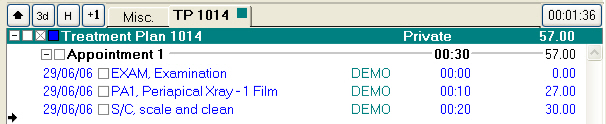
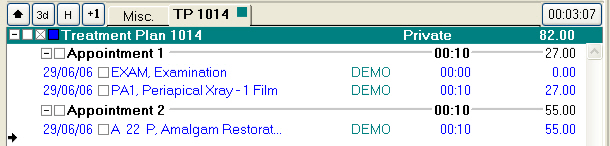
A Quick Plan can be set up to list services for a single appointment visit or a series of appointments as shown in the examples below:
Single Appointment Example
Multiple Appointment Example
Creating a Quick Plan
Create the Course of Treatment to be used as a template.
In the patient Chart tab, locate the Quick Plans tab and click its +1 button to open the Add Quick Plan wizard:
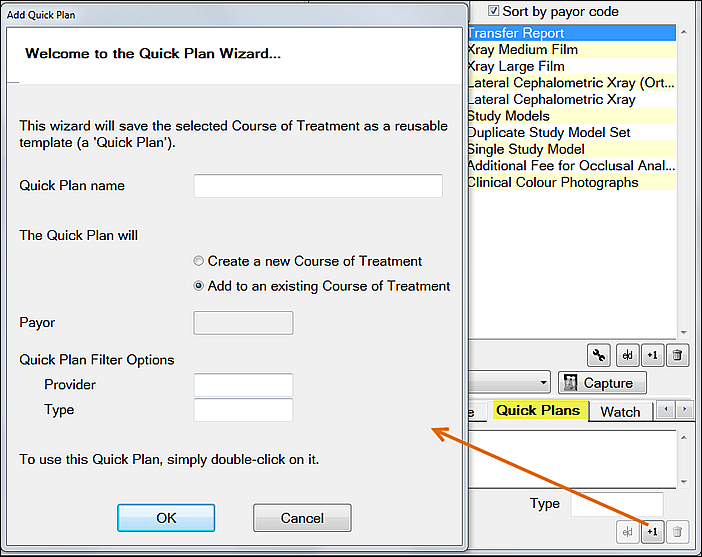
Type a Quick Plan name that clearly describes the plan. For example: Exam-Med, Xray-Amal, Filling.
Select whether the plan will
Create a new Course of Treatment (in which case a payor must be selected) or
Will add to an existing course of treatment.
And specify a Payor if required by this selection.
If you are likely to have lots of Quick Plans, you can specify a Provider and/or Type of Quick Plan, so that they are easier to locate and manage.
Click OK to save the plan.
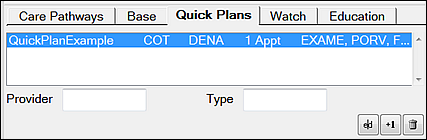
The new Quick Plan will be listed in the Quick Plans tab:
To use the Quick Plan, double-click on it to create a course or add it to an existing course, depending on the type.
Service items and/or appointments can then be added or removed as required.