Notes can be attached to the Services entered in the current Treatment Plan / Course of Treatment.
These notes can either be notes about the treatment for the dentist's information only (Clinical notes), or notes to the patient about the particular service, in which case you may want them to be printed on the patient's estimate or invoice (Invoice notes)Charted Treatment can hold both Clinical and Invoice notes. You can also use the Note button to add general treatment notes that are not specific to a charted service.
Clinical Notes remain editable up until midnight of the day they were createdcharged or TC’d, after which they become read-only. This enables clinicians to process patients through the practice workflow and later write up important clinical note details. Notes can be created and edited in several different ways, as detailed in the following topicsIf a service is not ticked or ticked but not Charged/TC’d then the notes will remain editable until Charged/TC’d.
Adding a Clinical or Invoice Note to a charted service
...
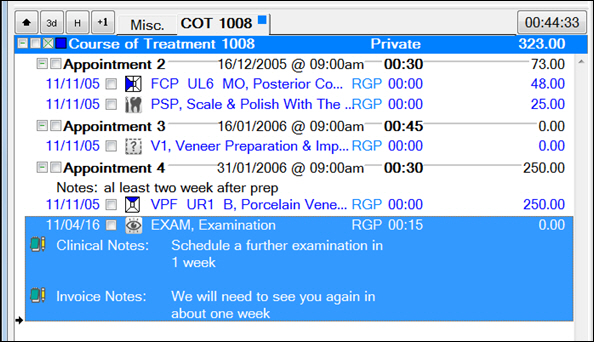
Clinical Notes are intended for use within the clinic and are seen by practitioners only.
Invoice Notes print on patient statements.To add a Clinical or Invoice Note to a service itempatients Statements, Estimates, & Invoices
In a patient's chart tab, either Double-click on the service in the Course of Treatment / Treatment Planning area
, orClick to select it and then select the Note button, orRight-click the item and select the Edit button.
An Edit screen displays:

The chart item notes section is divided into two tabs, one for Clinical Notes and one for Invoice Notes.
Clinical Notes:
Any notes that are made within the Clinical Notes tab will not be printed out on any stationery such as invoices.
These notes are intended for use within the clinic, such as to record details of a procedure.
From EXACT v12 onwards these notes remain editable up until midnight of the day they were created.Invoice Notes:
Type any relevant notes
Notes made within the Invoice Notes tab can be printed out for the patient.
Type or use Quick Notes in the relevant tab and then click on the OK button to save.
The These notes display in the Chart tab.
Notes can also be viewed in the Tooth (Treatment) History tab. “H” button
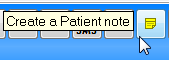
Adding General Clinical Notes with the Note Button
In addition to Clinical notes, which must be attached to a Service, the
...
“Note” button at the bottom of the Treatment area provides the ability to create a General Note.
...
This is useful for recording notes when attending a patient but not actually providing any chargeable treatment, e.g., a review appointment.To add a general Note with the Note button in the Treatment Area
Click the Note button at the bottom of the Charting window to open the Add Clinical Note window:

Enter notes relating to the patient.
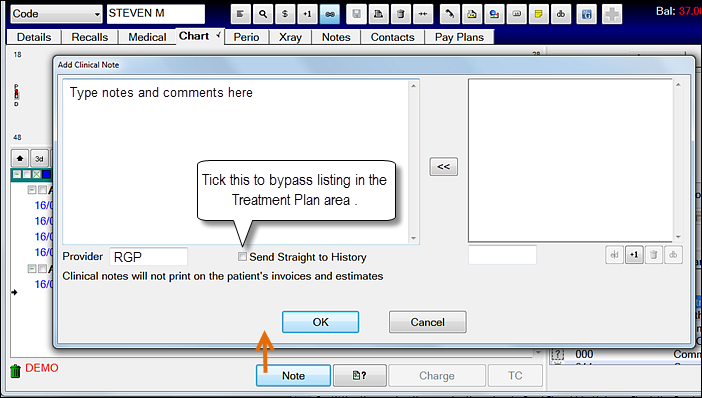
Type or use Quick Notes as required. Specify the Provider if this hasn’t auto filled.
Send Straight to History - Tick this checkbox to send this note directly into the patient's Treatment History window so it doesn’t appear in the COT. Leave it un-ticked to list it in the Treatment Plan area below the chart.
Click OK.
Depending on the status of the checkbox, the Note will either list in the Treatment Plan area or in the History List.
...
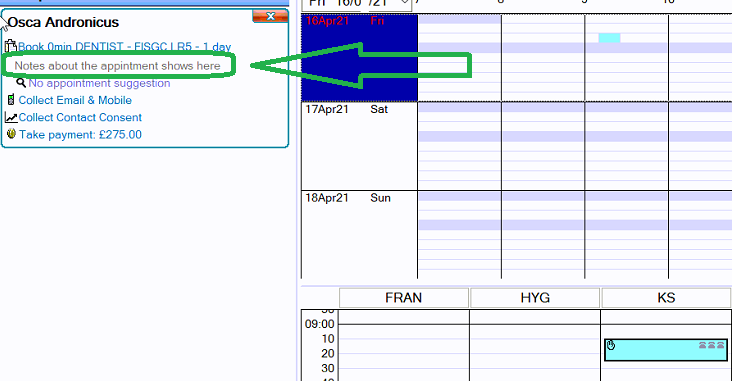
Often when an appointment is being created in the surgery a message may need to be sent to the receptionist regarding the appointment. These messages will be visible in the Appointment Book and in the Edit Appointment screen, which the receptionist will use to book further appointments.
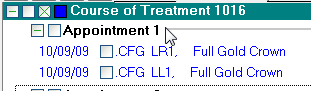
To make Notes about an Appointment
Double-click on the appointment in the Treatment Area. This is displayed on the Appointment line in bold black text:

An Edit Appointment window will open:

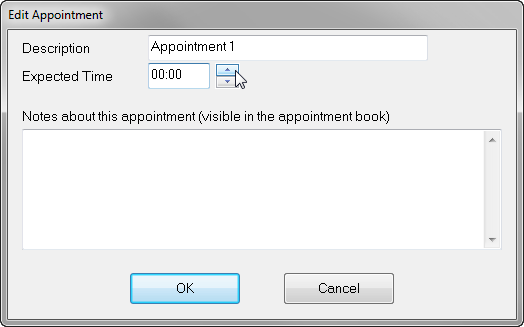
Type any text in the Notes about this appointment… section and click on the OK button.
The notes will be visible at Reception and also attached to the particular appointment within the Treatment plan as well as the Depart bar for receptionists, as shown below:

An alternative to this method of communicating with reception / providers is to use Pop up notes, which you create by clicking on the Notes button on the Toolbar:
Using Quick Notes to speed Note creation
In addition to entering clinical notes individually, preset clinical notes can be added via the Quick Note feature.
This is a form of automation that saves time in the clinic.
For example, you could create a series of Quick Notes for the types of anaesthetic administered, then simply add the appropriate note rather than repeatedly typing in the anaesthetic names.
If you create a long list of options, to speed selection you can group them by Type, and then select Quick Notes from the appropriate Type groupings.
To add a Quick Note to a service item
(Assumes that QuickNotes have already been created)
...
In the treatment area, click to select the service item to which you wish to add the Note.
Click the Note button to open the Add Clinical Note window.
The Quick Notes are listed in the right pane. You can type into the left pane and insert Quick Notes into the left pane at the cursor location in the left pane.
...

...
In the left pane, optionally type text, and click at the place where you want to insert the Quick Note.
...
Click to select a Quick Note in the right pane, then click the [<<] button (or double-click the Quick Note) to move it to the cursor location in the left pane.
If you've created Types, first select the appropriate Type to display a subset of Quick Notes from which to select.
Repeat as necessary until you've constructed your Clinical Note.
...
Optionally tick the [ ] Send straight to History checkbox.
Purpose: Sending straight to History bypasses the Note's display in the treatment planning / course of treatment area.
You can see it listed in History by clicking the [ H ] History button. The Note remains editable in History up until midnight of the current day.
If you do not tick this checkbox, the Note will list in the treatment plan / course of treatment area. From there you still have the option to tick it, right-click and select [ ] Send Completed to History.
...
Select a Provider.
...
Click OK.
If you opted to list the Note in the treatment area:
It will display directly below the service item that you initially selected.
So long as this Note is not ticked (as Complete), you can drag it to a different position anywhere in the list of treatments or you can right-click > Delete it.
If you tick and Charge this Note it will list as a zero-value Invoice transaction in EXACT, and as such it will also be flagged for reporting.
Double-click to Edit the Note.
You can right-click > Cut or Copy the Note.
If you sent the Note to History:
You can double-click to edit it from the [ H ] History list up until midnight of that day.
In keeping with legislation you cannot Delete the Note once it is sent to history.
You can Void the Note, which hides it from view and requires you to tick the Show Void checkbox to see it again.
To create Quick Notes
Open the chart tab for any patient, then click the Note button to open the Add Clinical Note window:

Select the [+1] button to open the Add Quick Note window:

In the Add Quick Note window type a Description for this Note.
Optionally select a Type, if you've already created these (if you haven't, the procedure to create them is covered below).
Why Types? With a patient in the clinic you'll want to use Quick Notes in a hurry, and in a long list of Quick Notes they are quicker to locate when grouped by Type.
To create Types:

Click the selector to open the View Note Types window.
Select the [+1] button to open the Add Note Type window.
NOTE: From v12.4 editing of Note Types is removed from the View Note Types window, resulting in a subtle change in behaviour... Previously, double-clicking on a Note Type in this window would display the Edit window. Double-clicking is now the same as clicking the OK button, effectively choosing the selected record.
To "edit" a Note Type, delete and then re-create it.
Type a Description to be able to identify this Type that you're creating.
Select OK and then repeat the process to create as many Types as required (you can always edit or Delete them, now or later).
Select OK to return to the Add Quick Note window.

Type the Quick Note itself. This is the text that will be inserted into a Clinical/Invoice Note.
- Select OK and OK again to exit.
Editing and Viewing Clinical Notes and Custom Screens
...