If you do not have access to some of the areas mentioned here please see a higher EXACT user to assist or amend your security permissions.
If you would like the article as a PDF, use the 3 Dot's in the top right to Export
CONFIGURATION
Please note for any of these changes you may need to be logged in as a SUPER user or an Administrator.
Adding Services
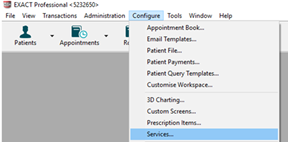
From the ‘Configure’ menu, select ‘Services’.

At the bottom right-hand corner of the screen click on the
This will bring up the ‘Add service item’ screen. Enter a code for the new service
Please note you can only use a code if it is not already present in the system.
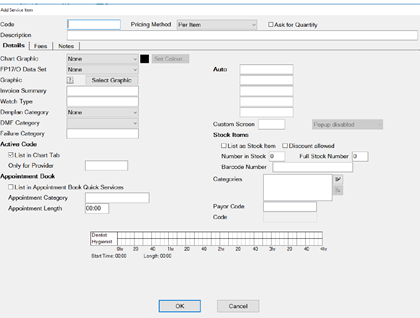
Enter a description and select the Pricing Method. If applicable, tick the ‘Ask for Quantity’ box.
Configure the Details Tab information as necessary, i.e. selecting the price code, graphic and colour for the service and add it to any required category. These options control what the service will look like and how it will function.
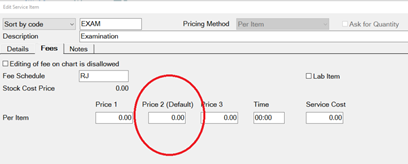
Next, click on the ‘Fees’ tab and enter the pricing information as appropriate.
Enter the price in ‘Price 2 (Default)’ field as this is where the default fee schedule picks up the prices for charting.
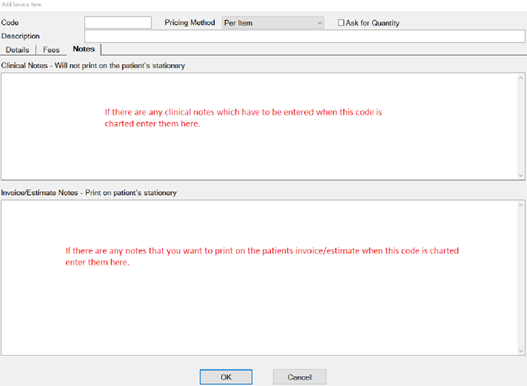
If required, click on the ‘Notes’ tab to enter ‘Clinical Notes’ or ‘Invoice/Estimate’ notes for this service.
Please note that this will show for all patients the service is charted for – you can still edit the invoice/estimate and clinical notes on the chart tab.
Press the OK button to create the new service. This will return you to the ‘List Service Items’ screen.
You can also view a helpful video on adding services using the link below:
https://www.youtube.com/watch?v=C7zP0_6qPgI
Amending Service Fees
Go to Configure > Services
Locate the service you wish to change the fee of – you can do this by scrolling through the service list or entering the services code into the bottom left-hand corner

Double click on the service and it will open the ‘Edit Service Item’ screen then click on the ‘Fees’ tab
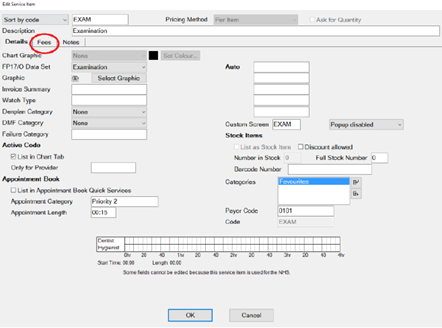
From this screen, you can change the price of the service in the ‘Price 2 (Default) column.
Repeat for any other services you need to amend.
Adding Services to Categories
Have the required ‘Edit Service Item’ screen open. This is done by locating the service item in the service list and double-clicking on it (please note if you are on the service list on the chart tab you will need to right-click on the service and select edit)
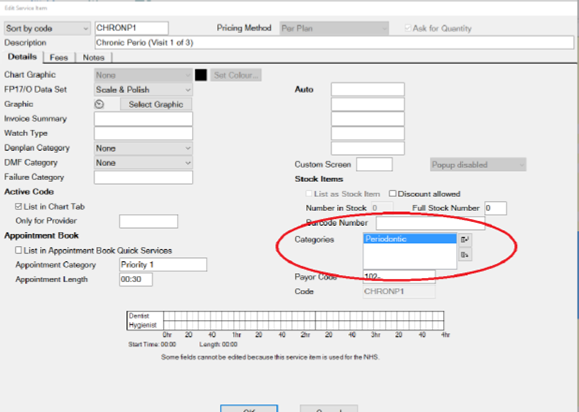
Click the insert icon shown below to the right of the ‘Categories’ field;

This will open the ‘View Service Categories’ window.
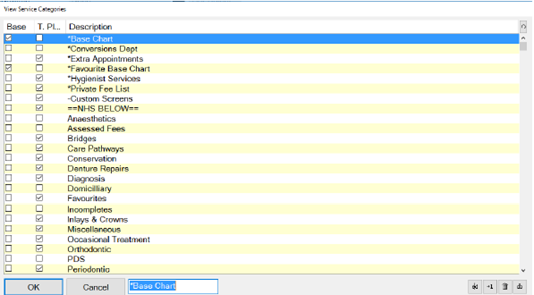
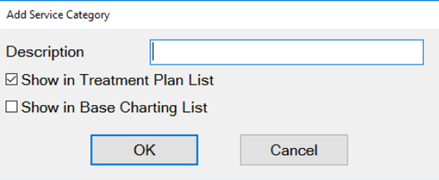
If the category that you would like to add the service to is not in the list click on the +1 in the bottom right-hand corner and you will see the ‘Add Service Category’ window. Give the new category a description and select whether it is for base charting or treatment then press OK
Ensure the category you would like to add the service to is highlighted and press OK.
You can add a service item to as many categories as you like. In order to add it to more categories follow steps 2 and 3.
Removing a service from a category
Have the required ‘Edit Service Item’ screen open. This is done by locating the service item in the service list and double-clicking on it (please note if you are on the service list on the chart tab you will need to right-click on the service and select edit)
Click on the category you would like to remove the service from in the ‘Categories’ field
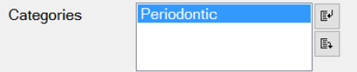
Click on the on the right-hand side and select
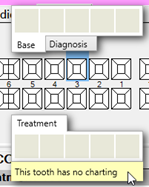
Quick Charting is the hover box which displays a list of selected services when you move your cursor over the tooth chart.
Go onto the chart tab of a test patient
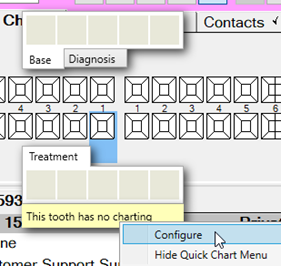
Hover over the tooth chart and you should see the screen below
Right-click on the yellow bar and select Configure
To add base items double click on them from the list on the right. You can move them around by dragging and dropping.
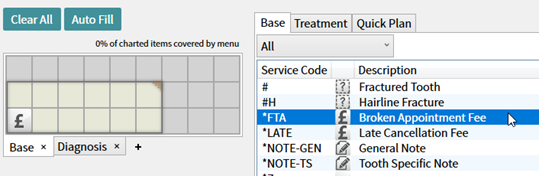
You can add up to 27 services to each tab to increase the number of services you can add click on the triangle in the top corner of the selection window and drag as required.
Click onto the treatment tab and repeat the blue step
Once you are happy with your Quick Charting set up click on OK
CHARTING TREATMENT
Once you have opened the patient record click on the ‘Perio’ tab
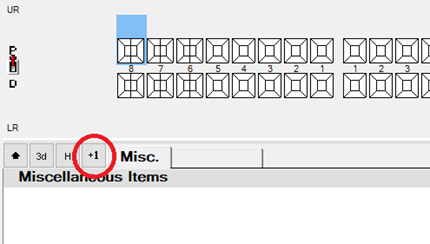
Click on the +1 under the lower window on the left-hand side of the screen
Use the checkboxes and dropdowns to record the patients BPE
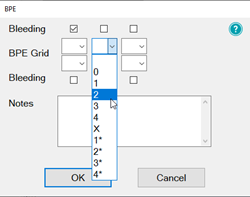
Once you have completed select OK
BPE Shortcut
In order to add the BPE score for a patient follow the steps below:
Click on the BPE button shown below button on the patient toolbar

Use the checkboxes and dropdowns to record the patients BPE

Once you have completed select OK
Opening a Course of Treatment
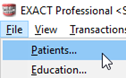
Go to File > Patients
Or click on the patient’s button on your workspace

Click onto the ‘Chart’ tab
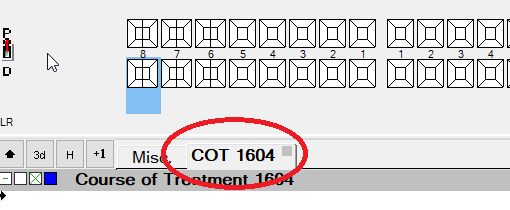
Underneath the tooth chart to the left-hand side click on +1
On the ‘Create Course of Treatment’ screen select which payor, the course of treatment is for. If it is a Private course of treatment please the field blank. For any other payor, you will need to click on the list button to the right-hand side and choose from your available list.
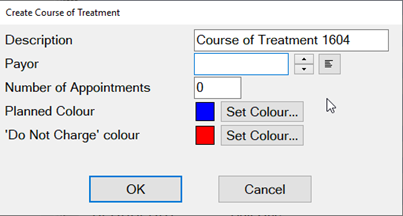
Once you have selected your payor click on OK
If you are not logged in as a provider you will need to enter the dentist, hygienist etc. initials into the ‘Provider’ field – you can use the list button view all the available treatment providers at your practices
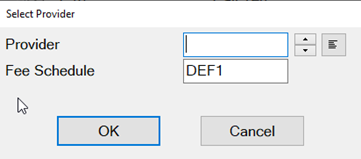
Click OK and your Course of Treatment will now show on the chart tab underneath the tooth chart
Charting Treatment
Once you have opened a Course of Treatment you can begin to chart your treatment
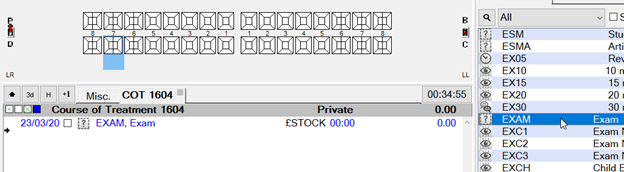
Select an item from your quick charting or double click an item from your service list. The service item will now appear on your course of treatment
Double click on the service in the COT window
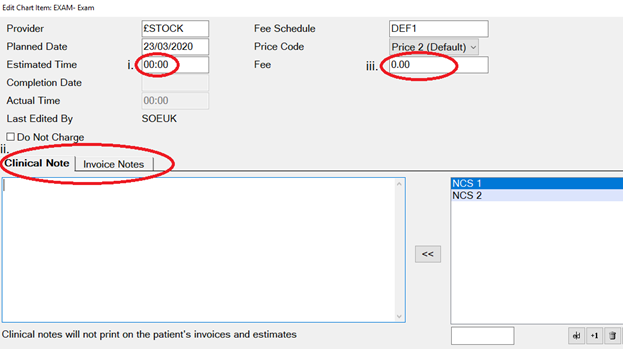
You can then do the following:
Add an estimate time that the service will take to complete
Add any clinical notes/invoice notes. Please note anything added to the Invoice Notes tab will appear on all patient stationary e.g. estimates and invoices.
Add or amend the fee for the item
Once you are happy with the changed select OK then repeat for all services that you need to add to the COT
Adding Appointments
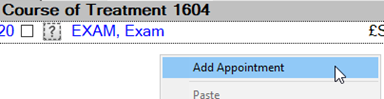
If you are planning a COT where multiple appointments will be required you can add appointments to your COT screen to break up the service items and make them easier to read.
Once you have added a service item to your COT right-click on white space on the COT window and select ‘Add Appointment’
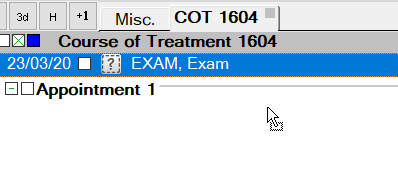
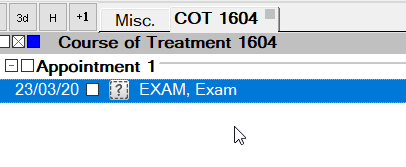
The appointment will appear underneath the item you have already charted. To move this service item into an appointment left click and hold down on and you will be able to drag this into Appointment 1
Repeat step 1 for each appointment you need to add charting your services as you go.
Marking Treatment as Complete
Once you have completed a service on a patient you will need to mark it as complete in Exact. You can do this by click on the check box to the right of the service.
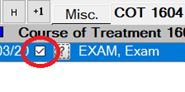
Please note: treatment should be ticked as soon as it is completed as Exact picks up the completion date from the day the service item is ticked.
Charging Treatment
Once you have marked treatment as complete you will need to select Charge. This will lock the completion date and fee for this item and send the required payment to the reception departure workflow.
Scheduling Future Appointments
Once you have charged your treatment if there are any future appointments you would like the reception team to book you will need to fill out the screen below which will display once you have charged the first appointment through.
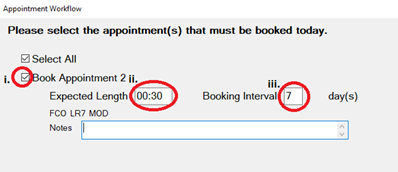
Add a tick in this box if you would like the receptionist to book this appointment.
Add the length you would like the appointment to be
Add how many days in the future you would like the appointment to be.
Once you are happy with the information entered select Close at the bottom of the screen.
Depending on your recall set up you will be prompted to set a recall date for your patient when charging treatment. The recall date should automatically set to the default recall interval chosen by the practice.
Advancing and pausing recalls
From the recall prompt you can do the following:
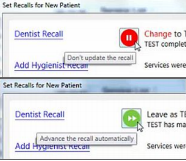 | Will allow you to not advance the recall date. |
Will allow you to advance the recall date to the suggested default. |
Changing the recall interval
If you would like to amend the recall interval from the default click on ‘Dentist Recall’ or ‘Hygienist Recall’ and you will see the screen below:
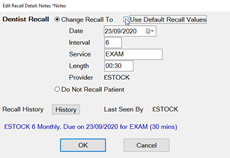
Untick ‘Use Default Recall Values’ and you will then be able to edit the recall interval, service and length as required.
From this screen you can also set the patient to ‘Do Not Recall Patient’ and this will stop them receiving any recall communications.
To view a patient's full treatment history first go to the patients' chart tab and follow the steps below:
Underneath the tooth chart to the left-hand side click on H
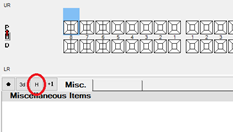
This will open the patients' treatment history broken down into three sections Base Chart items, Historical (items which have been charged) and Uncharged Treatment (planned work)
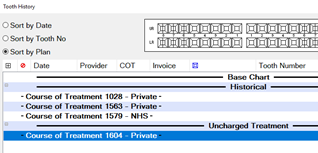
You can sort this screen in three ways:
Sort by Date – this will show you the treatment in date order with the newest work showing at the bottom.
Sort by Tooth No – this will show all service items grouped together by tooth
Sort by Plan – this will show all service items grouped together by which Course of Treatment they were completed on.
Voiding treatment from the tooth chart
Go to the patient's chart that you wish to edit
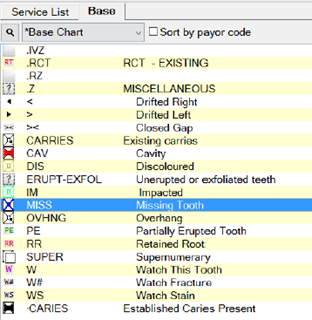
Hover over the tooth to find out the precise code that was used originally
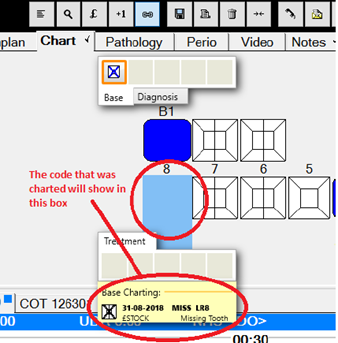
Highlight this in the Base Chart service list
Click onto the tooth in question and this will remove the incorrect base charting on the patient's tooth chart.
Voiding treatment from the patient's history
Use the steps in ‘Viewing Treatment History’ to access the history window
Scroll up to find the base charting section and highlight the item you want to remove
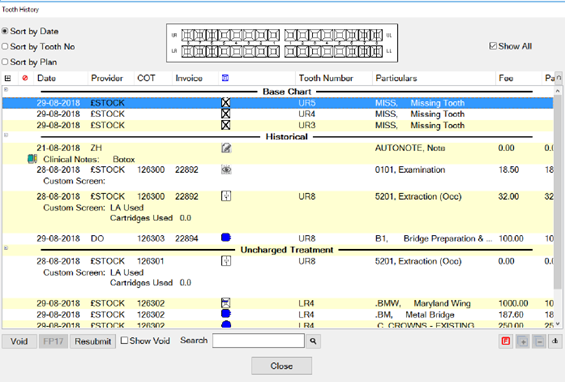
Then click on Void in the bottom right-hand corner and this will remove the charting.
THE PERIO TAB
Configuring classic perio
From the patients file select the ‘Perio’ tab you will see the options below

Separate tabs will allow you to record perio on the upper and lower arches on separate tabs

Combined Upper/Lower tabs will allow you to record perio on the upper and lower arches on the same tab.

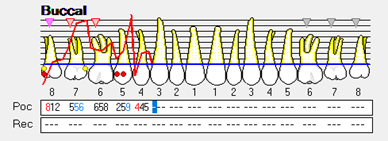
Recording Perio using the classic perio screen
Go to the Perio tab then click on the +1 at the bottom of the top window to the left-hand side
You can now begin charting from the R8 – L8 on each of the arches
You can type numbers in to chart the pockets and recession. If the number is above 9 you will need to click on ‘+’ on your keyboard followed by the number e.g. 15 is ‘+’ followed by 5 – these will show in blue. In order to chart an overgrowth press the ‘–‘ key on your keyboard followed by a number, these will show in red.
To add Furcation you will need to click on the triangles. One click will give you grade 1, two clicks grade 2 and three clicks grade 3.
To chart Suppuration click ‘s’ on your keyboard and to add bleeding click the ‘b’ key.
Turning on Single Screen Perio
Go to Configuration > User Settings
From the user setting screen click on the box next to ‘Use single screen perio’
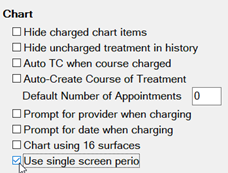
Click on the save icon shown below on the toolbar.

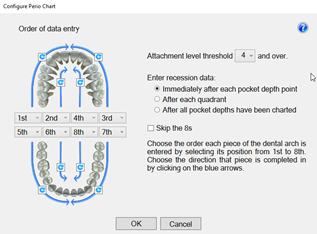
Configuring single screen Perio
Go to the 'Perio’ screen on a patient file
Click on the Spanner shown below in the bottom right-hand corner

On the screen below you can set the way that you chart including the order in which date is entered, attachment level threshold and recession data.
Using Single Screen Perio
From the Perio tab click on the +1 beneath the top window on the left
Add a title for your perio charting
From the chart, you can add the following
Mobility – Click on the field; one click is 1, two clicks is 2 and three clicks are 3
Furcation – Click on the field; one click is 1, two clicks is 2 and three clicks are 3
Plaque – Click in the field
Recession and Bleeding, Pus & Pocket Depth – add numerical values
Attachment – will automatically total from the recession and Bleeding, Pus & Pocket Depth.
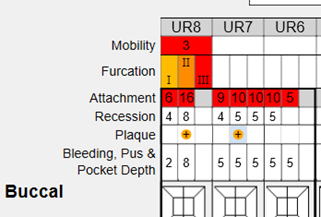
Once you are finished select OK and your charting will be saved.
THE MEDICAL TAB
Updating the Medical History with Clinipad
If you are using clinipad your patient would have filled out their medical history form on arrival. When you move the patient to the chair you should see the pop-up box below
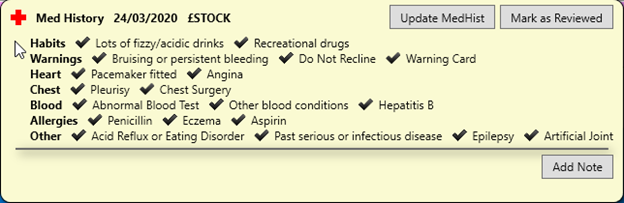
From this window you can do two things:
Update MedHist – this will need to be pressed if the patient remembers anything that they did not add when filling in the clinipad.
Mark as Reviewed – If there are no changes required and you have confirmed this with the patient click Mark as reviewed. This will save a line entry on the medical history tab with the date that you reviewed it.
Updating the medical history from a paper form
If you are working with paper-based medical history forms when the patient arrives you will see the box below:
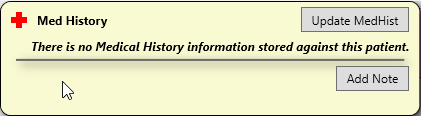
From this screen click on ‘Update MedHist’. From the medical history, window select all that apply and put a tick in Reviewed by at the bottom of the form then select Save.
Please then scan the paper form into the patient file using the steps below:
Click on the contacts tab
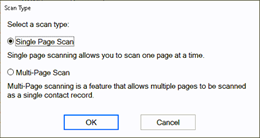
Click on Scan in the bottom right-hand corner
From the screen below select the scan type – if your medical history is only one page select ‘Single Page Scan’ and if it is more than 1 select ‘Multi-Page Scan’
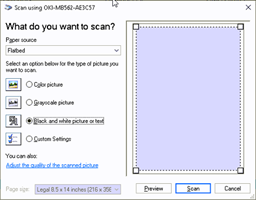
From the screen below select the paper source from the drop-down (this is whether you will be using your flatbed or feeder) and choose the picture type – I would advise using Black and White as this will be a smaller file.
Click on Save
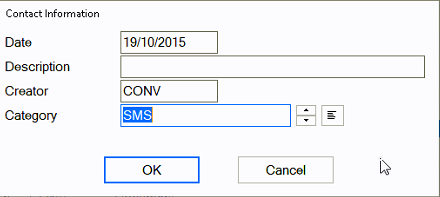
You will see the screen below:
The date will automatically generate to the date you are scanning the item in. If you need to backdate this you can.
You will need to enter a description so that people can easily identify the document is.
The creator will automatically be set as the person who is logged in when the scanning is taking place.
The category will automatically set as the first in your list. To change the category click on the list button and select from your available categories.
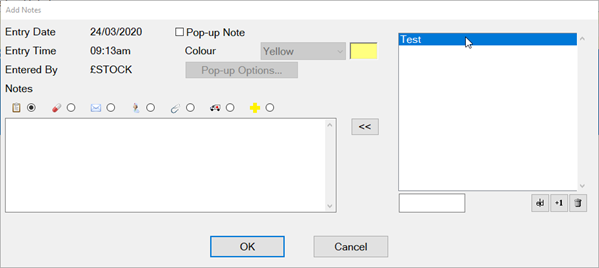
Adding a Medical Note
Go to the ‘Medical' then click on Add Note in the top right-hand corner
Enter your notes in the text field below, you can also choose the con that is relevant for your note.
Once you have finished your note select Save and this will then save a line entry on the medical history.
Setting up Medical Quick Notes
If you have medical notes than you will frequently need to use it would be handy for you to set these up as Medical Quick notes
Go onto a test patients file
Click on the ‘Medical’ tab
Click on Add Note in the top right-hand corner
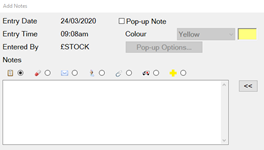
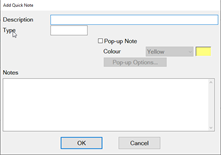
On the screen below select the +1
On the new window that opens below add a description then add the main body into the ‘Notes’ section
Once you are finished creating your template select OK
Using Medical Quick Notes
Go to the patients’ ‘Medical’ tab and select Add Note
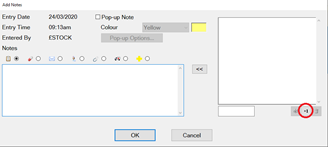
Click on it in the list of the left
Click on the << to add it for the patient.
Edit as required then select OK
Adding Medical alerts
Go to the patients ‘Medical’ tab
At the bottom of the screen, you will see the icons below
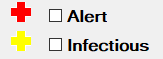
Click into the relevant box to add an alert to a patient
Viewing Medical Alerts
On the patient's toolbar, you will see the medical history ‘+’. The icon will show in different colours depending on the alert set:
 | No Medical Alert Set |
 | The Alert box is checked or both the Infectious and Alert box are ticked |
 | The infectious box is checked |
NHS
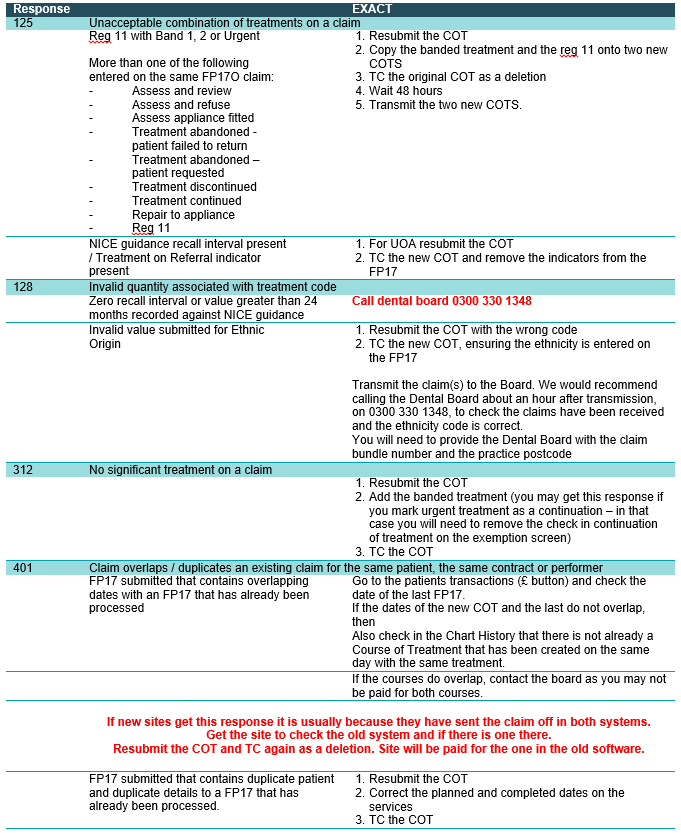
When you TC an NHS COT you will need to fill out the FP17 form which contains the following
I. Performer and Contract – this is the dentist that is claiming the UDA’s and the contract number they are claiming under.
II. Treatment Incomplete – to be used if a patient has not returned for their planned treatment.
III. Delete Claim – to be used if you have sent a claim in error and are now choosing to delete it.
IV. DMF Scoring – picked up automatically from the patient's tooth chart
V. Treatment Dates – ‘Date of Acceptance’ will pick up from the date of the first appointment and the ‘Completion/Last Visit’ will show as the date of the last treatment completed for the patient.
VI. Declaration – please tick as appropriate for the COT completed.
Summary – this section will show the UDA’s you have claimed and will update to show the confirmed UDAs when the schedules come in.

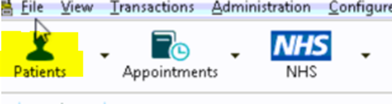
Go to File – Payors or if you have one, the ‘NHS’ button along the top.
To the right of ‘Sort by name/Sort by code’, find NHS.
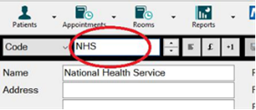
To the right of this screen, click on the button that says ‘Claim’.
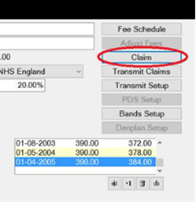
On the next screen, select the providers you wish to bundle claims for, leave blank for all providers, or select multiple to the right. The date field is set to today's date, so it will bundle everything up to today. Click ‘OK’.
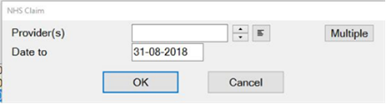
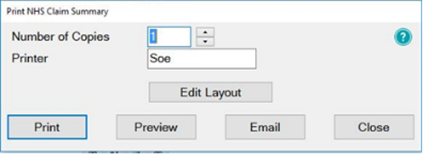
The system will bundle the claims, and once finished, will prompt you to print the list of claims, press print if you would like to print, or cancel to skip this.
If you get a message saying ‘No Claims Found’, nothing is ready to send, and if you get a message saying ‘There are too many claims for the bundle…’, once finished, you will need to press the ‘Claim’ button and bundle again, to bundle these extra claims ready to transmit.
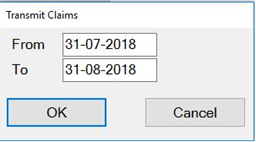
You will then get the ‘Transmit Claim’ screen click OK, the transmission is complete.
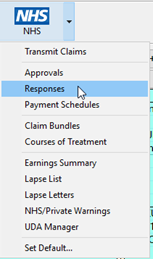
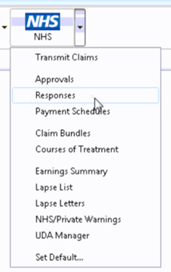
You can view NHS responses by clicking on ‘Unresolved Responses’ from the claims central screen shown in the ‘How to Transmit’ section. Alternatively, you can access NHS responses from the NHS button on the workspace by clicking on the drop-down arrow and selected responses as shown below.
To amend/resolve any responses you receive;
Click into responses under the NHS dropdown.
Highlight the responses you want to deal with;

Click on Resubmit in the bottom right-hand corner;

Once you have resubmitted, click on to the Patient icon at the top of your screen and it will load the patient that you have resubmitted the treatment for and allow you to amend the treatment.
Before you TC the treatment back through, please check that you have “prompt for date when charging” checked under your user settings;
You can view a video guide using the link below:
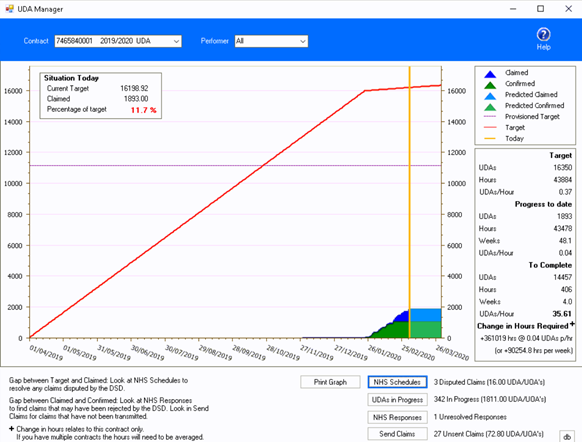
The UDA manager allows you to display a graph of UDA performance against targets.
To load the UDA Manager go to Administration > NHS > UDA Manager.
When this is clicked the UDA Manager screen will open and will default to all the practice totals if there is more than one provider on the NHS contract. To switch to the individual target overview, you can use the drop-down box beside ‘Performer’. You can also switch between different contract periods using the drop-down beside ‘Contact’
The graph shows the current situation as at today with the yellow vertical line, the claimed UDAs showing in blue, Confirmed UDAs showing in green all compared against the red target line.
This target line is based on the overall target compared to a dentist’s available diary space. To ensure this is as accurate as possible please make sure the overall contract target is correct, the correct dentist sub-targets are correct and also the appointment book rotas are correct for the dentists who are working on the contract.
If there are any claims that haven’t yet been transmitted you can click the Send Claims button and any unsent claims will be sent to the Dental Board.
PATIENT INFORMATION REQUESTS
To print an invoice click on the £ button on the patient's toolbar
Click on the invoice line for that the patient needs
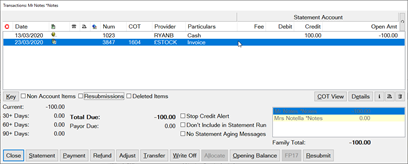
Click on the print icon shown below under the transaction window on the right-hand side

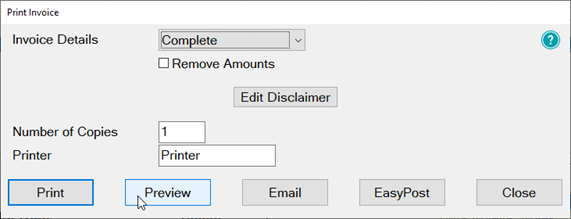
On the screen below select how to would like to give the patient their invoice
Print – this will print at the practice and you can hand it to the patient
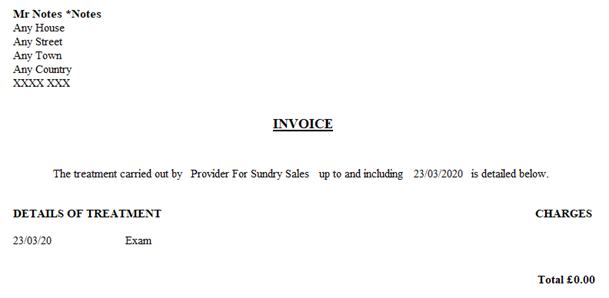
Preview – will allow you to view the invoice before printing
Email – will attach the invoice to an email as a PDF
EasyPost – will send a letter out to the patient without you having to do anything further.
Your estimate will contain the patient's name and address and any items which have been charged through under that invoice line.
MANAGING OPEN COTs
When to use this report:
It is recommended that this report is run at regular intervals, at least once a month or once a week, for each Provider.
This is used to print a report listing the patients who have:
Unclaimed complete treatment plans (all items charged but not TC'd)
Incomplete treatment plans (plans which are partially charged)
Incomplete treatment plans with uncharged items (plans which have items which are ticked but not charged).
For these three options, you can include
All treatment plans (will show all three options above)
Only plans with completed treatment
NOTE: A Course of Treatment/Treatment Plan may have chart items whose planned or completed dates span a range of dates. In the case where some of the chart items have planned or completed dates outside the date range selected for the report, use the Include all other treatment in the same COT/Treatment Plan checkbox to specify whether those chart items will be included or not.
To run the 'Outstanding Treatment' Report
Select Administration > Reports > List Outstanding Treatment:
The Sort Patients By option allows the report to sort on a number of criteria:
Use the Select Patients field to select or define a query for the patients in the From and To date range.
In the case where some of the chart items have planned or completed dates outside this date range, use the tick by Include all treatment on matching COTs/Treatment Plan checkbox to specify whether those chart items will be included in the Report or not.
For example: If you run the report for a date range over the last month with this option deselected, it will display any COTs with their information from the last month only, and any COTs prior to the last month will display as headings only. However, if you select this option it will show those matching COTs prior to this last month with their treatment item information, and COTs within the last month also with their treatment item information.
TIP: A useful query to use would be for patients with no future appointments booked. That way any patient who appears on the list will either need to be invoiced for completed work or scheduled for another appointment.
4. Optionally select a Provider from the list by clicking in the field and using the list button. The report will then print for the selected provider only. Use the Multiple button to select more than one provider.
5. Alternatively, you can select a Provider Category rather than one or more providers.
6. Use the Treatment From and To dates to specify the date range for the planned or completed treatment.
7. Other options are:
Tick | To |
List Treatment Details | Include the Treatment Plan details in the report. |
Include Inactive Treatments | Include any treatment that has been marked as inactive. |
Include Misc Treatments | Include any miscellaneous treatment carried out. |
Report Output
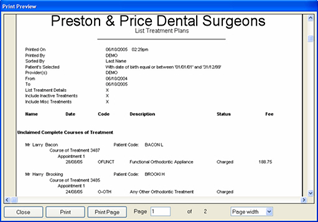
The example below shows an Outstanding Treatment report for all patients, with all checkboxes selected. Included in this report are:
Patients who have had Treatment completed in the last 2 months that was not charged; e.g. the treatment has been saved in the Chart tab but the Charge button has not been pressed.
Treatment that remains planned on the patient's chart tab.
Treatment details.
Ideally, the report will be run with each option selected.
For the Treatments not completed option, once the list has been printed, where the patient does not have any further appointments they can be contacted and if necessary the Course of Treatment closed and sent to the Payor as incomplete treatment.
For the Treatments completed but not charged and the Treatments completed but not claimed (TCed) options, there will be duplicates in the report, as TCing treatment also acts as a method of charging. If the treatment has not been TC'd then it may not have been charged also.
When selecting these options it may save time when cross-referencing patients to run one of the reports, deal with the patients who appear on the list, and then run the other option separately.
PATIENT COMMUNICATIONS
How to add SMS template
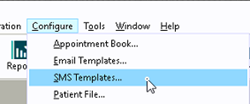
Go to Configure > SMS templates
Click on +1 from the toolbar
Enter a code and a description. Please note: the code needs to be unique

Type your message into the available field.
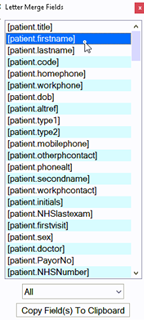
To automatically pull information from the patient file click on View Merge Fields at the bottom left of the window and it will open the ‘Letter Merge Fields’ window
Select the merge field you need then click on ‘Copy Field(s) to Clipboard’
To paste the merge field into the body of your SMS right-click in the space and select ‘Paste’
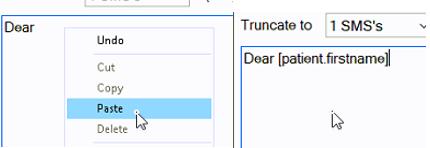
A single SMS is 160 characters long – if the template you create is longer than 160 characters you will need to change the truncate option to as many texts as you need.
Once you have finished your template click OK
How to contact patients by SMS
Go to the patients file that you wish to send an SMS to
Click on the SMS button shown below on the patient’s toolbar

If you would like to free type your SMS please go to the blue steps
On the screen below click into the SMS Template field and then click on the list button to the right-hand side
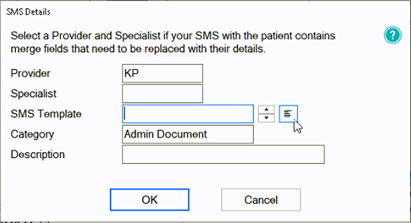
Select the email template from the list and then click on OK
Click OK
You will be shown a preview of your SMS – if you have not used a template you will need to type your SMS here
Once you are finished click OK and the SMS will go to your patient. Any SMS sent will be stored in the ‘Contacts’ tab.
How to add email templates
You can view a video guide using the link below:
https://www.youtube.com/watch?v=KgAX2dUrHU8
How to contact patients by email
Go to the patients file that you wish to email then click on the email icon on the patients' toolbar

If you would like to free type your email please follow the blue steps
On the ‘Email Details’ screen click into the ‘Email Template field and then click on the list button to the right-hand side
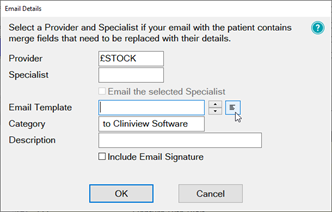
Select the email template from the list and then click on OK
Click OK
You will be shown a preview of your email – if you have not used a template you will need to type your email here.
Once you are finished click Send and the email will go to your patient. Any emails sent will be stored in the ‘Contacts’ tab.
