Configuring a printable patient Medical History
You may need to configure a printable version of the questionnaire for a patient to complete, and to allocate time before the patient's next appointment so that there is time for their history to be updated.
Both of these can be configured from the Medical History Configuration screen, which you access from the Medical tab:

To configure a printable form for the patient's Medical History:
First ensure that a printable custom Medical History Form has been created from the Patient File Configuration > Custom Medical Questionnaire.
If you need to create a new custom screen, or edit an existing one, you can do this (provided you have the appropriate security permissions) via the Configure > Custom Screens menu item.
In the Medical tab, click the Configure (spanner)

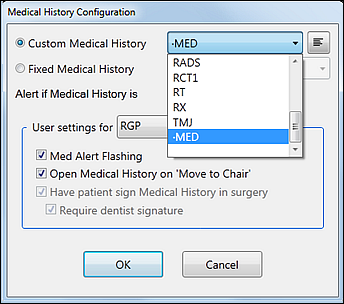
button to open the Medical History Configuration screen, and then select the Custom Medical History option:

Specify the custom screen used for the medical questionnaire by any of these methods:
Select from the dropdown menu:
Type the appropriate code.
Select with the (up/down) buttons.
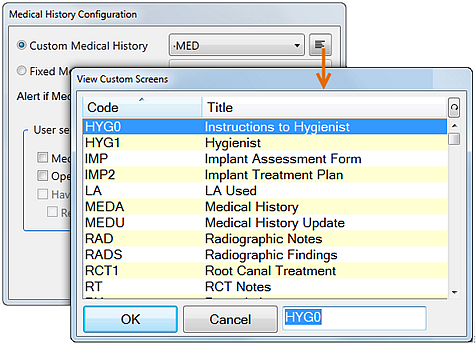
Click the

(List) button to display the available options, select an option, and then click OK:

This questionnaire has been configured from the Patient File Configuration > Custom Medical Questionnaire. If you need to create a new custom screen, or edit an existing one, you can do this (provided you have the appropriate security permissions) via the Configure > Custom Screens menu item.
Browse for the Printable Version. This allows you to specify the name of the document template file that can be printed. Enter the name of the template file, or click the

button to open the Document Details window to find it or to create a new one.
If you wish to have the patient answer a medical questionnaire at their next appointment, you can allow extra time for this prior to their next appointment. To do this, specify how many minutes early they are required to be, in the If MH needed request pt come in x minutes early field.
This extra time consideration propagates through to both SMS and Letter reminders, with a merge field that states "Please arrive XX minutes before your appointment time to update your medical history."
Configuring Medical History
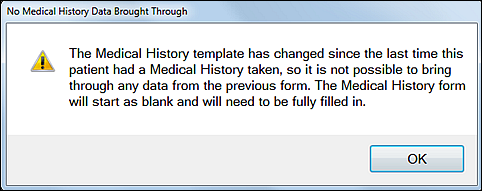
IMPORTANT: If you want to change your Fixed Medical History Form between Simple, Default and Advanced be aware that prior medical history information will not be retained on the new form, which will start from blank.

(EXACT will warn you of this fact when you attempt to change)
There is an option to require that the Medical History be reviewed in the surgery, and if this is required, whether a Dentist counter-signature is required on the form.
An Advanced version of the form allows three answer options: Yes, No and Don't Know:

This form also expands on some of the answers to prompt the patient to answer more fully. For example the Hepatitis field now asks about Hepatitis A,B,C or D, and the Blood pressure field now prompts for high or low blood pressure.
Configuration Options:
The Medical History configuration is per Provider. i.e. Providers in your practice can use different configurations.
From the Medical History Configuration you can configure as follows:
Set an alert for overdue medical notes (this can also be done from the Configure > Patient File screen).
Choose whether to customise a form or select a fixed template.
If using a custom form, specify the custom screen used for the medical questionnaire.
If using a Fixed form, select from options: Simple, Default and Advanced (see samples below)
For Clinipad, require that the Medical History Form be reviewed in the surgery by a Dentist.
With this option, also require that the Dentist counter-sign the form after reviewing it with the patient.
By default the Receptionist will be prompted at patient arrival to complete a medical history form, but this can be disabled so that it is not prompted.
To configure Arrival procedures for Medical History
Select either
Configure > Appointment Book > Arrival Options > Medical History
or
Patient File > Medical (tab) >

Users without permissions to the Configure-Patient File screen will not see this configure icon.
This screen includes custom settings per user that were previously configurable in User Settings.
Decide whether to use a Custom medical history form or a Fixed template.
----If Custom----Specify the custom screen used for the medical questionnaire (the system comes with a default screen, but this can be customised or you can create new screen options by means of the Configure > Custom Screens menu item):
Choose the required Medical Questionnaire by either
Entering the appropriate code, or
Using the (up/down) buttons, or
Click the

(List) button to display the available options, select an option, and then click OK:
This questionnaire has been configured from the Patient File Configuration > Custom Medical Questionnaire.TIP: If you need to create a new custom screen, or edit an existing one, you can do this (provided you have the appropriate security permissions) via the Configure > Custom Screens menu item.
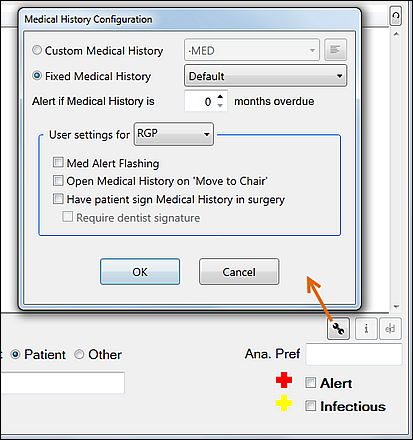
----If Fixed----Select the Fixed Medical History radio button. You'll see that the drop down menu becomes accessible:
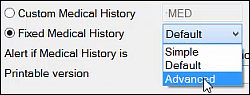
Select either Simple, Default or Advanced option from the drop down menu (see screen samples further down this page):
Default is available from v11.3 SP5.
If you use Simple, on upgrade to v11.3 SP5, Simple will still remain applicable unless you change it.
Advanced is available from v11.10.IMPORTANT: If you want to change between these options, be aware that prior medical history information will not be retained on the new form, which will start from blank. EXACT will warn you of this fact when you change:
Configure the Alert if necessary.
The Alert if Medical History is [x] months overdue field is by default set to a value of 1.
Consequently, Medical History will be prompted for update once a month, and the arrival window Send a Medical History form to Clinipad tick-box will be ticked by default, unless the patient has already completed their MedHist forms within the last month.

To disable this auto-prompt for a patient, set the value in the above field to 0, and click OK.
Select a user from the User settings for dropdown list:
(The options that you configure in the User settings for box will apply to this Provider only)
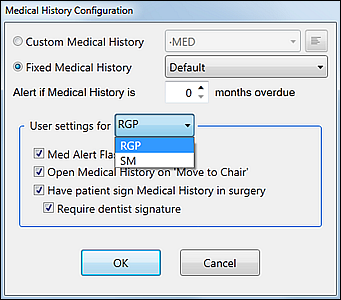
Checkbox - specify whether the Medical Alert must flash for this user.
Leave this box checked to cause the medical alert icon shown below to flash at the top of a patient’s details view if the patient has a medical condition. This is useful too in circumstances where a patient has both the medical and infectious alerts active, as it will alternate between each icon. However, some users prefer to have the flashing icon turned off as it can be distracting.
Prior to v11.10 this setting was in the Configure > User Settings window.
Checkbox - specify whether the Medical History Form must open when this user selects Move to Chair to move the patient from reception to clinic.
If set, this option will cause the medical history tooltip to open in a window when either of the "Move to chair" buttons (Patient preview, or Sidebar appointment book) is clicked. This allows the provider to view the patient's medical history and update it if required.
Prior to v11.10 this setting was in the Configure > User Settings window.
(Clinipad only) Checkboxes - specify a strategy for this User's review of the Forms, with options as follows:
|  Clinician review and signature is not required. The form only has a patient signature area. The patient completes and signs the form independently in Reception and hands it back to the Receptionist. |
|  In this scenario, When the patient fills in the medical history form as part of the arrivals process, they are not asked to sign the form, and a PDF copy of the form is not created. When the patient goes into the surgery and the dentist reviews the medical history, some text informs them that there is new medical data that needs to be signed. Using the Update MedHist using Clinipad then sends the new data back to Clinipad where it can be reviewed with the patient, and this time there is a signature box present for the patient (but not for the Dentist in this scenario). Once the patient signs this, Clinipad generates a PDF. |
|  This scenario is exactly as the one above, but when the patient signature box appears, so does a signature box for the Dentist to counter-sign, after which EXACT generates the PDF. |
Select OK to save the Medical History Configuration.
Sample Medical History Forms
Simple:

Default:

Advanced (showing completion):

This Advanced form is available for both on screen and Clinipad.
It features questions with three answer options: Yes, No and Don't know:

It expands on some of the answers to prompt the patient to answer more fully. For example the Hepatitis field now asks about Hepatitis A,B,C or D, and the Blood pressure field now prompts for high or low blood pressure.
It has new fields for Hearing or Sight Impairment, Depression, Stroke, Nervous Problems, Tuberculosis, Severe Headaches and Cold Sores.
Open Medical History on 'Move to Chair'
When a patient moves from reception to the chair in the clinic, it is useful to have the patient's Medical History open automatically on the clinic screen. Most Providers will particularly want to review this Medical History with new patients.
This automated display can be optionally configured from the Medical History Configuration window.
If set, this option will cause the medical history tooltip to open in a window when a user selects either of these buttons:
Patient preview > Move to chair.
Side bar appointment book > Move to chair.
To configure an auto-display of the Medical History on Move To Chair
From the Medical tab, click the

Configure button to open the Medical History Configuration.
NOTE: Users without permissions to the Configure-Patient File screen will not see this configure icon.

From EXACT v11.9 this screen includes custom settings per user that were previously configurable in User Settings.
Select a User from the dropdown list:

The options that you configure in the User settings for box will apply to this user only.
Check (tick) Open Medical History on 'Move to Chair' to specify that the Medical History Form must open when this user selects Move to Chair to move the patient from reception to clinic:

Click the OK button to save.
Repeat this procedure for all applicable users.