Specialist details are stored in the Specialist (also called Referral) File located under the File Menu. This is an address book for storing details for all of the specialists your practice uses, as well as for referral sources.
Adding a Specialist / Referral Record
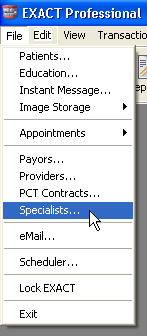
Select File > Specialists:

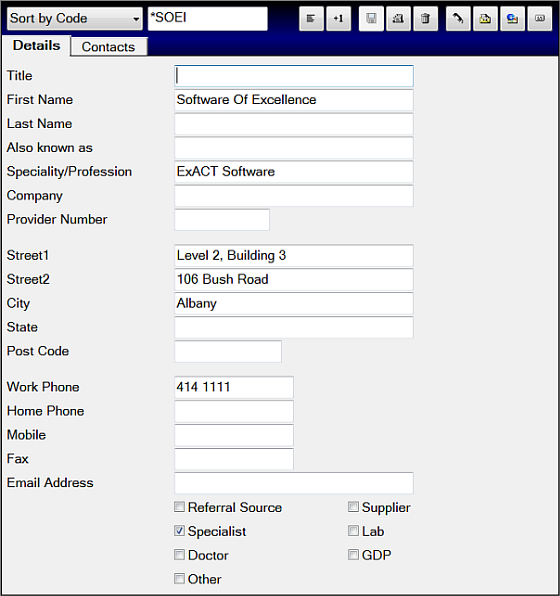
This will open the Edit Specialists window, by default on the Details tab:

Click the +1 button to add a new record.
This will open the Add Referral window, which has the same fields as the window above, with the addition of the Code field.
Enter the specialist details as follows:
Code
Enter an appropriate short code to uniquely identify this specialist.
Title
Enter the title (Mr, Doctor, Etc.) as appropriate.
First Name
Enter the first name or initials.
Last Name
Enter the specialist's last name.
Specialty/ Profession
Enter the type of specialtyor profession (e.g., oral surgeon, edontics, periodontics, etc.).
Company
Enter the name of the company the specialist is employed by.
Address
Enter the address (postal or physical, as required) of the specialist.
Post Code
Enter the appropriate post code.
Work Phone
Enter the specialist's telephone number.
Home Phone
Enter the specialist's private telephone number (if appropriate).
Mobile
Enter the specialist's mobile telephone number.
Fax
Enter the specialist's facsimile number.
Email Address
Enter the specialist's email address, if applicable.
EmailReferral Source
Tick this checkbox if this record is for a referral source, such as Yellow Pages, NHS, "word of mouth", etc.
Specialist
Tick this checkbox if this record is for a specialist.
Doctor
Tick this checkbox if this record is for a doctor.
Supplier
Tick this checkbox if this record is for a supplier.
Lab
Tick this checkbox if this record is for a laboratory.
GDP
Tick this checkbox if this record is for a general dental practice.
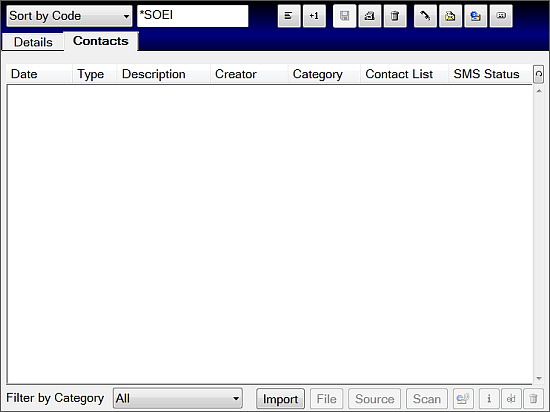
Open the Contacts Tab and optionally Import contacts:
Click the Save button to save the details of the new specialist record to file.

If you wish to add an image for the specialist, right-click the photo placeholder, and select the "Choose a new photo" option. This will allow you to choose the appropriate image file from you computer.
Editing a Specialist Record
From the File menu, click on “Specialists” :
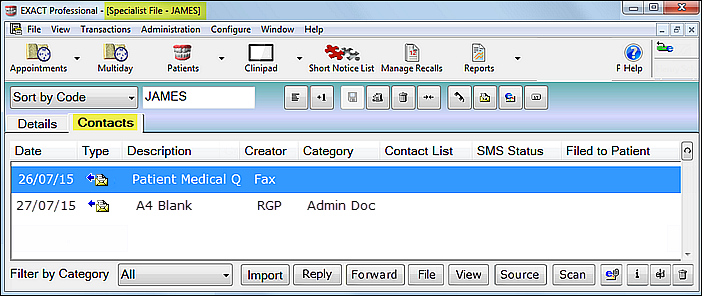
This will open the Specialist File window:
Enter the code for the Specialist, or use the buttons to scroll through the Specialists till you find the one you're looking for, or click the button to display the 'View Specialists' window:
Options/Buttons in the View Specialists Window
Sorting
By default, the specialist records are sorted in ascending alphanumeric order by 'Code'.
To sort by 'Last Name', click on the header for that column, or click on the 'First Name' column heading to sort by that column.
Each time you click on each of these column headings, they are toggled from ascending to descending order and back again.
Records Displayed
If you have a large number of records in the Specialist file, you can filter the records displayed by clicking the 'Type' drop-down button and choosing a specific type:

This filter is also present anywhere that the Specialist file is used in EXACT: in the Patient file, when creating letters or emails, etc.
Buttons
Note that all the usual buttons are present on the toolbar at the bottom right corner of the 'View Specialists' window:

These enable you to edit, add, print, or delete one or more records; and to phone, write to, email, or create a mailing label for the one or more specialists.
Contacts Tab (Specialists)
The Contacts tab stores contacts with or on behalf of a specialist. Contacts take the form of letters sent/received, phone calls made, and email sent/received, if these features have been activated.
Each time a contact is generated within EXACT, an entry will appear in the specialist’s Contacts tab.
Standard Features of the Contacts tab:
Phone Conversations can be listed with a brief description
Letters Sent can be listed with a brief description.
Features with EXDOC installed:
If the EXDOC document management module is installed, the following additional features are enabled:
Phone conversations can be listed with extensive notes
Letters sent can be listed and viewed
Documents received can be listed
Specialist documents can be imported and viewed
Documents can be scanned with a TWAIN-compatible scanner.
Features with EXDOCe installed:
If the EXDOCe document management module is installed, the following additional features are enabled:
Sent email and SMS messages (such as appointment reminders) are recorded.
From EXACT v11.8 the Contacts Tab features Reply and Forward buttons, as in the above image.
Fields in the Contacts Tab
Date Column | This displays the date the contact was generated: when the item was sent, received, scanned into the specialist file, etc. This is generally the date the item was sent, received or imported but can be changed at the time of scanning/importing to reflect the document creation date. |
Type | The type of contact is indicated by the symbol displayed to the right of the date. Symbol Contact Type  Phone call  Label (for Envelope or Postcard etc)  Scanned Document/Image (EXDOC only)  Letter sent  Letter received  Letter to be sent, currently a "work in progress"  Sent email  Received email  Email appointment reminder sent  SMS appointment reminder sent to recipient  SMS message received by gateway (not yet delivered)  SMS delivery failed (SOE is the provider; password is wrong, insufficient credit, etc.)  SMS status unknown (TXTConnecxions / Icetrak / 4Production)  SMS failed or not sent to gateway  SMS status unavailable (other SMS providers) |
Description | Displays the description of the document. |
Creator | The name of the person who created the document. |
Category | There are six Document Types: Admin Document, Clinical Document, Clinical Diagram, Medical History, Treatment Card, and Other Document. These are used to classify all documents scanned or imported into the ‘Contacts’ tab, and also letters that are created within EXACT. |
Contact List | If the Contact entry was generated from a Contact List, the Contact List name will be displayed here. |
SMS Status | This column will display a brief explanation of the status of any SMS message that has been initiated to send to a specialist, corresponding to whichever of the six SMS status icons is in the Type column. |
Filed to Patient | If a letter or email to a specialist is also sent a patient, it will register in that patient's contact tab, and the patient's name will be displayed in this column. |
Controls in the Contacts Tab
Import | Import an existing document (EXDOC only) |
Reply | Reply to a Contact (EXDOCe). |
Forward | Forward a Contact (EXDOCe). |
File | File the current document against a patient and/or specialist. This will open the following dialog: 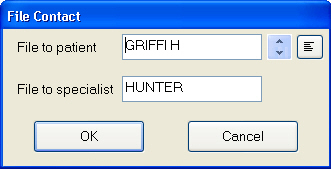 Select the appropriate patient and/or specialist, and click the 'OK' button. |
View | The 'View' button is used to view email messages, and is 'greyed out' for other documents. To view other documents, double-click the item. |
Source | Select scanner (EXDOC only) |
Scan | Scan document (EXDOC only) |
Attach  | Highlight a document on the contacts tab, then click this button to send the document as an email attachment to the patient (they must have an email address set up in their patient file). The button is 'greyed out' and inactive unless a document is highlighted. |
Information  | 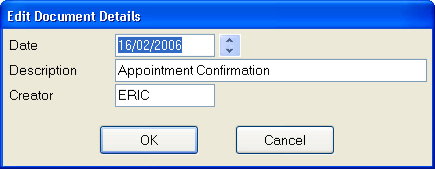 This button opens a window for editing the contact item details. The appropriate 'Edit' window ('Edit Email', 'Edit Letter', etc.) for the item will be opened. |
Edit  | This button edits the highlighted Contact. Alternatively double-click on a Contact entry. (Editing of Letters is available only if EXDOC is installed). |
Delete  | This button deletes the highlighted Contact record. |