See also: ![]() Adding a printer
Adding a printer ![]() - this includes adding a printer and configuring it as the default stationery printer for the dental practice.
- this includes adding a printer and configuring it as the default stationery printer for the dental practice.
Points to note on Printers:
The dental practice is responsible for ensuring that the latest drivers are installed for the printer/s.
Printer drivers need to be installed on all workstations that will need to print.
If all printers are already configured to work within Windows, the printing setup will take less time during the EXACT installation.
Generally, it is not required that the network printer is ‘mapped’ to a local LPT port and it is not recommended.
The printers spooling type should be set to RAW.
If the same printer is to be used for both A4 and A5 printing, multiple printers will need to be configured, one for A4 and one for A5. The printers should be shared and clearly labelled so as to easily identify them, e.g. HP_A4 and HP_A5.
Recommended Card printer settings
From our experience, we have seen that card printers require the following settings:
Paper Settings - Landscape
Paper size - Label 2.25 - 3.00
Copy Count - 1
Graphic Resolution - 200 DPI
Media - 3.5 ips
Paper output - Cutter Disabled
Print Density - 11
Metallic spooling - ON
To set up a printer
This is a task per computer. It requires that the printer / printer driver is installed on the computer.
If not already installed, install the printer software / driver on the computer.
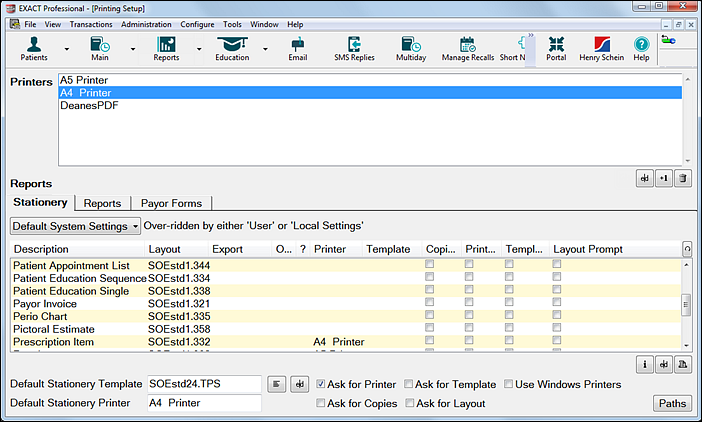
Select Configure > Printing Setup... to open the Printing Setup screen:
Select the +1 button to open the Add Printer window:
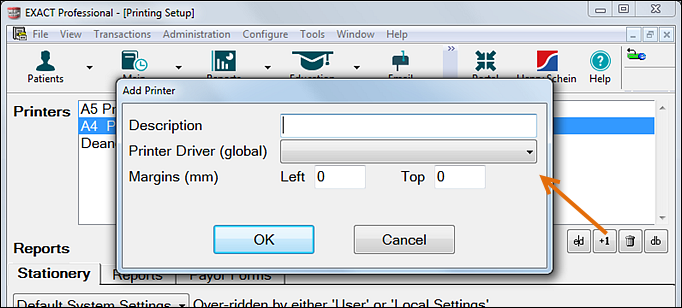
Type a meaningful Description that all practitioners will understand.
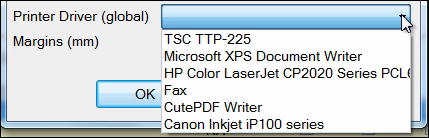
Click the Printer Driver dropdown and select the printer from this list of printers that are installed on this computer:
Click OK.
Optionally set this workstation / computer as the stationery printer for the practice (see procedure below).
Repeat the printer installation on all required EXACT workstations / servers.
To use this printer as the default stationery printer for the entire dental practice
Locate the Default Stationery Printer field at bottom left of the screen:
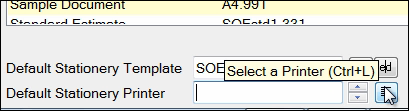
Click the selector against this field, and from the popup choose the printer then select OK