Frequently Asked Questions
How do I find an available appointment? | Example: Options
To create an appointment in the clipboard and the Hold list
|
How do I recall patients for an appointment? | The procedure below will guide you through the most common recall method: to send an SMS message to patients who have a mobile or SMS Home number in their patient record, and a letter to those who do not. Patients will each receive only one SMS message or one letter. If you need more information, or you wish to use other recall methods, please see the "Managing Recalls" section. To recall patients for an appointmentStep 1: Create a recall list.
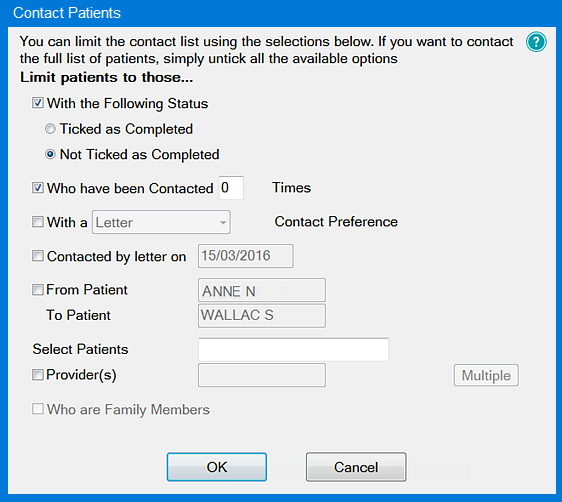
Step 2: Select the patients to be recalled:
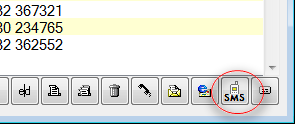
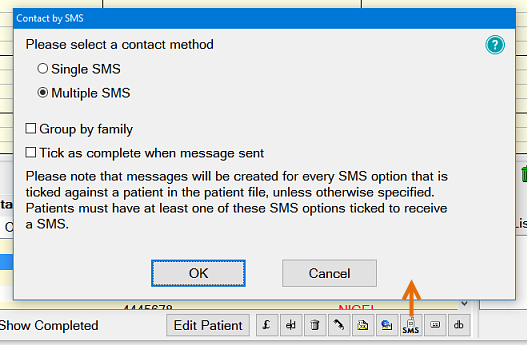
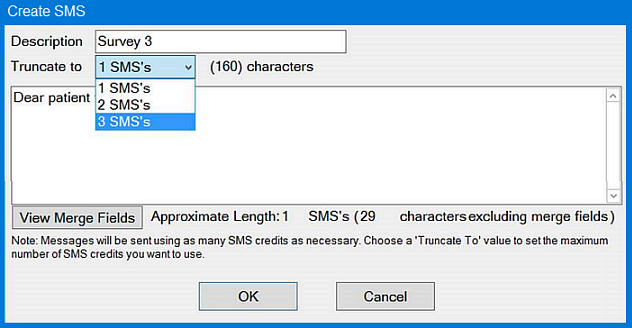
Step 3: Select and configure the SMS recall method:
Step 4: Stagger SMS: what you choose for this option depends on how many patients were in your original list.
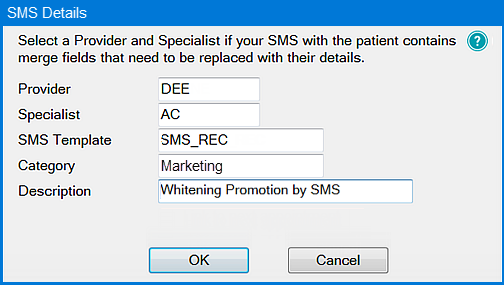
Step 5: SMS Details
Step 6: Edit the SMS text and details:
Step 7: Send the message.
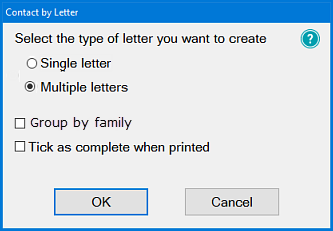
Step 8: Select patients to whom recall letters should be sent.
Step 9: Document Details dialog - as with the SMS message, there are merge fields that are provider-specific, so you may need to select the appropriate provider.
|
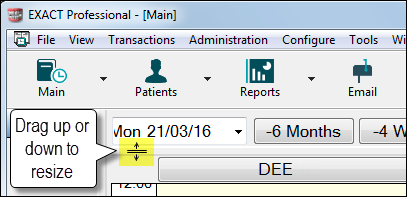
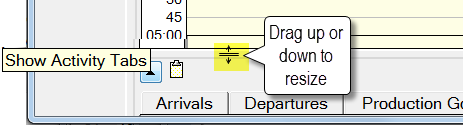
Where has my View Week gone? | Q: When I open my appointment book, the Week View pane at the top isn't showing. Where has it gone, and how do I get it back? A: It is still there, just hidden. This can happen if you (or someone else) maximised the Day View' area, so it is over the top of the Week View area. To re-display your View Week pane
To resize the Activity Tab area
|
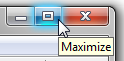
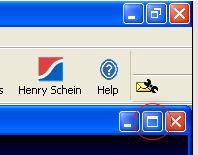
Where has my appointment book toolbar gone? | If the Appointment Book window is not maximised, it is possible for it to occupy the whole screen and yet for the bottom of it to not be visible, so it appears that the toolbar has disappeared. To re-display the Appointment Book toolbarCheck the top right-hand corner of the window - if it looks like this, it is not maximised: Windows 7 Windows XP
Click the 'maximise' button shown circled above; the appointment book will be maximised, with the frame 'clipped' to the sides of the window, and the toolbar will be visible again. |
How do I delete a patient appointment? | Appointments are usually deleted from the appointment book by dragging them with the mouse to the Bin You can drag Appointments to the Bin from either the Clipboard or the View Day area. View deleted appointments by double-clicking the Bin. To Drag an Appointment to the Bin
You can also delete an appointment in other ways: |
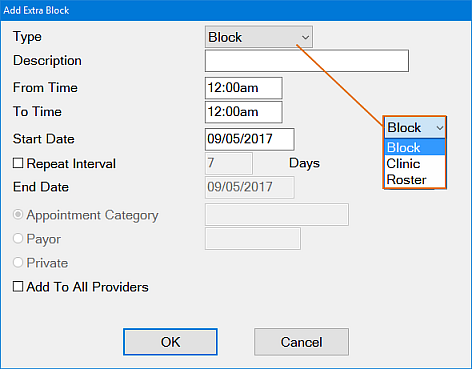
How do I set up blocks in the Appointment Book? |
There are also two methods to delete a Block or Clinic. The method you choose will depend on whether you want to delete just one Block/Clinic for a selected day or multiple repeats of a Block or Clinic. |
How do I change an appointment time or length? | To change an appointment timeDo one of the following:
To alter an appointment lengthDo one of the following:
|
How do I set up a Family Appointment? |
IMPORTANT: Prior to using this function ensure you have entered information into the Family Members section of the Patient Details tab. TIP: When booking family appointments you can select the members of the family that you would like to book into the appointment. To book a Family Appointment
Select an appointment time and double-click to bring up the Edit Appointment window, from where you can click the Create Family Appointment button:
- or - Click the +1 button at the bottom right corner of the Hold List and then click the Create Family Appointment button in the Edit Appointment window that displays:
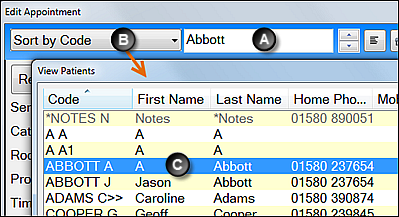
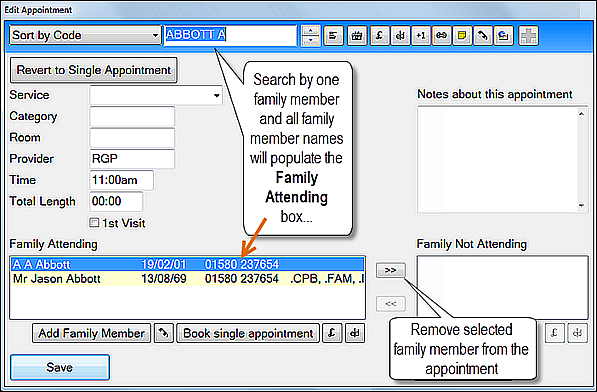
2. In the Edit Family Appointment window, locate the first member for the appointment by entering their name into the Sort By field:
All family members will be automatically selected to attend the family appointment:
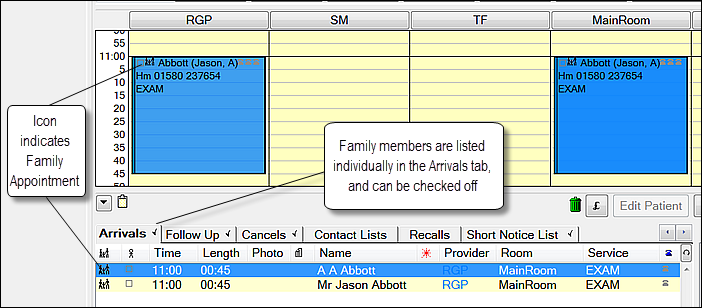
3. Use the >> button to remove family members that are not to be booked into this appointment. 4. Enter information regarding the Service, Category, Room, Provider, Time, Total Length, and optionally type Notes about the appointment. 5. Click the Save button 6. If saving back to the Hold List, drag into an available appointment slot 7. When the family comes in for the appointment, The family members will appear individually in the Arrivals tab allowing you to indicate which of the family members have arrived for the appointment by checking the checkbox against each patient (this will then activate the correct number of stick people to appear at the door in the surgery).
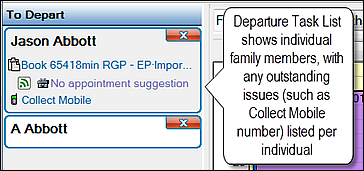
8. (If using Appointment Workflow) When you click the Family appointment as Arrived, the appointment workflow Arrivals Task List will show family members individually, allowing you to deal with outstanding issues (such as Medical History Update) per patient. 9. (If using Appointment Workflow) When the family appointment is completed, the Departure Task List will show each family member, again allowing you to deal with outstanding issues (such as Collect Mobile number) per patient:
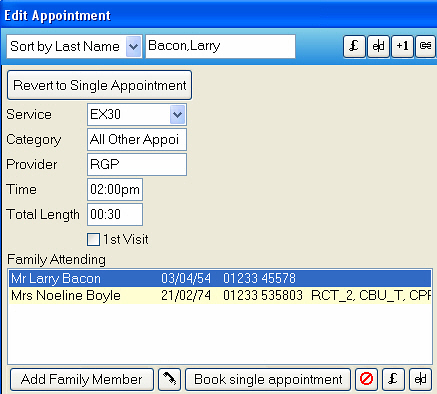
As family appointments are completed (once they have been seen in the surgery), you will need to check which - if any - members of the family require any additional appointments. Follow the steps below to do this: To book further appointments for family members
|