This report is used to print a list of patients who have completed lab work currently listed against their patient record.
NOTE: For the lab work due report to run effectively, initially a certain amount of configuration is required to set up the laboratories that are used by the Practice and set a prompt against the services that require lab work.
To Run the Lab Work Done Report
From the ‘Administration’ menu, select ‘reports, and then ‘Lab Work Done’:

This report can be run for individual Providers, or more than one Provider can be selected by clicking on the button.

The option is also available to print as one report or as a separate report for each Provider.
If locations are enabled, more than one location’s lab work can be included by clicking on the button.
The report can be limited to lab work for a single Payor by using the ‘Payor’ field.
The ‘From’ and ‘To’ date fields are used to define the date range for the report.
NOTE: The ‘To’ date should be a date in the future if the report is to show due as well as overdue lab work.
A summary report only can be printed by clicking in the ‘Summary Only’ checkbox.
The standard option buttons for printing reports are available.

To Configure EXACT for the Lab Work Done Report
Click on the ‘Configure’ menu and select ‘Services’:
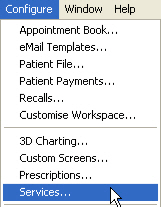
Double click on the service to edit. This will open the ‘Edit Service Item’ window.
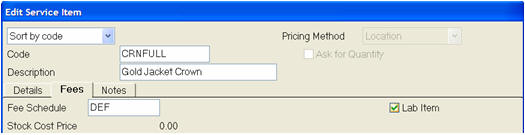
Click on the Fees tab, tick the box for Lab item, and click ‘OK’.
Next set up the laboratories that is used. To do this, click on the file menu and select Specialists.
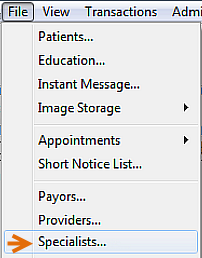
Click on the button to open the ‘Add Referral’ window. Enter a Code, and a description for the code in the First name field. Then enter as much information as required, recommended is an address, phone number and e-mail address. Remember to tick the box for Lab and click ‘OK’ (See example below).
Repeat step 4 as required until all lab details have been entered.
With both the service configured and the lab details set up, the next time the service is charted, you will be prompted for a lab and due date.
Select the lab you wish to use by choosing a laboratory from the list or by using the button.

Select the date the lab work is due back and click ‘OK’.
