Getting Started
Search these help files
Everything you need to know if you're new to EXACT. This introductory section covers topics such as the dental practice roles, components of EXACT, controls, and how to find your way around the menus.
This introductory section covers topics such as the dental practice roles, components of EXACT, controls, and how to find your way around the menus.
The Patient Journey and Appointment Workflow
EXACT software facilitates and automates the Patient Journey through a dental practice:

Patients optionally book appointments online through a configurable booking website.
They receive automated recall, reminder and other notifications by SMS, Email or EasyPost.
EXACT can automatically acknowledge SMSes and Emails that Patients send to the Practice.
The patient file contains detailed personal and dental data from which EXACT generates a pop-up medical history screen for the appropriate practitioners.
An Appointment Workflow Manager ensures that practitioners complete tasks at each point of the patient journey through the practice.
Receptionists work primarily in the Appointment Book, which includes multiple utilities to speed, simplify and streamline their tasks.
EXACT tracks the location and status of patients as they move sequentially through arrival - clinic - departure.
A custom Appointment Workflow ensures that Receptionists fulfil all clinic obligations with each patient.
See also:
Clinicians (Dentists and Hygienists) have immediate access to Patient medical history in the form of a screen popup. They work mainly in the Patients interface.
Treatments are predefined in EXACT. When the Provider finalises a treatment, EXACT prompts for planning for the next treatment, which is then defined as a Recall, to be facilitated by EXACT.
Dentists use an innovative Quick Chart to chart treatments.
See also:
Practice Managers control the software configuration and the various tools that enable business success. They automate the dental practice processes with modules such as Utilisation Manager, SMS Replies and Online Bookings, and they monitor business metrics by means of detailed reporting.
See also:
Typical Role Tasks in a Dental Practice
Receptionist Tasks
| Tasks that are likely to be performed in the Receptionist role |
Dental practice workflow
- Facilitate patient processing through the practice by means of the Appointment Workflow (a team effort)
Patient records
- Create a new patient record
- Search for, Add, Edit and Delete patients (including families) in the Patient File > Details tab
- Display, update and monitor the patient medical details
Appointments and appointment book
- Find available appointments and use an Advanced Search for the best appointment options for a patient
- Manage a multi-column (multi-Provider) appointment book
- Book appointments for single patients and book family appointments
- Delete appointments, change their time and duration, use the Edit Appointment window
- Manage co-ordinated appointments (with both Dentist and Hygienist)
- Monitor patient appointment status and stage of care through information in the appointment book
- View records of historical appointments for a patient
- Manually book patients for recall appointments or use automated Recall Management tools
- Move appointments using the clipboard and move them without using the clipboard
- Add patients who are awaiting treatment to a Waitlists tab
- Add blocks in the appointment book for individual Providers (e.g. for personal holidays), and for all Providers
- Manage Rotas, Rosters, Blocks and Clinics (Multi Column Books)
- Configure holidays in the appointment book
- Transfer appointments from one Provider to another
- Online appointment bookings and their appearance in the appointment book
Working with the Short Notice List
- Understand how Utilisation Manager and the Short Notice List affect the Receptionist role
- Add appointments to Short Notice List. Find gaps and book patients from the Short Notice List. Fill gaps from the Appointment Book itself
- Remove gap appointments from the Short Notices List. Postpone a patient's gap communications for a few days. Cancel Appointments
- Check that SMSes have been sent, received, or acted upon
- Manually match SMS Replies from patients
- Troubleshoot the Short Notice List
Working with automated recall bookings
- Understand how the Recall Manager module affects the Receptionist role
- Use the Appointment Book Recalls Tab and the Patients Recalls Tab, and Respond to the Recalls Prompt
- Recall patients. Manually run EXACT's automated recalls. Manually contact patients from the Recalls List
Working with automated and manual SMS Replies
- Understand how the SMS Replies module affects the Receptionist role
- Manage the SMS Replies facility
- Use the SMS Replies Counter Alert to check how many unmatched SMS replies need to be resolved
- Monitor and match SMS Replies
- Manually contact patients by SMS
Working with EasyPost automated print and postage
- Understand how the EasyPost module affects the Receptionist role
- Monitor EasyPost actions by means of the EasyPost Jobs Monitor and EasyPost Jobs Report
- Post the following through EasyPost: an Invoice, a patient Statement, statement runs.
Financial transactions
- Take payments (adjustments, transfers, region-specific procedures such as HICAPS in Australia and NHS procedures in UK)
Communications
- Manage the patient Contacts tab (phone, email, SMS, letters, Easypost)
- Create patient documents, Patient Letters, use merge fields in documents, use Letter Templates
- Manage patient financial transactions, Statements, Patient Payments
- Patient Education
- Configuring and dealing with Automatic Appointment Reminders and Automatic Appointment Follow-ups
Forms and patient signatures
- Clinipad electronic forms and signatures, use Clinipad with Patient arrival in reception
- Ask patients to sign the practice Terms and Conditions on the Clinipad
- Issue Oral Health Surveys to patients in reception
Dental practice productivity
Instant messaging within the practice
- Understand how the Instant Message utility affects the Receptionist role
- Send an Instant Message to: selected EXACT users / all EXACT users
- Create and send a 'Panic' message
Task management within the practice
- Understand how the Tasks utility affects the Receptionist role
- Add a New Task
- Mark Tasks as Completed
- Add Notes to a Task
- Deal with popup reminders
Reporting
- Receptionist reporting activity depends on the practice. See Reporting for an introduction.
Sundry
- End-of-day Banking
- Extra Item Sales and Stock Items
- Exemptions
- Lab Work Follow-up
- COV Check
Clinician Tasks
| Tasks that are likely to be performed in the Clinician role (Dentists and Hygienists) |
Dental practice workflow
- Facilitate patient processing through the practice by means of the Appointment Workflow
(move the patient to the clinic chair following arrival processing at reception, and process the patient back to reception after treatment) - Understand the functionality of the 'Arrivals Door' in the EXACT interface, especially how to move the next patient to the chair and how to return a patient to the waiting room
Patient records
- Medical History - display, update and monitor the patient medical details
- Mark medical records as Reviewed
- Add Medical Notes (including popup notes)
- View and use the Medical History List
- View/set patient Anaesthetic Preference
- Configure EXACT to automatically open patient medical history on 'Move to Chair'
- Create a new patient record
- Search for, Add, Edit and Delete patients (including families) in the Patient File > Details tab
Appointment book
- Monitor a multi-column (multi-Provider) appointment book
- Monitor patient appointment status and stage of care through information in the appointment book
- View records of historical appointments for a patient
- Transfer appointments from one Provider to another
- Online appointment bookings and their appearance in the appointment book
Charting and Treatment
- Understand how to use the Chart Tab, including price editing for services and charting, tooth chart modes, and chart configuration
- Use charting options such as 16-surface charting and the Quick Chart Menu
- Understand how to use and customise the Services List
- Add Quick Notes to service items
- Chart services for both base charting and treatment charting
- Use the Perio Tab to record extensive periodontal charting
- Use the Pathology Tab to create and maintain both intra-oral and extra-oral diagnosis pathology charts
- Create Treatment Plans / Courses of Treatment
- Enter, modify and delete Patient Notes from the Notes tab
- X-rays / intra-oral camera
- Manage patient recalls from the Patients Recalls Tab and the Set Recalls popup prompt.
Dental practice productivity
Instant messaging within the practice
- Understand how the Instant Message utility affects the Clinician role
- Send an Instant Message to: selected EXACT users / allEXACT users
- Create and send a 'Panic' message
Task management within the practice
- Understand how the Tasks utility affects the Clinician role
- Add a New Task
- Mark Tasks as Completed
- Add Notes to a Task
- Deal with popup reminders
Reporting
- Clinician reporting activity depends on the practice. See Reporting for an introduction.
- Create an Estimate
Communications
- Patient Education (GURU, 3D charting)
- Instant Messaging within the practice
- Exemptions
- Quick Plans
- Prescriptions
See also:
Clinician Masterclass: ![]() Quick Charting, Quick Plans, Quick Notes
Quick Charting, Quick Plans, Quick Notes ![]()
Clinician video series starting here: ![]() Medical History
Medical History ![]()
Practice Manager Tasks
| Normal tasks: |
Set up and configure the practice
See the sub-topics under these sections:
Set up Providers, Payors and Specialists
- Configure Providers by means of the Provider File Window
- Configure Specialists by means of the Specialist / Referral record
- Configure Payors by means of the Payor File Window
(UK only) Maintain GDPR Compliance
See these topics:
- GDPR compliance-related features
- GDPR compliance-related procedures by practice role
- Preferences to contact patient
- Contact Consent Query
- Contact Preferences Audit
- User Activity Audit
Dental practice workflow
- Understand the functionality of the 'Arrivals Door' in the EXACT interface, especially how to move the next patient to the chair and how to return a patient to the waiting room
- Configure the Appointment Workflow for the practice
Understand all elements of Patient records
- Medical History - display, update and monitor the patient medical details
- Mark medical records as Reviewed
- Add Medical Notes (including popup notes)
- View and use the Medical History List
- View/set patient Anaesthetic Preference
- Configure EXACT to automatically open patient medical history on 'Move to Chair'
- Create a new patient record
- Search for, Add, Edit and Delete patients (including families) in the Patient File > Details tab
Appointment book
- Find available appointments and use an Advanced Search for the best appointment options for a patient
- Manage co-ordinated appointments (with both Dentist and Hygienist)
- Monitor patient appointment status and stage of care through information in the appointment book
- Monitor a multi-column (multi-Provider) appointment book
- View records of historical appointments for a patient
- Transfer appointments from one Provider to another
- Online appointment bookings and their appearance in the appointment book
- Manually book patients for recall appointments or use automated Recall Management tools
- Add patients who are awaiting treatment to a Waitlists tab
- Add blocks in the appointment book for individual Providers (e.g. for personal holidays), and for all Providers
- Manage Rotas, Rosters, Blocks and Clinics (Multi Column Books)
- Configure holidays in the appointment book
Working with the Short Notice List
- Understand how Utilisation Manager and the Short Notice List affect the Receptionist role
- Add appointments to Short Notice List. Find gaps and book patients from the Short Notice List. Fill gaps from the Appointment Book itself
- Remove gap appointments from the Short Notices List. Postpone a patient's gap communications for a few days. Cancel Appointments
- Check that SMSes have been sent, received, or acted upon
- Manually match SMS Replies from patients
- Troubleshoot the Short Notice List
Working with automated recall bookings
- Understand how the Recall Manager module affects the Receptionist role
- Use the Appointment Book Recalls Tab and the Patients Recalls Tab, and Respond to the Recalls Prompt
- Recall patients. Manually run EXACT's automated recalls. Manually contact patients from the Recalls List
Working with automated and manual SMS Replies
- Understand how the SMS Replies module affects the Receptionist role
- Manage the SMS Replies facility
- Use the SMS Replies Counter Alert to check how many unmatched SMS replies need to be resolved
- Monitor and match SMS Replies
- Manually contact patients by SMS
Working with EasyPost automated print and postage
- Understand how the EasyPost module affects the Receptionist role
- Monitor EasyPost actions by means of the EasyPost Jobs Monitor and EasyPost Jobs Report
- Post the following through EasyPost: an Invoice, a patient Statement, statement runs.
Working with Online Appointment bookings and payments
- Configure Online Appointment Bookings
- Configure Online Recalls
- Configure the online booking website
- Configure practice Policies on the online booking website
Patient communications, reminders, education
- Manage the patient Contacts tab (phone, email, SMS, letters, Easypost)
- Create patient documents, Patient Letters, use merge fields in documents, use Letter Templates
- Manage patient financial transactions, Statements, Patient Payments
- Patient Education
- Configuring and dealing with Automatic Appointment Reminders and Automatic Appointment Follow-ups
- Configure automated SMS Replies
- Configure automated EasyPost communications
Forms and patient signatures
- Clinipad electronic forms and signatures, use Clinipad with Patient arrival in reception
- Ask patients to sign the practice Terms and Conditions on the Clinipad
- Issue Oral Health Surveys to patients in reception
Dental practice productivity
Instant messaging within the practice
- Understand how the Instant Message utility affects the Receptionist role
- Send an Instant Message to: selected EXACT users / allEXACT users
- Create and send a 'Panic' message
Task management within the practice
- Understand how the Tasks utility affects the Receptionist role
- Add a New Task
- Mark Tasks as Completed
- Add Notes to a Task
- Deal with popup reminders
Set up Clinipad
Set up Oral Health Surveys
Set up and run Recalls and Recall Automation
- Configue Recall Manager and Recall Types
- Set up Recall Automation
- Manage Recalls (main) screen
- How Providers set the Recall Details
- Variable Recall Default Values
- Monitoring Recalls
- Appointment Book Recalls Tab
- Patients Recalls Tab
- Responding to the Recalls Prompt
- Recalling patients
Set up Utilisation Manager and the Short Notice List
- Understand configuration information/options
- Appointment Clinics and Short Notice List bookings
- Disabling display of the Short Notice List
- Configuring settings for the Short Notice List
- Configuring time parameters for the Short Notice List
- Configuring AUTOMATED Contact options for Short Notice List:
Gap Available | Confirmed | Gone
Practice marketing by means of Marketing Manager
Configuring user rights for Marketing Manager
Creating an automated campaign with Campaign+
Managing multiple campaigns from the Marketing Manager Desktop
Tracking, monitoring and analysing campaigns from the Dashboard
Reporting
Sundry
- End-of-day Banking
- Extra Item Sales and Stock Items
- Exemptions
- Lab Work Follow-up
- COV Check
- Production Goals
- New Providers/Users
- Specialists
- User security
- Payment plans
- Deal with Payors and Payor policies
- Take payments (adjustments, transfers)
- Recall/Contact Lists
- Lab Work Follow-up
- Statement runs/Debtors
- Submit Claims
- UDA Manager
- Region-specific tasks such as NHS Contracts in the UK and HICAPS in Australia
- Schedule Events
- Monthly Reports
- Implementing and updating Services/Fee Schedules
- Custom Screens
- KPI Reports
- Backup/Upgrades - including testing
- General Ledger Export
- New Licences
Opening EXACT and Logging in
- Either click the Start button and choose EXACT Dental:

- or -
Double-click the EXACT Dental icon on the Desktop:

- A Login screen will appear:
- Enter the appropriate User Name and Password by accepting the defaults if they are correct, or click in these fields and change them if necessary (Note that all entries are automatically converted to UPPER-CASE):

If you make a mistake on user name and/or Password, the fields will flash in red as a warning:

If you change the User Name you will see a new checkbox field: Set new default login (below).
Check this box if you want the new name to be the default in future:

- Accept the default value at the Practice field, or click the drop-down list to choose from those displayed.
- Click OK when all entries are correct, to open the EXACT program window:

NOTES ABOUT LOGIN:
Date: In extraordinary circumstances when logging into EXACT you can enter a date other than the default of today's date, if you require records to be created for an earlier or later date.
Set new default login: Place a tick in this checkbox to change the default login 'User Name', 'Password' and 'Practice' to those for the current login. The new defaults will apply every time you login until they are changed again by using this method.
Exiting EXACT
There are several different ways you can exit from EXACT.
![]() Important: Use the method that suits you best, but never simply turn off the computer, as this could potentially corrupt the EXACT database.
Important: Use the method that suits you best, but never simply turn off the computer, as this could potentially corrupt the EXACT database.
To exit EXACT
Use either of these four methods:
- Click the
 'Close' button in the top right-hand corner of the EXACT window:
- or -
- Select the ‘Exit’ command from the File menu:

- or -
- Right-click on the bar at the very top of the EXACT window, and select the 'Close' option:

- or -
- Hold down the
 button on your keyboard, press
  and then release both keys.
Layout, Menus and Screen Operations
This section introduces the screen and window layout in EXACT, lists the Menus and explains how to perform specific on-screen operations.
TIP: Initially there is a lot of information to take in, so return again to this section later when it will make more sense.
Parts of the EXACT Screen
This is a normal EXACT screen:- the Patient File, with the Patient Details tab selected.

| Window header bar, identifying characteristics of the current window. Note how it in this case identifies the patient. |
| EXACT Menus bar, providing access to EXACT menu commands. |
| Standard Window controls for resizing or hiding the window. |
| The Workspace bar, where you can arrange your commonly-used shortcuts. |
| Find and select patient records from these controls. |
| Patient File toolbar, with grouped functions. |
| Patient File tabs with patient-related screens and operations associated directly with patients |
| Main display and data entry screen where you can view and edit information. |
Header Bar

The header bar has two functions:
- It displays the name of the active window, and for some screens (Patient File, Provider File, etc.) it also displays the record name and/or other pertinent information.
- By means of the header bar you can drag the window around the screen.
To move the EXACT Window
If a window is not maximised (does not occupy the whole screen) you can drag it around the screen from the header bar.
If you are using dual monitors, you can also use this method to move a window from one monitor to another.

Customisable Workspace Bar

You can customise this Workspace bar, and then with a click access your most frequently-used windows.
Customisation is per user login
The number of Icons or Window Names that you can display depends on the size of icon, length of window name, and the size of your available screen.
Note: EXACT minimum resolution is 1280 x 1024 (at lower resolutions the screen is truncated). However, some features and modules within EXACT require a widescreen monitor, for which we recommend screens capable of 1920 x 1080 and above.
The maximum resolution available depends on your computer hardware (monitor type/size and graphics adaptor card), and is set in Windows Control Panel.
Workspace Icons
A Reception user might include the following icons on the Workspace bar:
- Patients
- Appointment Book
- Create Bank Deposit
A Clinical user might include the following icons on the Workspace bar:
- Patients
- Patient Education
- Recall Manager
An Administrator user might include the following icons on the Workspace bar:
- Patients
- Appointment Book
- Specific payor files
- Contact Lists
- Allocated Payments
- Recall Manager
System Icons on the Workspace Bar
In addition to the user-customised icons, there may be other icons present that are set by the system:

| Select the Portal icon to access the user portal where you can view videos, read blog articles and download software. See also: Software of Excellence User Portal (Software of Excellence User Portal, http://portal.softwareofexcellence.com) |
| Click the New Features icon to open the Help Start page, from where you will see a New in this version hyperlink. Click this to view the features, each of which is further hyperlinked to the new content. Once viewed, the icon will disappear from the EXACT workspace bar. You can at any time view new features via the Help Home page - simply click the Help icon as described below. |
| An icon to access the Henry Schein website to order dental supplies. |
| Click the Help icon to access EXACT Help files. For many of EXACT's windows, this will display context-specific information for the window that is currently displayed. |

Customising the Workspace Bar
The Workspace bar enables you to access commonly-used EXACT screens via icon buttons on the top of your screen.
It is customisable per user (each user may customise their own workspace bar to suit their needs).

From EXACT version 11.3 you can opt to hide the Henry Schein button (see below).
TIP: Workspace settings are saved as part of the user record for the logged-in user, and will be applied each time the user accesses EXACT, even from another PC.
To customise the Workspace Bar for the current logged in user
- Access the Customise Workspace window via the Configure menu:

- or -
Right-click with your mouse anywhere in the workspace bar and select Customise...

This will open the Customise Workspace window:

This has two panes:
- Available windows at left - these are not displayed in your workspace bar.
- Selected windows at right - these display in your workspace bar. The ordering is important - from top to bottom is how they will display in horizontal sequence.
- Double-click any name to move it from its current pane into the alternative pane.
(You can also select the name and then click a button to move it left << or right >>)
- Move all required windows to the Selected Windows list in the right pane.
- Move any unwanted windows back to the left pane.
Note that this does not delete them from EXACT; it only removes the icons from the Workspace bar.
- In the right pane, change the order in which the icons are displayed by selecting an icon and using the
 Up/Down buttons to move the icon up or down in the list.
(Optional) To remove the Henry Schein button from the workspace bar
- De-select the Enable Henry Schein button checkbox:

- Select OK.
TIP: Workspace settings are saved as part of the user record for the logged-in user, and will be applied each time the user accesses EXACT, even from another PC.
Using the Workspace Bar
Once your workspace bar is customised, it will display every time that you log on to EXACT.
This bar provides constant quick access to EXACT functions from anywhere in EXACT.
Click an icon to display the screen or process you wish to access.
With many icons you will see a dropdown arrow to the right of the icon. This indicates that there are multiple options with that icon.
For example:
| Click a patient record to open and display that Patient File. If the patient you require is not in the list, click the Patients button to open the Patient File, and then use the patient search facility to find the required record. |

| Click a Main option to open that desktop. |

| Your Favourite reports are accessible from the Reports dropdown. (These are reports that you have specified as Favourites) |

| Use the Education dropdown menu when explaining treatment to patients. Each option opens a colour slide that explains the procedure. For example:
|


Lost-Connection Alert
- Applies from EXACT v12.6 onwards.
- The alert may indicate that maintenance is necessary from an IT-competent person.
- Please contact the Support Desk if you do not know what to do.
| EXACT displays a flashing alert in the workspace bar when a communications connection has been lost. This empowers the practice to immediately diagnose and potentially independently resolve connection issues. |
To respond to the Lost-connection Alert
- Mouseover the flashing alert for a tooltip:

- Click the flashing alert for a popup message, which will vary according to the cause of the alert.
Examples:


DDX Lab Link
![]() The DDX Lab Link icon in the workspace bar simply enables links to the DDX website, and Dentists who are registered with DDX use these links as a convenient means to access DDX pages
The DDX Lab Link icon in the workspace bar simply enables links to the DDX website, and Dentists who are registered with DDX use these links as a convenient means to access DDX pages

Options are to
- Connect to the DDX portal.
- Directly add a new case (if you are already logged in) - it will open a New Case with the current EXACT patient details populated.
- Display a list of DDX cases.
NOTE: The DDX icon must be manually added to the workspace bar.
To add the DDX icon to the workspace bar
- Right-click the workspace bar and click customise:

- In the Customise Workspace window, select the DDX Lab Link item.
- Click the move-to-right button >>.
- When the DDX Lab Link button appears in the right pane, select it and use the Up/Down arrows to reposition it in the list (to determine where it will appear in the workspace bar).
- Click OK.
Menu Bar
The primary EXACT functions are accessible from the menus at the top of the screen:

Select a menu item by using either the mouse or the keyboard, or a mixture of both.
To select menu items with the mouse
- Click the menu heading in the menu bar to display a list of the available commands.
File menu example:

- When you hover your cursor over a menu item, it will highlight, as in the Appointments item above.
- Click to select, or press the Enter key on the keyboard while that item is highlighted.
To select menu items with the keyboard
- Press the ALT key on your computer keyboard to activate keyboard selection and show the underlined letter selection per menu item.
Notice that a single letter in each word is now underlined:

- Press the appropriate letter on your keyboard to choose that item.
For example, in the system depicted above, the F key
 will access the File menu, and the T key
  the Transactions menu.
You can also use the arrow keys on the keyboard; pressing the
 key while File is highlighted will move the focus to View, then to Transactions, etc.
 - Press the menu letter on the keyboard to drop down that menu.
For example, show the File menu by pressing the F key
:
- To select a menu item either
- Select the underlined letter (such as P key
 for Patients), or
 - Use the keyboard up/down arrow keys

 to move to the item you require, then press the Enter key
  .
.
- Select the underlined letter (such as P key
Access the primary EXACT functions from the menu bar at the top of the screen:

The content of these menus may vary by user permissions, practice setup, installed modules and geographic region.
File Menu
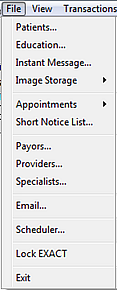
| Patients... | Opens the patient file at the DetailsTab. |
| Education... | The Patient Education Window is a console for managing and running full-screen educational slide shows. |
Instant Message... | Instant Message enables fast text communications between EXACT users on a network |
| Image Storage > | Compress Images... Compress various types of images to improve storage. Restore Images... Restore images from a backup medium to the database. |
| Appointments > | Main... Loads the default Multicolumn Appointment Book displaying multiple Providers for the current day Multiday Appointment Book... Loads the Multiday Appointment Book, which can display 5, 7, 14 or 28 days of appointments on the screen Single Column Appointment Book... Loads the Single Column Appointment Book where the column is divided into View Week and View Day areas List Appointments... Select List Appointments to list patient arrivals and departures, as in the Arrivals and Departure tabs. |
| Short Notice List... | This link opens at the Short Notice List Screen. The Short Notice List / Utilisation Manager facilitates chairtime utilisation. |
| Payors... | Opens the Payor File window, where you can add or edit Payors (schemes that subsidise treatment) |
| Providers... | Opens the Provider File Window where you can add or edit Providers (Clinicians) |
| Specialists... | The Specialist File is an address book for storing details of the specialists and referral sources that your practice uses |
| Email... | Opens the Email Inbox for viewing and responding to incoming Email |
| Scheduler... | With Scheduler you can automate EXACT events |
| Lock EXACT | Use when you leave your computer. This locks EXACT and displays the Login dialogue on a blank EXACT screen. It does not close down the program. Login normally to unlock and continue. |
| Exit | Close the EXACT software. To use EXACT again you'll need to run it and then Login. |
View Menu

| View Transactions... | If a patient is selected in the Patient file, this will open the Patient Transactions window. |
| View File... | (view a Patient list from which to select a Patient File) If you already have the Patients desktop open this opens the View Patient window. If the Patients desktop is not open selecting View File... will have no result. With the Patient desktop open you could also open the View Patient window by these means: - Press F4 or - Press CTRL-L or - Click the View Patients button:
|
| Link To... |
Transactions Menu
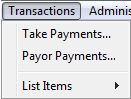
| Take Payments... | Open the Patient Payments window to process a payment. |
| Payor Payments... | |
| List Items > | List Adjustments... Viewing and printing a list of all Adjustments List Discounts... View a list with columns for Date, Type, Transaction Number, Invoice Number, Provider, Entered by, Patient Details, Amount, Amount Open. Actions: View full details of a Discount, Print the list of Discounts, Delete a Discount. List Invoices... List Invoices Actions: Show allocations for the selected invoice, Print an invoice, Print the list of invoices, Delete selected invoice/s, Add further allocations to an invoice. List Payment Bundles... View a list of Payment Bundles with columns for Date, Type, Number, Providers, Payment Method, Deposit Amount, Amount. Actions: Update a Payment Bundle (adds new receipts or adjustments), Edit a Payment Bundle, Print the list, Delete a Payment Bundle. List Payments... View a list of Payments with columns for Date, Type, Printed or not, Receipt Number, Deposit, Provider, Payment Method, Entered, Patient Details, Amount, Amount Open, Receipt Type. Actions: View the details of any Payment, Print a Payment, Print the list of Payments, Delete a Payment. List Transfers... All or part of the monetary value of a patient transaction can be transferred to another patient, or payor. This is commonly used if one cheque is being processed to pay more than one account. See also Transfers. List Courses of Treatment... From the List Courses of Treatment window you can view details of current patient CoTs and you can perform actions with a selected patient / CoT. List Write Offs... List all write-offs. Actions: Print the list. Display information on a selected write-off, delete selected write-offs. List Contacts... List the Contacts with patients, with columns for Date, Type of Contact, Patient Name, Specialist, Description of the Contact, Creator of the Contact, associated Contact List (where applicable), Body Text (where applicable) Actions: View full details of a selected contact, Edit details, Print details, Delete a Contact. List Estimates... View a list of Estimates with columns for Date, Type, Printed or not, Emailed or not, Estimate Number, Provider, Patient Details, Amount. Actions: View full details of a selected Estimate, Print Estimate, Print the list, Delete. List Prescriptions... View a list of Prescriptions with columns for Date, Type, Printed or not, Emailed or not, Provider, Patient Details, Prescription Item details. Actions: View details of a prescription, Configure prescription items (Edit, Add new, Delete), Print a prescription item, Delete a prescription item. List Statements... View a list of Statements with columns for Date, Type, Provider, Person who entered it, Patient Details. Actions: Delete a Range of Statements, Delete the selected Statement. List Xrays... List All Transactions... View a list of all transactions with columns for Transaction Number, Date, Name, Transaction Detail, and the Amount |
Administration Menu

| Reports... | Open the Reports screen with a menu of reports. |
| Statement Run... | Use the Statement Run to print statements for all patients who owe money as at a particular date (usually the current date). A Statement Run is normally performed once a month, or at other regular intervals. |
| Run Batch Invoices... | Run the Batch Invoice Process, with the (checkbox) option to Print the Invoices as they are created. |
Wait Lists... | Print a Wait List |
| Managing Recalls... | The Manage Recalls screen is the main management interface for monitoring and managing recalls. It displays a month summary per line, with an Effectiveness summary bar chart in colours that represent the Recall-health of the Practice: |
| Marketing... | The Marketing desktop enables practitioners to track and manage campaigns. |
| Contact Lists... | A Contact List is a list of patients who match selected criteria. Contact Lists are used extensively throughout EXACT, so should be understood by all practitioners. |
| Manage SMS Replies... | The Manage SMS Replies screen lists all the SMS messages that were received by the practice that were either not automatically processed by EXACT, or were added to the SMS Replies list because the settings in EXACT directed them to be. These specific SMS replies may require user intervention. |
| Tasks > | Tasks... Tasks is a dental practice "To Do List" that allows users to create and monitor tasks that have implications for the Appointment Book. New Task... Add a new Task New Task re Patient... Similar to the above New Task, but specifically in relation to the currently selected patient. |
| Search and Change... | The Search and Change wizard enables you to search for specific patient records and change them. |
| Delete Aged Data... | Use the Delete Aged Data tool to delete dental records that exceed the regulated record-retention age in the UK. The tool can optionally be used in other regions. It partially automates the process of identifying, checking and deleting patient aged records. This tool is only accessible to Administrator-level users. It needs to be used with care as it can potentially delete important data. Please create a complete backup before using this tool. |
| EasyPost Job Monitor... | Use the EasyPost Job Monitor to Track the status of manually-generated and automated EasyPost recall jobs. |
Configure Menu

| Appointment Book... | Users with appropriate security access can configure the appointment book appearance to optimise viewer interpretation. |
| Email Templates... | Create email templates to enable quick, easy, standard-appearance email messages. |
| SMS Templates... | Select or create an SMS template |
| Patient File... | |
| Patient Payments... | Configuring Patient Payments |
| Patient Query Templates... | Lists the Query Templates in use by the practice. Query Templates are used throughout EXACT as a means of specifying sets of patients. Actions: View and Edit a selected Query Template, Add a new Query Template, Delete a Query Template, Import a Query Template (as .CSV), Export the selected Query Template (as .CSV) See also: Selecting patients by means of Query Templates | Using existing Queries | Creating a new Contact List |
| Customise Workspace... | Customise the workspace bar across the top of the screen to suit the way you work. Customisation is per user your Login. |
| 3D Charting... | The first time that the 3D Chart is activated, a 3D Chart Setup Wizard will appear to take you through the configuration. The wizard needs to be run only once on each workstation. You can manually run the 3D Chart Setup Wizard from the Configure > 3D Charting at any time to change settings if there are hardware changes. |
| Custom Screens... | Configure a Custom Screen. Use Custom Screens to design customised data entry windows that can be attached to various parts of the EXACT program. Custom screens are usually attached to service items, although they can also be used to record medical history and create extra tabs in the Patient File window to record specialised information. |
| Prescription Items... | Any items that you wish to prescribe need to be added into EXACT. Patient prescriptions are issued, stored and viewed from the patient Prescriptions tab. Add prescription items from Configure > Prescription Items... |
| Services... | Configure Services in the Service File (List Service Items screen, Using the List Service Items window (Service File)). |
| Import Files... | First backup your database. Select Import Files to locate and import a CSV file. |
| Export Files... | Export a Table as a .CSV file (select the table from a dropdown menu and then save to a folder) |
| Security... | Open the Security Window. From here a user withs Administrator permissions can set security rights for areas of the software. |
| Practice Information... | Use the Practice Information window in the Configure menu to enter and maintain various practice details, and to register EXACT modules. |
| License Manager... | Use License Manager to see how many licensed computers you have and when the licences expire, see how many free (unused) licence slots you have available, see which computers are currently logged into EXACT, or if they are not logged in, when they last were, delicense computers that are no longer in use, or about to be retired from use with EXACT, so that you can use their licence on another machine, relicense computers that you have previously delicensed, or request extra licences to allocate to other PCs. |
| Workstation Update... | Configure how your workstations update their EXACT software: either automated (hands-free) or customised via Administrator-level login. |
| Printing Setup... | Use the Printing Setup to configure a printer for each computer. You can also specify this printer as the default stationery printer for the entire practice. |
| Add User / Provider... | This enables easy wizard-based setup of a system user, for all roles in the dental practice. |
| User Settings... | Configure User Settings for a named user, on any computer where that user has logged into EXACT. |
| Settings... | This is a password-protected area of EXACT where authorised users can access and change settings. |
| Online Appointments... | Configure Online Appointment Bookings from within EXACT. |
| Email Parameters... | Configure Email Parameters. This may require some technical knowledge. |
| Automatic Appointment Reminders... | Use Configuring Automatic Appointment Reminders to configure EXACT to automatically send appointment reminders to patients in SMS, Email and EasyPost. |
| Automatic Appointment Follow Ups... | This feature enables EXACT to automatically send patient appointment follow-ups by SMS, Email and/or EasyPost. If you use SMS, EXACT can automatically reply with a second follow-up SMS. See Configuration options, Configure up to three appointment first follow-ups and Configure the optional second follow-up. |
Window Menu
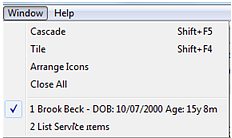
| Cascade | Select to cascade the open windows within EXACT behind each other:
|
| Tile | Select to tile the open windows alongside each other within EXACT:
|
| Arrange Icons | |
| Close All | Close all of the open windows. |
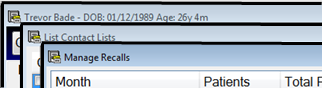
| List of open windows (1, 2...) | Click any of these listed open windows to jump to that window. |

Help Menu
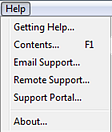
| Getting Help... | Pops up a window with the Phone, Fax and Email of the local Support Desk. |
| Contents... | Opens the Help documentation at the Main contents page. |
| Email Support... | Opens your EXACT Email Support area, from where you can Create New Email Now to draft an Email to the Support Desk. |
| Remote Support... | Opens a Remote Support page from where you can connect with a Support Desk member. |
| Support Portal... | Requires an Internet connection. Opens the Software of Excellence Portal, from where you can read Blog articles, watch videos, read Knowledge Base articles and download the latest software. |
| About... | Opens an About window with detailed information on your EXACT system, including EXACT version and date installed, country, installed modules, Add-ons, current database in use, name of the server, names of client workstations, Actions: View details of any workstation or server computer, Print a list of all system computers, Delete a computer from the system, view a list of all databases in the EXACT system with their locations and sizes. |
Data Entry Screens
Information stored in EXACT is accessed via data entry screens or windows, as in the example below.
This is an example of the Patient file, which is the file most frequently used in EXACT.

A typical window within EXACT may contain fields for entering information, drop-down lists, option buttons, check boxes, spin boxes, switches and tool buttons.
To make it easier to view and edit the information, related fields are often arranged in groups, such as personal information, contact details, etc. Each field has a label, which also acts as a prompt when entering or editing information. Some information is defaulted from the details entered - for example, patient age is derived from date of birth, and Post Code from address. Some fields require only that you tick an option by clicking on an option button whereas others allow you to choose from a menu of possible options.
Windows like the one above that have more information than can easily fit on one screen have tabs, which are labelled according to the information on them. For example, the Patient File has a Recalls tab which has details of recalls and tool buttons to set recalls; the Medical tab is used for medical details, and so on.
Sometimes a button or action will display a dialog box, which requires some interaction from the user such as answering a question, entering information, or even just acknowledging a warning message.
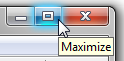
Setting the EXACT Window Size
You can customize the size of both the main EXACT window and individual windows within EXACT.
To set your EXACT screen to the maximum size: | To make the main EXACT window smaller: | To make the current open window smaller: |
|
|
|

The restore down button will restore the window to the last size it was before it was maximised.
Once you restore the window down,
- Hover the mouse cursor over the edge of the window you wish to move; the cursor will change to a double-sided arrow:

- Holding the mouse button down, drag the mouse pointer (and window edge) to where you want the edge of the window.
- Repeat for any other sides of the window you wish to change.
- Some windows can also be resized by clicking on and dragging a corner of the window with the mouse, in which case the cursor will appear at the corner:

Drag the cursor diagonally to resize the window in two dimensions at once, and retain the window's proportions.NOTE: A few windows in EXACT (usually dialog windows or messages) are fixed in size and cannot be changed like this. In these cases, the cursor does not change when hovered over a border, and the window controls illustrated above are not present.
If you make a window too small, some fields or buttons may disappear off the edge of the window, and be inaccessible until the window is resized. However, you can easily temporarily resize the window in these cases, or hide the window.
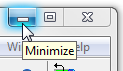
Hiding and Restoring an EXACT Window
To hide (minimise) an EXACT window
If you want to temporarily remove a window from the screen (e.g., to hide it so another person cannot view the information on it, or to stop it obscuring another window), click the Minimise button in the top right-hand corner of the window:
The window will disappear from the screen, but will still be open. An icon representing the minimised window (in this example, the Patient File) will be added to the bottom of the screen:
![]()
While minimised, you can move the window anywhere on the screen - it does not have to be 'parked' at the bottom.
To restore a minimised window to the screen:
- Click the Maximise button
 to restore it in a full-sized window,
- or -
- Click the Restore button
 to restore it to the screen at the size it was before you ‘hid’ it.
If you minimised or ‘hid’ the main EXACT screen, then it will show as an icon in the task bar at the bottom of the screen.
If you hover your mouse cursor over the icon, it will show a 'tooltip' (Windows XP or earlier) or a miniature 'snapshot' of the screen (Windows 7):
![]()
To restore it to the screen, click the icon with either mouse button; the left one will restore it instantly, whereas the right mouse button will display a small menu giving you several options including to close or restore the window:
Windows XP: | Windows 7: | ||
|
| ||


Screen and Data-entry Conventions
Using Dialog Boxes
Dialog boxes appear in multiple shapes and sizes, as they are used for interaction (dialog) between EXACT and the user.
They allow you to enter information or to confirm choices. An information dialog box will contain fields where information can be entered and edited.
For example, the Create Course of Treatment dialog box:

Other dialog boxes prompt you to confirm actions. For example, if a Dentist TCs a course of treatment without completing, the following dialog box appears:

This dialog gives you just two options - Yes or No.
Click on the appropriate button to answer the question, or press the ![]() key when that button is highlighted.
key when that button is highlighted.
Fields
Fields are areas within a window where information is entered or displayed. All fields within EXACT Dental are shown with a name (prompt) to describe the information inside them.

A field is active when it contains a flashing bar or cursor (like the "First, Sec. Name" field above), or when the contents and/or border are highlighted, like this example: ![]() .
.
An active field can have text and/or numbers entered and edited within it. The cursor indicates the current insertion point and shows where text will be inserted as it is typed in. To make a field active, click in the field with the mouse. The cursor will appear in the field to show it is active.
Sometimes the entry box for the field appears greyed out, as in this example:
![]()
This means it is available only during specific circumstances or when running a certain configuration (i.e., it is set by another field).
Data entry fields in the Patient Details window may also sometimes be coloured, like this:
![]()
This means that the field is mandatory, and the record cannot be saved to file until this and all other mandatory fields are completed.
Note: Mandatory fields will have been specified for your practice when EXACT was installed. However, this can be changed by a user with appropriate security privileges, via the Patient File Configuration window.
Moving Between Fields
Press the ![]() Tab key or click in the next field with the mouse. The cursor will move to the next field, making it active.
Tab key or click in the next field with the mouse. The cursor will move to the next field, making it active.
The Enter ![]() key has special meaning within the Windows environment and can be set up to perform a specific function in EXACT, so it is generally not used for moving between fields. However, an option in the User Settings window gives you the choice of using the Enter
key has special meaning within the Windows environment and can be set up to perform a specific function in EXACT, so it is generally not used for moving between fields. However, an option in the User Settings window gives you the choice of using the Enter ![]() key to either move between fields or to act as if the
key to either move between fields or to act as if the ![]() button has been clicked.
button has been clicked. 
Generally, as you leave a field to move to another, the entry in that field is automatically checked, ensuring that the characters that have been entered are acceptable and that the information is valid. If the entry is invalid for that field (such as an invalid date), the record cannot be saved until the error is corrected. In some instances, the appropriate options for that field will be displayed, while in others, you cannot edit another field until the data is corrected.
Of course, some text fields allow entry of almost any characters and are therefore not validated as for example a time, date, or numeric field would be.
Using Text Fields
A text field is an area within a window where text can be typed, pasted and/or displayed. For example, in the following field, the text "Philippa" has been entered:
![]()
Field colour
If (as in the example above) the area is coloured white, it means you can click in the field and edit the text.
If however the area is the same colour as the background, it means the data is for display only, and you cannot edit it. In the example below, the patient's age (circled) has been set by the system, using the patient's birth date:
![]()
To enter information in a text field
- Click in the field with the mouse (or move to the field using the
 key).
key).The cursor will appear in the field to show it is active, like this:

or if there is already text in the field, it might be highlighted like this:

- Use the keyboard to enter or edit the text by typing in the appropriate text, or use

 to paste in text that has been copied to the Windows clipboard.
TIP: If the text in the field is highlighted (as in the example above), any typing or pasting will replace it. If this is not what you want to happen, first click in the field to remove the highlighting before youtype or paste. Alternatively, you can edit text within a field or replace it.
To edit text within a field using a mouse
- Click in the field at the beginning of the text to be changed.
- While holding down the left mouse button, drag the mouse pointer across the text to be edited and then release the mouse button. The text will be highlighted to show it is selected, as shown below:

- Type the new text using the keyboard, thereby replacing the selected text.

To edit text within a field using a keyboard
- Click in the field, at the beginning of the text to be changed.
- While holding down the
 key, use the key to highlight the text to be edited.
You can delete the highlighted text by pressing the ![]() key,
key, ![]() key, spacebar, or simply by typing.
key, spacebar, or simply by typing.
Field Validation:
EXACT automatically checks text as you type, ensuring that the characters are acceptable and that the information is valid. For example, is the date entered a real date? February 30th would fail the date validation rules, and a time of 11:78 would fail the time validation rules.
Of course, some "free text" fields allow almost any characters and are therefore not validated as a time, date or numeric field would be.
Generally, if you enter invalid information in a field, you will not be able to enter information in any other field, and cannot save the record until the error is corrected. In many instances, an error message or a list of valid options is displayed.
Using Multi-line Text Fields
A multi-line text field allows more data than will fit on one line, such as a patient’s medical history. Multi-line text fields behave in a similar way to a word processor as far as entry and editing are concerned.
To enter text in an empty multi-line text field
- Focus the field by clicking it with the mouse, or navigating to it using the Tab key.
- As you type lots of text, it will automatically ‘wrap’ onto the next line.

- To force the text onto a new line, press the Enter key.

- When the information in this field occupies more lines than the field has room to display, you will see scroll bars:

Using Numeric / Currency Fields
Numeric (or 'amount') fields can also be edited in the same manner as ordinary text fields, although unlike text fields, many have some form of formatting automatically applied. For example, a tax or currency amount will usually be expressed to two decimal places, so if you type "100", it will display as "10.00".
![]() When a numeric field is active, arrows will appear next to it. You can use the arrows (or the up/down keys on the keyboard) to increase or decrease the amount by one whole unit with each click on the arrow. So for example, if a tax field displays "10.00", then clicking the
When a numeric field is active, arrows will appear next to it. You can use the arrows (or the up/down keys on the keyboard) to increase or decrease the amount by one whole unit with each click on the arrow. So for example, if a tax field displays "10.00", then clicking the ![]() Up arrow will change the amount to "11.00" and the
Up arrow will change the amount to "11.00" and the ![]() Down arrow will change it from "10.00" to "9.00".
Down arrow will change it from "10.00" to "9.00".
Limitations
Furthermore, only numbers, decimal points and the dash or minus symbol ‘–’ are allowed to be entered.
Currency symbol is automatically implied
The currency symbol is not required; this is configured at installation, and set within EXACT for display and for reports.
To quickly change the numeric value click the ARROWS as follows
|
Using Data Fields
Date fields are like text fields and can be edited in the same way, but are subject to validation.
Arrows ![]() will appear next to a date field when it is active, unless it is a 'display only' field.
will appear next to a date field when it is active, unless it is a 'display only' field.
Acceptable formats for a value of May 5th, 2012:
5/5/12 05/05/12 05/05/2012 5.5.12 05.05.12 05.05.2012 5-5-12 05-05-12 05-05-2012 050512
You will see that you can use separators such as ‘/ . -’ or no separator at all.
If you choose not to use any separators you will need to ensure that all six digits are entered, so for single digits (i.e., numbers below 10) use leading zeros.
To quickly change the Date, click the ARROWS as follows
by one day |
| LeftClick |
by one month |
| RightClick |
by one week |
| MiddleClick |
by one month |
| Ctrl-LeftClick |
by one week |
| Shift-LeftClick |
Using Time Fields
Time fields can be edited in the same way as text fields, but are subject to validation:
- A time may be entered in 24-hour format (for example, 14:12 for "twelve minutes after 2 PM"),
- A time may be entered by means of an A (or a) after the number to indicate AM, or by entering a p to indicate PM (for example, 2:00p or 2:00P for two 'o clock in the afternoon)
- A number less than 12 with no suffix will generally be interpreted as AM.
Clickable arrows ![]() appear next to a time field when it is active, and will change the time up/down by the smallest unit when clicked:
appear next to a time field when it is active, and will change the time up/down by the smallest unit when clicked:
- one minute for ordinary time fields,
- five minutes for appointment fields.
To quickly change the time field, click the ARROWS as follows
by one hour |
| RightClick |
by 10 minutes |
| MiddleClick |
by one hour |
| Ctrl-LeftClick |
by 10 minutes |
| Shift-LeftClick |
Standard Field Editing Using the Keyboard
Key(s) | Operation |
|---|---|
| If text is selected, it deletes that selection. If no text is selected, it deletes the character to the left of the cursor. |
| If text is selected, it deletes that selection. If no text is selected, it deletes the character to the right of the cursor. |
| Moves the cursor one character to the left. |
| Moves the cursor one character to the right. |
| Moves the cursor to the start of the word to the left of the cursor. |
| Moves the cursor to the start of word to the right of the cursor. |
| Extends selection one character to the left. |
| Extends selection one character to the right. |
| Extends selection to the start of word to the left of the cursor. |
| Extends selection to the start of word to the right of the cursor. |
| Moves cursor to the next field. |
| Moves cursor to the previous field. |
| Moves cursor to the start of the current line. |
| Extends selection to the start of the field. |
| Moves cursor to the end of the current line. |
| Extends the selection to the end of the field. |
| Copies the currently selected text to the clipboard. |
| Pastes (inserts) whatever is in the clipboard into the current cursor location. If part or all of the current field's contents are highlighted, they will be replaced. |
NOTE: Where two or more keys are shown together, this means you should press those keyboard keys together. Because the ![]()
![]() and
and ![]() keys can each be held down without being interpreted as multiple key presses, the best practice when using several keys together is to first hold down any of these keys before momentarily pressing an arrow or letter key.
keys can each be held down without being interpreted as multiple key presses, the best practice when using several keys together is to first hold down any of these keys before momentarily pressing an arrow or letter key.
Controls
Controls are buttons or special fields on the screen that control EXACT functionality.
This section describes
- The use and purpose of the various controls.
- The options available for each control.
- The effect a control or option has.
Using Spin Boxes/Up and Down Arrows
Some fields have multiple preset values available as entry options*.
These fields display a set of arrows next to them when they are active (i.e., when they are made the focus by clicking in the field, or using the ![]() key to move to it).
key to move to it).
![]()
These arrows are referred to as either “the up and down arrows” or the “spin box”.
Clicking on the up arrow ![]() will move forward through a list, one entry at a time; e.g. A-Z.
will move forward through a list, one entry at a time; e.g. A-Z.
Clicking on the down arrow ![]() will move backward through a list, one entry at a time; e.g. Z-A.
will move backward through a list, one entry at a time; e.g. Z-A.
TIPS:
For many fields such as dates, numbers, currencies, etc., click with the right mouse button or middle mouse button (or scroll wheel) to advance the quantity displayed more quickly. For instance, in a date field, each right-click of the 'up arrow' ![]() will advance the date by one month, and each right-click of the 'down arrow'
will advance the date by one month, and each right-click of the 'down arrow' ![]() will go backwards one month.
will go backwards one month.
Each middle-click of the 'up arrow' will advance the date by one week, and each middle-click of the 'down arrow' will go backwards one week.
Pressing the ![]() key while you click the left button has the same function as the right mouse button.
key while you click the left button has the same function as the right mouse button.
Pressing the ![]() key while you click the left mouse button has the same function as the middle button / scroll wheel of the mouse.
key while you click the left mouse button has the same function as the middle button / scroll wheel of the mouse.![]() The up and down arrows
The up and down arrows ![]()
![]() on the keyboard can also be used to move backward and forward through entries in a spin box if you wish.
on the keyboard can also be used to move backward and forward through entries in a spin box if you wish.
* For a new database, or for infrequently-used files, there may be some fields for which multiple choices are not available until such time as data has been entered into them, 'populating' the field option list.
Using Drop-down List Boxes
A drop-down list box is a field with a small down arrow ![]() to the right:
to the right:
![]() or:
or: ![]()
Click the down arrow to see a discrete (fixed) list of options for that field:
| or: |
|


Select your option from the list by clicking with the mouse, or pressing the ![]() key when the option is highlighted.
key when the option is highlighted.
(Note that depending on the position on the screen, some drop-down lists may actually open upwards, rather than drop down).
TIP: For many option lists, the program will ‘remember’ the option that you selected for the field, and that will become the default setting for that field next time it is used.
To Select an Option from a Drop-down List:
- Click the down arrow
 to the right of the field to display the list.
If the list is too long for the list box, a vertical scroll bar appears at the right:

Use (click) the "Up Arrow" to scroll up through the list,
- or -
Drag the "Slider" with the mouse to move up or down the list,
- or -
Use (click) the "Down Arrow" to scroll down through the list. - Click to select an option or press when the option is highlighted.

- The list will disappear and the option selected will be shown in the field.

Using Option (radio) Buttons
Option buttons (also called “radio buttons”) are small round buttons usually found in groups of two or more.
![]()
These may be displayed either horizontally or vertically, depending on the window they are in.
To Select an Option:
- Click once on the required option button or option name with the mouse.

- An option is selected when a small coloured circle is shown inside the option button.
Only one option in a group of related options can be selected at a time.
Selecting a new option will de-select the previous option.
Check Boxes
A check box represents an option that can be turned on or off.
![]()
When a check box is selected, the option is turned on and a tick appears in the box (as in the example above).
The check box is a toggle; every time you click it the selected state toggles between “Off” and “On".
To select / de-select the check box click the check box or check box name.
Switches
Switches are used to switch between different displays or options.
The main switch is used with regard to the tooth chart. It switches between the display of permanent/mixed/deciduous teeth; in the example below it is in the "Permanent' position.
| Permanent/Mixed/Deciduous Switch |
The other main switch is the 'Base/Current' chart switch:
| Base / Current Chart Switch |
To change the position of the switch
Click it to cycle between the position options. For example, in the illustration above, the Base/Current Chart switch is in the top or “Base” setting. When clicked it will move to the middle “All” position, then to the bottom “Current” setting, then back to “Base”.
Command Buttons
A command button carries out an action. A command usually has a name that describes the action that it carries out. For example, the ‘Charge’ button will Charge the patient for the treatment completed.
![]()
To carry out the action described by the name, click on the button with the mouse; the button will be highlighted and the desired operation will be enabled.
To view the tooltip on some buttons
Some buttons use a graphic, rather than a name. If you wish to know what a button’s function is, you can hover the mouse pointer over the button to view its tooltip: In this case, click the button to "Create An Estimate".
Tool Buttons
Tool Buttons are widely used in EXACT. They are usually grouped on a Tool Bar:
![]()
To use tool buttons
- Tool Buttons are the mouse equivalent of keyboard-issued commands. If you position or ‘hover’ the mouse button over one of the various icons on the tool bar, a 'tooltip' will appear explaining the purpose of the button, and any shortcut keystroke(s) that will operate the button:

You can activate a button by either clicking on it, or using the appropriate shortcut keystroke(s) on the keyboard.
- The following Tool Buttons are used universally within EXACT. Other Tool Buttons are discussed within other topics.
| The List button. Depending on which file is currently active, the button will display a list of existing records. For example, if you are in the Patient file, you will get a list of patients; if you are in the prescription file, you will get a list of possible prescriptions | |
| Use the ‘Plus One’ (add) button to add a new record. What you are adding will depend on which file is currently active. For example, in the Patient file, this button will add a new patient. | |
| Use the Edit button to edit the selected record or entry. For example, when booking an appointment the edit button can be used to update the selected patient’s details. | |
| Use the Save button to save any changes that have been made to the current window. If this button is black, it indicates that changes have been made that require saving. If this button is grey, it indicates that the record has no changes to save. | |
| Use the Bin or Trashcan button to delete the currently selected record. This button is controlled by security settings and is therefore displayed only if the user who is logged on has sufficient security privileges. If displayed, you can delete an item by either highlighting it then clicking the button, or by using the mouse to drag the item to the button. |
Code FIeld
Whenever you need to use an existing patient, provider, payor, or specialist record, you need to enter the code for that record into the code field on the applicable screen.
If you know the code, simply type it in the field using the keyboard.
If you don't know the code, or only know part of it, use the code search procedures.
Alternatively, you can choose to find or display a record by sorting the file using a different field.
To sort a file using a different field
- Click the 'down arrow' next to the Sort by field:

- Click the field you wish to sort records by; these examples are for the Patient File:

Although all the files use the 'Code' field by default, once you have selected another 'Sort by' option, that will become the default until you change it again.
Code Search Procedures
To locate a code using the spin box (up and down arrows)
When a code field is active a pair of arrows ![]() appear next to the field. Use these for scrolling through the codes in a file, by clicking on the
appear next to the field. Use these for scrolling through the codes in a file, by clicking on the ![]() button to scroll up through the codes, or on the
button to scroll up through the codes, or on the ![]() button to scroll down. (The up/down keys on the keyboard also scroll through the codes).
button to scroll down. (The up/down keys on the keyboard also scroll through the codes).
To search for codes
Find the required code by using one of the following code search procedures, which are referred to throughout EXACT Help topics as "normal code search procedures".
- Leave a Code Field Blank
Press or click the List Button
  when the field is blank to display a window containing a list of all the records in the file, starting at the first record.
At this stage, you can also enter a partial code to further define the record you are trying to find. Select the record by double-clicking on the correct record, or click once on the record and then click the
 button.
 - Enter a Partial Code
Enter the first few letters of a code - the program will search through all the codes until the first match is found. After entering the partial code do one of the following:
Select from a list | Press For example, a patient list will appear if the partial code was entered into a patient code field, or a prescription list will appear if the partial code was entered into a prescription code field. Page up/down the list using the Double-click on the item when it becomes visible. While the list is present, type the beginning of the code to move the list to the matching code (e.g., JO to move to the start of patient codes beginning with "JO"). To select the record, double-click on the correct line, or highlight the required record and click |
Search forward from current code | Click the up scroll arrow |
Search backward from current code | Click the down scroll arrow |
EXACT Shortcuts
There are some keys or key combinations that may be used within EXACT to save time by eliminating a few keystrokes or mouse clicks.
If you are typing information such as patient information into EXACT, using key combinations can be more efficient than using the mouse, as you do not need to switch hands between mouse and keyboard.
Short-cuts in the Main EXACT screen
Press the ![]() key on your keyboard; this will underline the applicable key for each of the top-level menus along the top of the EXACT screen. You can then press a letter key to access them, as follows:
key on your keyboard; this will underline the applicable key for each of the top-level menus along the top of the EXACT screen. You can then press a letter key to access them, as follows:
Keys | Accesses/Opens: |
| The File menu |
| The View menu |
| The Transactions menu |
| The Administration menu |
| The Configure menu |
| The Window menu |
| The Help menu (also accessible via the |
Shortcuts in the Patient File window
Key | Operation |
| List Patients. |
| Opens the Patient Transactions window. |
| Opens the Add Patient window, but is overridden in the following tabs: |
| Deletes the current patient record (confirmation required first). |
| Opens the Find patients window. |
| Creates a link between the Patient window and another window. |
| Opens the View Patients window, to list patients. |
| Opens the Print Patient Details dialog. |
| Saves the current changes. |
| Opens the Contact by Phone dialog. |
Help
In any EXACT window, press the ![]() key to open context-specific Help (if available) for the window you are currently using.
key to open context-specific Help (if available) for the window you are currently using.
This has the same function as clicking the ![]() button on the top-right corner of the window, and will open the Help file in a browser window.
button on the top-right corner of the window, and will open the Help file in a browser window.
If there is no context-specific Help topic available for the current window, the Help file will display the main Help menu, from which you can search for more information.
Spell-Checking Notes
Many of the Note facilities in EXACT have a spell-checking option.
Automated spell-checking is only available in modules that make use of third-party tools, such as Presentation Manager, in which there is automated spell-checking by Microsoft Word.
- Right-click your text in the Note.
- From the right-click menu select Spell Check.
- In the window that pops up you may need to select the Dictionary Language.
If you initially don’t see the Spelling window, it may be behind another window.
- Use the tools in the Spelling window to correct any mistakes.

- When finished you will see a message Spell check is complete.

Three Frequently-used Desktops
Practitioners tend to spend most of their time in three desktops:

Main / Appointment Book desktop

This desktop provides multiple utilities around the appointment book. It is used mainly by Receptionists.
Patients desktop

This provides multiple utilities around the patient, and is differentiated into Tabs:
![]()
The patient Details tab is initially used by Receptionists in setting up the patient file, but is then used by all practitioners for a range of patient-related functions.
The other tabs are normally used by Clinicians but the Practice Manager may also use them, especially the Pay Plans tab.
Note that there is a set of buttons across the top of this desktop that apply to the selected patient across all tabs:
![]()
Hover your mouse cursor over any button to see a tooltip:

Throughout the desktop you can view tooltips. For example:

Reports desktop

The Reports desktop is used mainly by the Practice Manager in monitoring and managing the business. It may be used by other practitioners to access specific information.
©2023 Henry Schein One International. All rights reserved.